Best Practices for Hydrating on Long Rides

Ever wondered why hydration is so crucial for cyclists, especially on long rides? Well, keeping your body sufficiently hydrated is not just about quenching your thirst. It’s about maintaining optimal body functions, enhancing performance, and promoting a quick recovery. Think of water as the oil to your body’s engine, without which, your performance can take a nosedive.

Neglecting proper hydration can lead to severe consequences for both your health and performance. It’s no secret that dehydration can result in reduced endurance, increased fatigue, lowered resistance to heat stress, and an overall decline in performance. But did you know it can also lead to serious health issues like heatstroke?

In this blog post, we will dive into the importance of hydration for cyclists, bust some common hydration myths, and provide practical tips on how to stay adequately hydrated during long rides. Sounds interesting, right? Let’s get started!

Understanding Hydration and its Importance for Cyclists

Water plays a pivotal role in our bodies— it helps regulate body temperature, lubricates the joints, aids digestion, and transports nutrients to give you the energy you need to ride. Now, imagine running low on such an essential component— that’s what happens when you get dehydrated.

Dehydration occurs when the body loses more fluids than it takes in, affecting your body’s ability to perform normal functions. For athletes and cyclists, this can translate into impaired performance and longer recovery times. So, staying hydrated is not just about feeling good but also about keeping your cycling performance at its peak.

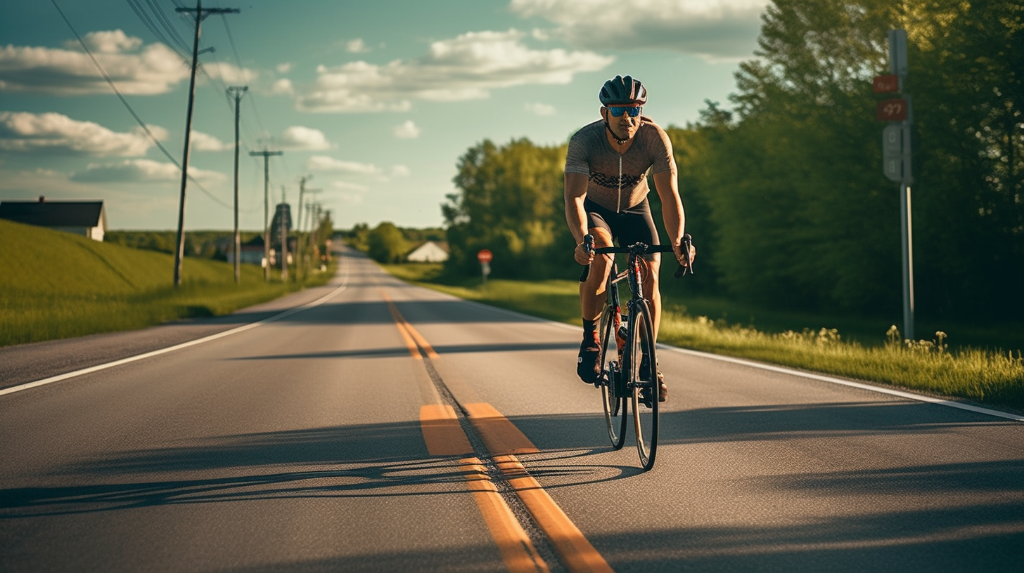
But remember, the hydration needs of a cyclist can vary based on several factors including the ride’s duration, intensity, and the environmental conditions. A leisurely ride in cool weather will not require the same hydration strategy as a high-intensity ride in the summer. Sounds complex? Don’t worry, we’ll simplify it for you!

Myths about Hydration in Cycling

There’s a lot of information out there about hydration, and unfortunately, not all of it is accurate. Misconceptions can lead to improper hydration habits which can adversely affect your performance or even your health. So let’s debunk some common myths about hydration in cycling, shall we?

How Much to Drink and When

When it comes to hydrating for long bicycle rides, timing and quantity are key. But how much should you drink, and when is the best time to do it? The answers to these questions can significantly impact your performance and recovery.

Hydrating Before the Ride

Starting your ride well-hydrated is crucial. But what does that mean, exactly? As a general rule, aim to drink at least 500ml (about 17 ounces) of water in the two hours leading up to your ride. This gives your body time to absorb the water and prepare for the upcoming exertion. Does that seem like a lot? Consider this: your body can lose up to a liter of water per hour during intense exercise, so starting off well-hydrated can make a significant difference in your performance and comfort.

Hydrating During the Ride

Now let’s talk about staying hydrated during the ride. While it’s tempting to only drink when you feel thirsty, this isn’t the best strategy. Thirst isn’t always a reliable indicator of hydration levels, especially during long rides. Instead, aim to sip small amounts of water frequently. A good rule of thumb is to drink about 150-200ml (around 5-7 ounces) every 15-20 minutes. This will help to maintain a steady level of hydration and prevent any sudden drops in performance.

Hydrating After the Ride

What about after the ride? Rehydration is just as important post-ride as it is pre-ride and mid-ride. Your body needs to replenish the fluids and electrolytes lost during your cycling session. Within the first 30 minutes after your ride, aim to drink at least 500ml of water, and continue to hydrate throughout the day. Remember, effective rehydration is about more than quenching your thirst – it’s about giving your body what it needs to recover and prepare for your next ride.

What to Drink: Water vs. Sports Drinks

Have you ever wondered whether you should reach for water or a sports drink during your long bike ride? It’s a common question among cyclists, and for a good reason. Both options have their pros and cons, and the choice can directly impact your performance and recovery.

Water is a natural and easily accessible hydrator. It helps regulate body temperature, lubricate joints, and transport nutrients to give you energy and keep you healthy. However, water alone may not be sufficient for rides longer than an hour as it doesn’t replenish electrolytes lost through sweat.

On the other hand, sports drinks are designed to provide hydration and replenish electrolytes. They often contain carbohydrates for additional energy. But be wary, not all sports drinks are created equal. Some are packed with sugar and artificial ingredients that might do more harm than good.

So, when should you choose each? As a general rule of thumb, water is sufficient for shorter, less intense rides. For longer, more intense rides, especially in hot weather, a sports drink may be more beneficial.

Water Sports Drinks
Hydration Excellent Excellent
Electrolyte Replenishment Poor Good
Energy Boost None Varies
Sugar Content None Varies
Artificial Ingredients None Varies

Signs of Dehydration to Watch Out For

Hydration is not just about drinking the right amount; it’s also about knowing when to drink. Recognizing the early signs of dehydration can help you stay ahead of it and maintain your performance on the bike.

Thirst is often the first sign of dehydration, but it’s not always reliable, especially during intense physical activity. In fact, you may be significantly dehydrated by the time you feel thirsty. Hence, don’t wait until you’re thirsty to drink.

Other early signs of dehydration include dry mouth, decreased urine output, and light-headedness. More severe symptoms, such as rapid heart rate, sunken eyes, and extreme fatigue, indicate serious dehydration that requires immediate action.

Remember, dehydration can impair your cycling performance and pose serious health risks. So, when you notice these signs, it’s time to stop and drink, even if you don’t feel thirsty.

Hydration Accessories for Cyclists

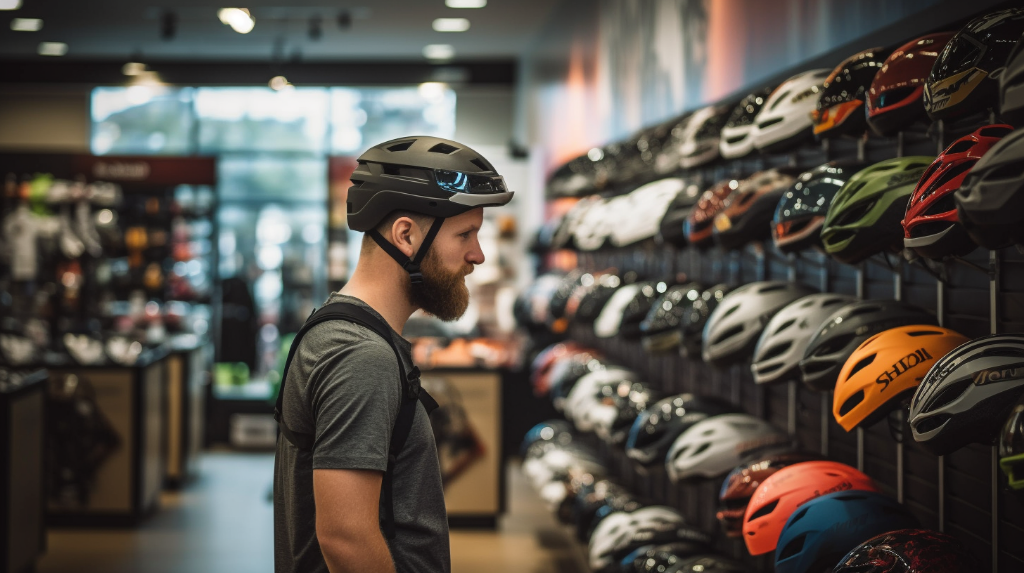
When it comes to long rides, having the right gear can make a significant difference in your hydration strategy. There are several hydration accessories designed to make drinking during a ride more comfortable and convenient. These include water bottles, hydration packs, and bottle cages. But which ones should you choose? That often depends on the type of ride you’re planning.

Let’s take a closer look at some of these hydration accessories:

  • Water bottles: These are the most basic hydration accessories. Look for ones that are easy to open, leak-proof, and insulated to keep your drink cool.
  • Hydration packs: These backpack-like accessories are perfect for longer rides. They can hold more water than a bottle and include a tube for hands-free drinking.
  • Bottle cages: These are essential for securing your water bottle to your bike. They should be sturdy and hold your bottle tight, even on rough terrains.

Final Tips for Staying Hydrated

Staying hydrated during long rides is essential for optimal performance and recovery. We’ve covered a lot of ground in this blog post, discussing the importance of hydration, how much to drink, when to drink, and what to drink. We’ve also debunked some myths and highlighted signs of dehydration to watch out for.

But, what’s the key takeaway here? Remember, every cyclist is unique. Your hydration needs may vary based on a range of factors, including the duration and intensity of your ride, the weather, and your personal physiology. So, listen to your body and adjust your hydration strategy as needed.

Don’t forget to invest in a good hydration accessory. Whether it’s a sturdy water bottle, a convenient hydration pack, or a secure bottle cage, the right gear can make staying hydrated on your ride much easier.

So, are you ready to take your ride to the next level? Keeping these hydration tips in mind can help you maintain your momentum, recover faster, and enjoy your ride to the fullest. Happy cycling!

Locking Up Your Bike: Best Practices for Security

Have you ever thought about how secure your bike really is when you leave it unattended? A reliable bike lock is an essential piece of equipment for any cyclist, yet many of us make common mistakes when locking up our bikes. This post is here to guide you through the best practices for securing your bike effectively and reducing the risk of theft.

Why It’s Essential to Lock Your Bike Correctly

Did you know that thousands of bikes are stolen every year, and many of these thefts occur due to improper locking techniques? Even in areas perceived as safe, bike theft is a real concern. When bikes aren’t locked properly, they become easy pickings for opportunistic thieves. So, it’s not just about having a lock, but using it correctly that truly matters.

Understanding Different Types of Bike Locks

There’s a wide range of bike locks available in the market, and each comes with its own set of pros and cons. Let’s take a brief look at some of the most common types.

U-locks are popular due to their strength and resistance to most types of tools used by thieves. However, their rigid shape can sometimes make them less versatile than other types of locks.

Chain locks offer flexibility and can secure your bike to a variety of objects. But remember, not all chains are created equal; some can be easily cut with bolt cutters.

Folding locks, on the other hand, blend the strength of U-locks with the flexibility of chain locks, but they can be more expensive.

Your choice of lock should depend on your specific needs, the areas where you usually park your bike, and of course, your budget.

How to Use a Bike Lock Effectively

Ever wondered why some bikes are stolen while others are left untouched? It’s not always about the value of the bike—it often comes down to how effectively the bike is locked. Using a bike lock is not rocket science, yet there are common mistakes many people make which can make their bikes an easy target. Let’s go over how to use different types of bike locks and discuss some important factors like the location and positioning of the lock and the bike.

First and foremost, always ensure that your lock is fastened securely. A loosely fastened lock is a gift to bike thieves. Make sure your bike is locked tightly, leaving no space for thieves to insert tools. Remember, the tighter the lock, the tougher it is for a thief to crack open.

Locking Strategy for U-Locks

U-locks, also known as D-locks, are popular due to their strength and resistance to cutting tools. But even the sturdiest U-lock won’t be of much use if it’s not used correctly. Here’s how to do it:

When using a U-lock, always aim to lock the frame and the wheel to a solid object. The object you lock your bike to should be immovable and taller than the bike, such as a bike rack or a lamp post. Why? Well, if the object is shorter than the bike, thieves can easily lift the bike over the object. Remember, it’s not just about locking the bike, it’s about where and how you lock it.

Tips for Using Chain Locks

Chain locks offer flexibility and convenience, allowing you to lock your bike to a variety of objects. However, they can be vulnerable if not used properly. Here are some tips to use a chain lock effectively:

First, make sure the chain is tightly wrapped around the frame and the wheel. Any slack in the chain can be an invitation for thieves. Ensure that the chain doesn’t touch the ground as it can provide leverage for thieves to break the lock. Also, consider the points of attachment. Locking your bike to a sturdy, immovable object is a must. Avoid locking your bike to anything that can be easily cut, broken, or lifted.

Selecting the Ideal Spot to Lock Your Bike

Choosing the right location to lock your bike is just as important as the lock you use. So, what makes a location suitable or unsuitable for locking a bike?

Visibility is key. Always lock your bike in a well-lit, high-traffic area. If potential thieves know they are likely to be seen, they’ll think twice before attempting to steal your bike. Plus, if your bike is stolen, there are more chances that someone might have seen something.

Consider the object you’re locking your bike to. It should be sturdy and immovable. Your bike is only as secure as what it’s locked to. Trees, for instance, are not ideal as they can be easily damaged or cut down. Instead, opt for bike racks or metal railings.

Finally, avoid locking your bike in the same place all the time. If thieves notice a pattern, they might target your bike. Vary your routine and keep them guessing!

Additional Security Measures

Ever wondered how you could make your bike even more secure? Well, there are a myriad of ways to enhance bike security beyond just using a good lock. Combining multiple locks, for instance, can drastically improve your bike’s security. This method involves using two different types of locks, such as a U-lock and a chain lock. The idea here is that a thief would need two different types of tools to break both locks, which is less likely.

Another technique you might want to consider is removing the front wheel when you lock up your bike. This might sound inconvenient, but it could be the difference between having a bike to ride home and having to walk. By removing the front wheel, you make your bike less attractive to thieves as it’s incomplete and therefore less valuable.

Lastly, have you ever thought about using a seat leash? This simple device secures your seat to your bike, making it harder for thieves to simply unbolt and steal this often-targeted component. It’s a small investment that could save you a lot of trouble in the long run.

  • Using multiple locks
  • Removing the front wheel when locking up
  • Using a seat leash

Understanding Lock Ratings and Standards

Did you know that there are organizations that categorize locks based on their security level? One such organization is Sold Secure, a UK-based independent test house for security products. Their ratings, which include Gold, Silver, and Bronze, can give you an idea of the relative security provided by different locks.

A Gold rating, for instance, signifies the highest level of security, tested against a wide range of tools and for a longer duration. Silver-rated locks offer a compromise between security and cost, while Bronze-rated locks offer defense against opportunist thieves and are ideal for low-risk areas.

It’s important to note, however, that no lock is completely theft-proof. Lock ratings should therefore be used as a guide to help you make an informed decision based on your specific needs and circumstances.

Rating Meaning
Gold Offers the highest level of security. Tested against a wide range of tools and for a longer duration.
Silver A compromise between security and cost. Offers substantial resistance against a variety of tools.
Bronze Defense against opportunist thieves. Ideal for low-risk areas.

Maintenance Tips for Bike Locks

Ever wondered why your bike lock isn’t as smooth and quick to operate as when you first bought it? It’s no secret that a bit of regular maintenance goes a long way in keeping your bike lock in prime condition. And it’s not as difficult as you may think!

Firstly, you should clean your lock regularly. This doesn’t need to be a thorough scrub, but a simple wipe down to remove any dirt or grime that can get into the locking mechanism. You can use a soft, damp cloth for this. A clean lock is not just more pleasant to use, it also functions better and lasts longer.

Another crucial aspect is lubrication. Just like your bike chain, your lock could also use a little bit of lubricant now and then. So, every few months, apply a small amount of lubricant to the keyhole and the locking mechanism. This will ensure that your lock opens and closes smoothly, reducing the chances of it jamming when you’re in a hurry.

Lastly, don’t forget about storage. When not in use, store your lock in a dry place to avoid rust and corrosion. Avoid leaving it outside in the rain or in a damp garage overnight.

What to Do If Your Bike is Stolen

Despite our best efforts, sometimes the unfortunate happens – your bike gets stolen. It’s a situation no cyclist wants to find themselves in, but it’s important to know what to do should it occur.

  • Report the theft to the police as soon as possible. Provide them with as much detail as you can, including the make, model, and any distinguishing features of your bike.
  • Notify your insurance company. If your bike is insured, you should report the theft to your insurance company immediately. They may require a police report, so be sure to have that on hand.
  • Monitor local resale platforms. Keep an eye on local online marketplaces, pawn shops, and flea markets. Thieves often try to sell stolen bikes quickly, and you might just spot yours.

Final Thoughts

Securing your bike effectively is a combination of several factors – choosing the right lock, using it correctly, and taking additional security measures. But let’s not forget the importance of maintaining our locks and knowing what to do should the worst happen.

Remember, a good quality lock is an investment – not an expense. It’s a small price to pay for the peace of mind that comes with knowing your bike is secured. So, be vigilant, proactive, and always lock your bike properly. After all, isn’t the safety of your beloved bike worth it?

Understanding Cycling Lingo: A Guide to Jargon

Have you ever found yourself among a group of cyclists and felt completely out of the loop due to their peculiar jargon? If you’re a novice cyclist or a bicycle hobbyist, understanding the unique language of the cycling community can make a world of difference.

Not only does it help you fit in, but it also enhances your safety, communication, and overall cycling experience. In this blog post, we’ll take you on an exciting ride through the world of cycling lingo. Buckle up and let’s get rolling!

Why Cycling Lingo Matters?

Understanding cycling lingo is more than just learning a new language. It’s about fully immersing yourself in the vibrant cycling culture and becoming a part of the community. The terminology used by cyclists is not just random words but a reflection of a shared passion and lifestyle.

Moreover, it can improve safety by enabling clear and quick communication during rides. After all, wouldn’t you want to understand if a fellow cyclist is warning you about a pothole or an approaching car?

The Origin of Cycling Lingo

Like any other specialized language, cycling lingo evolved out of necessity and camaraderie. It originated in the early days of the sport when cyclists needed a quick and effective way to communicate during races and group rides.

Over time, these terms have evolved and expanded, reflecting the growth of the cycling community and the development of the sport. Curious about some of these terms? Don’t worry, we’ll get to them soon!

Getting to Know Basic Cycling Terms

So, you’ve decided to take up cycling, or maybe you’re just interested in understanding the lingo better. Either way, there’s a whole new vocabulary to learn. But don’t worry! It’s not as daunting as it might seem. Here, we’ll break down some common terms that every cycling novice should be familiar with.

Bike Parts and their Names

Just like a car, a bicycle is made up of various parts, each with its own specific name. Knowing these names can be incredibly helpful, especially when it comes to repairs or upgrades. Let’s take a look at some of them:

Part Name in Cycling Lingo
Handlebars Bars
Saddle Seat
Brakes Stoppers
Tires Rubber
Gears Cogs

Common Rider Actions and Phrases

Now that we’ve covered the names of different bike parts, let’s move on to some common actions or maneuvers a cyclist might perform, and the phrases related to them. For example, “drafting” refers to the act of riding closely behind another cyclist to reduce wind resistance. Similarly, “shifting” refers to changing gears on a bike to adjust the difficulty of pedaling.

Ever heard of a “bunny hop”? In cycling terms, it’s a technique used to lift both wheels off the ground to avoid obstacles. And if you hear a cyclist say they’re going to “clip in”, it means they’re attaching their shoes to their bike pedals.

Understanding Cycling Slang & Jargon

Just like any other hobby or profession, cycling has its own set of informal terms or ‘slang’. These are often used among cyclists to convey specific ideas or conditions. For example, a “bonk” isn’t a collision, but a state of severe exhaustion causing a sudden loss of energy.

Ever been on a “century”? In cycling, that’s a ride of 100 miles or more. And if a cyclist mentions a “fixie”, they’re referring to a fixed-gear bike, a type of bicycle that has a single gear and doesn’t allow coasting.

Isn’t it fascinating how a single word can convey so much information? That’s the beauty of understanding cycling lingo. It not only enhances your cycling experience but also helps you connect with the cycling community on a deeper level. So, are you ready to talk the talk?

Deciphering Race Terminology

Ever watched a professional cycling race and wondered what on earth the commentators were talking about? You’re not alone! The lingo used in these races can sound like a completely different language if you’re not familiar with it. But fear not, we’re here to help you decode this cycling jargon.

Understanding these terms can not only enhance your viewing experience but can also give you a deeper insight into the strategies and techniques used by professional cyclists. So, are you ready to dive in?

  1. Peloton: This term refers to the main group of cyclists in a race. It’s from the French word ‘pelote’, meaning ‘ball’. Think of it like a swarm moving together.
  2. Breakaway: When a small group or single rider decides to leave the peloton and forge ahead, it’s called a breakaway. It’s a common strategy in cycling races.
  3. Drafting: This is a technique where cyclists ride closely behind others to reduce wind resistance and save energy. If you’ve seen cyclists riding in a line, they were drafting.
  4. Echelon: A diagonal line of cyclists, formed to combat crosswinds. It requires skill and teamwork to form an effective echelon.
  5. Domestique: A French term for a rider who works for the benefit of their team and leader, rather than trying to win the race themselves.
  6. Lead Out: When a rider accelerates to maximum speed to benefit another rider tucked in their draft. It’s often used in sprint finishes.
  7. Time Trial: This is a race against the clock where cyclists start individually or in small groups. It’s often referred to as the ‘race of truth’ because it’s about pure speed – no drafting, no tactics, just pedal power.
  8. Crit: Short for criterium, this is a race on a short circuit course, often in city streets. It demands speed, agility, and tactical savvy.

Unique Cycling Phrases & Expressions

Just like any other sport, cycling has its share of unique phrases and expressions that might leave non-cyclists scratching their heads. But don’t worry, we’ve got you covered. Let’s explore some of these phrases and expressions that are as unique as the sport itself.

“On your wheel” – This phrase is used by a cyclist to let another cyclist know they are riding closely behind them. It’s a courtesy to prevent sudden moves that could cause a collision.

“Half wheeling” – This is a faux pas in group rides. It refers to when one rider edges their front wheel half a wheel ahead of another rider, causing the latter to speed up to match pace.

“Bonking” – No, it’s not what you’re thinking. In cycling terms, bonking refers to running out of energy or hitting the wall. It’s basically extreme fatigue. Trust us, you don’t want to bonk during a ride.

“Chasing rainbows” – This phrase is used when a cyclist is aspiring to become a world champion. The World Champion in cycling wears a rainbow-striped jersey.

Tips to Master Cycling Vocabulary

Ever wondered how to get a hang of all the cycling jargon out there? Well, you’re not alone! Here are a few tips to help you become more fluent in cycling vocabulary.

First and foremost, immerse yourself in the cycling community. Join a local cycling club, participate in group rides, or follow cycling forums online. You’ll naturally pick up the lingo as you interact with other cyclists.

Secondly, don’t be afraid to ask questions. If you come across a term you don’t understand, ask a fellow cyclist or look it up. Most cyclists are more than willing to help a newbie out!

Finally, practice makes perfect. The more you use these terms in your daily conversations, the more comfortable you’ll get with them. So, start using them today!

Fun Quiz: Test Your Cycling Lingo Knowledge

Now that you’re familiar with some common cycling terms, let’s see how well you’ve remembered them. Ready for a quick quiz?

  1. What is a ‘peloton’?
  2. What does ‘bonking’ mean in cycling?
  3. What is a ‘granny gear’?
  4. What is ‘drafting’?
  5. What does ‘cadence’ refer to?

Don’t worry if you didn’t get all of them right. The important thing is that you’re learning and improving!

Final Thoughts

Understanding cycling lingo is more than just learning a bunch of new words. It’s about being part of a vibrant, passionate community of people who love cycling just as much as you do. So, don’t stop at this blog post. Keep exploring, keep asking questions, and most importantly, keep cycling!

Remember, every pro cyclist was once a beginner who didn’t know what a ‘peloton’ was. So, don’t be discouraged if it feels like there’s a lot to learn. You’ll get there in no time!

So, are you ready to dive into the world of cycling lingo? Let’s gear up and hit the road!

Common Cycling Mistakes to Avoid for Beginners

Welcome, novice cyclists and hobbyists! There’s something truly thrilling about cycling, whether it’s the rush of wind in your face or the feeling of accomplishment after a long ride. However, as with any new activity, beginners are prone to making a few common mistakes. It’s essential to address these mistakes not only for safety but also to improve your overall cycling experience.

In this post, we’ll be highlighting some of these common mistakes and providing guidance on how to avoid them. So, strap on your helmet, and let’s get started!

Riding the Wrong Size Bike

One of the first mistakes beginners make is riding a bicycle that doesn’t fit well. Did you know that the size of your bike can significantly affect your riding experience? A bike that’s too big or too small can lead to discomfort, poor control, and even injuries.

Imagine trying to control a bike that’s too large for you – it’s like wearing oversized shoes! On the other hand, a bike that’s too small can make you feel cramped and limit your mobility. Therefore, it’s crucial to find a bike that fits you perfectly, ensuring a more comfortable and safer ride.

Neglecting Safety Gear

Safety should always be a priority when cycling, and the right gear can make all the difference. Helmets, reflective clothing, and gloves are all essential components of a cyclist’s safety kit.

Many beginners underestimate the importance of safety gear, thinking it’s unnecessary or cumbersome. However, these items are designed to protect you and make you visible to others on the road. So, remember, safety first!

Not Using the Gears Correctly

Ever found yourself struggling to pedal uphill or going faster than you’re comfortable with downhill? This might be a sign that you’re not using your gears correctly. As a beginner, it’s easy to overlook the importance of properly using your gears, but they’re crucial for an efficient and enjoyable ride. So, what common mistakes are made with gears?

Improper Gear Shifting

Improper gear shifting is a common mistake among beginners. This typically happens when cyclists shift gears too quickly or without enough anticipation. Imagine you’re approaching a steep hill, would you wait until you’re halfway up before shifting into a lower gear? Probably not, right? Shifting gears too late can strain your muscles and make your ride more difficult than it needs to be. It can also cause unnecessary wear and tear on your bike components. So, how can you avoid this? The key is to anticipate changes in the terrain and shift your gears in advance.

Ignoring Lower Gears

Another common mistake is ignoring lower gears. Lower gears are there to make pedaling easier when climbing steep hills or riding against the wind. Despite this, many newcomers are reluctant to use them, perhaps because they believe that higher gears are always better. However, ignoring your lower gears can lead to excessive strain on your muscles and joints, not to mention make your ride more tiring than it needs to be. Remember, cycling should be enjoyable, not a chore!

Overlooking Bike Maintenance

Just like any piece of machinery, your bike needs regular maintenance to function optimally and safely. It’s not just about keeping your bike looking shiny and new, but ensuring its performance and your safety. So, what aspects of bike maintenance do beginners often overlook?

Neglecting Tire Pressure

One of the most common oversights is neglecting tire pressure. Riding with too much or too little air in your tires can lead to a host of problems. Too much pressure, and your ride becomes jarring and uncomfortable. Too little, and you risk a flat tire or even a dangerous blowout. But it’s not just about comfort and safety. Correct tire pressure also affects your bike’s handling and performance. So, make sure to check your tire pressure regularly and adjust it according to your bike manufacturer’s instructions.

Inadequate Hydration and Nutrition

Ever wondered why you feel fatigued quickly during a bike ride? That’s probably because you’re not properly hydrated or nourished. Especially during longer rides, your body needs a steady supply of water and nutrients to keep the muscles working and prevent dehydration.

Beginners often underestimate the importance of hydration and nutrition. They might think, “I’m just going for a quick ride. I don’t need to bring water or snacks.” But here’s the kicker: even short rides can be physically demanding and can cause dehydration if you’re not careful. So, it’s always a good idea to bring a water bottle and some energy-boosting snacks with you.

Ignoring Rules of the Road

Just because you’re on a bike doesn’t mean traffic rules don’t apply to you. In fact, cyclists need to be extra vigilant and adhere strictly to road rules to ensure their safety. It’s not uncommon to see beginners weaving in and out of traffic, not signaling their turns, or even riding against traffic. These actions are not only dangerous but also illegal in many places.

Remember, safety is paramount when cycling. Ignoring traffic rules can lead to accidents and serious injuries. So, always make sure you’re familiar with the local traffic laws before hopping on your bike.

Common Beginner Mistake Potential Impact
Riding the Wrong Size Bike Can lead to discomfort and injury
Neglecting Safety Gear Increases risk of injury in case of accidents
Not Using the Gears Correctly Can cause wear and tear on the bike and affect riding experience
Overlooking Bike Maintenance Can lead to bike malfunctions and accidents
Inadequate Hydration and Nutrition Can cause dehydration and fatigue
Ignoring Rules of the Road Increases risk of accidents and legal issues

Not Warming Up or Cooling Down

Ever skipped your warm-up or cool-down exercises because you were too eager to get on the road or too tired after a long ride? Let’s be honest, we’ve all been there. But here’s the thing: these exercises are not just for show. They play a crucial role in preparing your body for the ride and helping it recover afterward.

When you warm up, you gradually increase your heart rate and circulation, which helps prepare your muscles for physical activity. It also improves your flexibility and reduces the risk of injuries.

Similarly, cooling down after cycling helps your body return to its normal state. It allows your heart rate and blood pressure to fall gradually, preventing dizziness or fainting. It also helps in muscle recovery, reducing the risk of stiffness and soreness. Skipping these stages may lead to unnecessary strains, injuries, or prolonged recovery times.

Riding Without a Plan

Imagine you’re out for a ride, enjoying the beautiful day, when suddenly you realize you’re lost. Or maybe you underestimated the difficulty of a trail and now you’re stuck in the middle, exhausted and unsure if you can make it back. Sounds scary, right? That’s what can happen when you ride without a plan.

Having a route or plan before you start cycling is important for several reasons. First, it helps you prepare mentally for the ride, setting realistic expectations about the distance and difficulty. Second, it allows you to prepare physically, ensuring you have enough energy and hydration for the entire ride. Finally, it ensures your safety, allowing you to share your route with someone in case of emergencies.

So, next time you head out for a ride, take a few minutes to plan your route. Consider the distance, terrain, and your physical condition. And always let someone know where you’re going and when you expect to be back.

– A list of quick tips to avoid these common mistakes.

  1. Always spend at least 10 minutes warming up before you start cycling, and another 10 minutes cooling down afterward.
  2. Plan your route before you start riding. Consider the distance, terrain, and your physical condition.
  3. Always let someone know where you’re going and when you expect to be back.

Not Investing in a Good Saddle

Have you ever felt like you need a cushion for your cushion after a long bike ride? That’s probably because your saddle isn’t right for you. A comfortable saddle is crucial for long rides. It can make the difference between a smooth, enjoyable ride and a painful ordeal.

Many beginners make the mistake of choosing a saddle based on looks alone. But what’s more important is how it fits your body and riding style. The wrong saddle can cause discomfort, numbness, and even lead to long-term injuries.

– A list of recommended saddles for beginner cyclists.

  • Brooks B17: Known for its durability and comfort, this saddle is a great choice for long-distance cyclists.
  • Selle Italia Diva Gel Superflow: This saddle is designed specifically for women, offering a comfortable ride without compromising performance.
  • Fizik Aliante Gamma Kium: This saddle is lightweight and flexible, making it suitable for both road cycling and mountain biking.

In conclusion, learning to avoid these common cycling mistakes can greatly improve your cycling experience. Remember, everyone was a beginner once, and the key to becoming a better cyclist is to learn from your mistakes and keep practicing. Have any questions or want to share your cycling experiences? Feel free to leave a comment below. Happy cycling!

Hand Signals and Communication on Group Rides

Picture this: you’re out on a sunny day, cycling along with a group of friends. The wind is in your hair, the sun is on your face, and the rhythmic whir of wheels is in your ears. It’s a perfect day for a ride. But then, someone in front of you suddenly swerves, and you barely avoid a collision. What went wrong? The answer is simple – lack of effective communication.

When it comes to group rides, hand signals and communication are more than just courteous gestures; they are essential for safety. This blog post will guide you through the importance of hand signals and communication techniques during group rides, discuss the basics of cycling etiquette and delve into the various hand signals and verbal commands used by cyclists. So, strap on your helmet and get ready for an informative ride!

The Necessity of Hand Signals and Communication on Group Rides

Imagine driving a car without indicators or brakes. Sounds dangerous, doesn’t it? The same principle applies to cycling, especially in group rides. Without proper hand signals and communication, you’re not only jeopardizing your safety but also that of your fellow riders.

Hand signals are the ‘language’ of cyclists, enabling them to convey their intentions to other road users, particularly when turning, stopping, or changing lanes. Simply put, they are to cyclists what brake lights and indicators are to motorists. Similarly, verbal communication is equally important in group rides, as it allows cyclists to alert others about potential hazards and obstacles on the route.

Basics of Cycling Etiquette

Before we dive into the specifics of hand signals and communication, it’s important to touch on the basics of cycling etiquette. After all, good communication is rooted in respect and understanding.

Cycling etiquette is a set of unwritten rules that cyclists follow to maintain harmony and safety during rides. It includes everything from respecting traffic laws, maintaining a consistent line and speed, to using hand signals and vocal warnings. Knowing and respecting these rules not only makes you a responsible cyclist but also contributes to a safer and more enjoyable riding environment for everyone.

Understanding the Hand Signals

Have you ever wondered what all those hand movements by cyclists mean? They are more than just random gestures; they are a form of communication among cyclists, especially during group rides. In this section, we will explore the different hand signals used by cyclists and what each one means. This will help you understand and use them effectively during your own group rides.

Stopping and Slowing Down

One of the most important signals to know is the one used to indicate stopping or slowing down. When a cyclist wants to signal that they are stopping, they will extend their left arm out to the side and downwards, with the palm of their hand facing backwards. On the other hand, to signal slowing down, the cyclist will extend their left arm out straight and move it up and down.

Remember, these signals are crucial for maintaining safety during group rides. You wouldn’t want the cyclist behind you to crash into you simply because they were not aware that you were slowing down or stopping, would you?

Turning and Changing Lanes

Another set of important signals are those used to indicate a turn or lane change. You’ve probably seen a cyclist extend their right arm out to the side when they plan to make a right turn. Similarly, a left turn is signaled by extending the left arm out straight. Changing lanes is often signaled by a quick look over the shoulder, followed by the appropriate turn signal.

By understanding and using these signals, you can help create a safer and more harmonious environment for all cyclists on the road.

Common Verbal Commands in Group Rides

Did you know that cyclists don’t just communicate through hand signals? Verbal commands also play a significant role in group rides. Let’s take an in-depth look at what some of these common commands are and what they mean.

Calling Out Obstacles

The roads are full of obstacles that can pose a danger to cyclists. From potholes to parked cars, it’s essential for cyclists to be aware of these potential hazards. This is where verbal commands come in. A cyclist might shout “Car back!” to warn others of an approaching vehicle from behind or “Hole!” to alert others about a pothole on the road.

These are just a few examples of the verbal commands cyclists use. They are an integral part of ensuring safety during group rides.

Below is a table summarizing the different hand signals and verbal commands, along with their meanings.

Hand Signal/Verbal Command Meaning
Left arm out and downwards, palm facing backwards Stopping
Left arm out straight, moving up and down Slowing down
Right arm out to the side Right turn
Left arm out straight Left turn
“Car back!” Warning of an approaching vehicle from behind
“Hole!” Alert about a pothole on the road

Practicing Your Signals and Communication

So, how do you get better at using hand signals and verbal commands? The answer is simple: practice. You don’t need to be on a group ride to practice your signals and commands. In fact, it’s better to get comfortable with them before you join a group ride. You can practice your hand signals while you’re cycling alone. Try signaling turns and stops until it feels like second nature. And don’t forget about verbal commands. Even if you’re alone, try calling out obstacles or announcing your moves as if you were in a group. It might feel silly, but it’s a great way to get comfortable with the commands.

You can also practice with a friend or family member. They don’t even have to be on a bike. They can be in a car, or on foot. The point is to practice communicating your intentions clearly and confidently.

The Role of the Lead and Tail Riders

Now, let’s talk about the roles of the lead and tail riders in a group. These positions carry additional responsibilities when it comes to communication. The lead rider is at the front of the group and is responsible for signaling turns, announcing changes in speed, and calling out hazards that are ahead. The tail rider, who rides at the back of the group, also plays a crucial role. This rider’s job is to keep an eye out for problems within the group and communicate with the lead rider if necessary.

The lead and tail riders need to be experienced and comfortable with all the signals and commands. They also need to have a good understanding of group dynamics and be able to make decisions quickly and confidently. It’s a big responsibility, but also a great way to contribute to the group.

  • Left turn signal
  • Right turn signal
  • Stop signal
  • Slowing down signal
  • Obstacle on the road command
  • Changing speed command
  • Changing formation command

Remember, effective communication is key to a safe and enjoyable group ride. So, whether you’re a lead rider, a tail rider, or anywhere in between, make sure you know your signals and commands and use them consistently.

Mistakes to Avoid in Group Cycling Communication

Just like any other new skill, learning group cycling communication can have its fair share of mistakes. But don’t worry—we all have to start somewhere, right? Let’s take a look at some of the most common mistakes beginners make and how we can avoid them.

One of the most common mistakes is not using hand signals or verbal commands at all. Remember, communication is key in group rides. It’s not just about your safety, but the safety of the entire group. So, always make sure to use the appropriate signals and commands.

Another frequent mistake is using incorrect or unclear signals. This can be just as dangerous as not using signals at all. Practice your signals before you hit the road to ensure they are clear, visible, and correct.

Further Resources

Ready to take your group cycling communication to the next level? There are plenty of resources out there where you can learn more about cycling hand signals, communication, and group ride etiquette.

  • Cycling UK: A comprehensive guide to cycling hand signals and verbal commands.
  • Bicycling Magazine: Offers a wealth of articles and resources on all things cycling, including etiquette and safety.
  • Your local cycling club: Joining a cycling club is a great way to get hands-on training and meet fellow cycling enthusiasts.
  • British Cycling: Provides detailed guides and resources for all levels of cyclists.

Final Thoughts

There you have it—the ins and outs of group cycling communication. Remember, effective communication is crucial for a safe and enjoyable group ride. And don’t forget, it’s okay to make mistakes as long as you learn from them.

Whether you’re a seasoned cyclist or just starting out, it’s always a good idea to brush up on your hand signals and verbal commands. So, why not take a few minutes to review them before your next ride?

And finally, never stop learning and improving. Cycling is a journey, not a destination. Happy cycling!

The Basics of Bike Maintenance: Keeping Your Bike in Great Condition

Welcome, cycling enthusiasts and beginners alike! Today, we’re going to talk about something that’s hugely important yet often overlooked – regular bike maintenance. You see, a well-maintained bike not only lasts longer but also provides a safer, smoother ride. If you’re new to this, don’t worry. Maintaining your bike isn’t as complex as it seems, and it’s definitely worth the effort.

Imagine gliding down the road on a bike that responds swiftly to your every command, its gears shifting smoothly, its tires full of air. Doesn’t that sound appealing? That’s what regular maintenance can do for your beloved two-wheeler.

The Importance of Regular Bike Maintenance

So, why is regular bike maintenance so important? The answer is simple. Regular upkeep of your bicycle can prevent sudden breakdowns and costly repairs. It’s like getting regular check-ups for your health. Prevention is always better (and cheaper) than cure, right?

Moreover, a well-maintained bike enhances your riding experience. No more struggling with a stiff chain or wobbly wheels. Instead, you’ll enjoy a smooth, effortless ride every time you hit the road. Sounds good, doesn’t it?

Starting with the Basics: Essential Tools for Bike Maintenance

Before we dive into the nitty-gritty of bike maintenance, let’s talk about the basic tools you’ll need. No, you don’t need a fully-equipped garage. Just a few essentials will do.

So, what are these tools? First off, a bicycle repair stand. This tool will hold your bike steady while you work on it. Next, you’ll need a set of Allen wrenches for tightening and loosening bolts. A tire pump and pressure gauge are crucial for maintaining correct tire pressure, while a chain tool and some lubricants will help keep your chain in top shape. Sounds manageable, right?

Easy Maintenance Tasks You Can Do at Home

So, you’ve got your essential bike maintenance tools and you’re ready to start. But what exactly can you do at home? Quite a lot, actually! Let’s explore some simple maintenance tasks that you can handle without needing to run off to the professionals.

Cleaning your bike

First things first: cleanliness is next to godliness, especially when it comes to your bike. Keeping your bike clean not only makes it look good, but it also helps maintain its performance and longevity.

So, how do you go about cleaning your bike? It’s easier than you might think. Start by removing any excess dirt and grime from the frame and wheels. You can use a soft brush or a rag for this. Then, apply some bike-specific cleaner (or mild soap) and scrub gently. Rinse it off with a hose, making sure not to directly spray bearings or other sensitive parts.

Next, use a clean rag to dry the bike thoroughly. Remember, water can lead to rusting, so it’s crucial to remove all moisture. Once the bike is dry, detail the bike’s frame with a soft cloth and a bit of polish. This will give it a nice shine and provide some protection against dirt and moisture.

Checking and inflating the tires

Did you know that correct tire pressure can greatly affect your bike’s performance and safety? That’s right! Under-inflated tires can make your ride sluggish and increase the risk of punctures, while over-inflated tires can lead to a harsh ride and even blowouts. So, it’s vital to keep them in check.

But how do you do that? First, you’ll need to find the recommended tire pressure for your bike. This information is usually printed on the side of the tire. Then, use a tire pressure gauge to check the current pressure. If it’s too low, use your bike pump to inflate the tire to the recommended level. Make sure not to exceed this level to avoid over-inflation.

Remember, tire pressure can fluctuate with temperature changes, so it’s a good idea to check your tires before every ride. Trust us, your bike (and your ride) will thank you!

More In-depth Bike Maintenance Tasks

So, you’ve mastered the basics and you’re ready to tackle more complex bike maintenance tasks? That’s awesome! But remember, while some tasks can be handled at home with your trusty tool kit, others may require a bit more finesse and possibly the help of a professional. Having said that, let’s dive into some of these more in-depth tasks.

Brake Check and Adjustment

How important are well-functioning brakes? The answer is simple: extremely important. Your brakes are your primary safety mechanism when riding, and ensuring they’re in top condition can be the difference between a smooth stop and a potential accident. So, how do we check and adjust them?

Start by examining the brake pads. They should contact the rim evenly and shouldn’t be excessively worn or misaligned. To adjust, simply loosen the bolt, align the brake pad with the rim, and tighten. If the brake levers feel too loose or too tight, you can adjust the tension using the barrel adjuster near the levers or at the brakes themselves. Remember, this is a general guide and the specifics may vary depending on your bike’s brake system.

Chain Maintenance and Replacement

Think of the chain as the heart of your bike’s operation. It’s what transfers the power from your pedaling to the bike’s wheel. But like any moving part, it’s subject to wear and tear and needs regular maintenance.

Chain maintenance includes regular cleaning and lubrication. A dirty chain is not only inefficient, but it could also damage your gears. So clean it regularly with a brush and soapy water, dry it thoroughly, and then apply a chain lubricant.

As for when to replace the chain, a simple rule of thumb is to measure 12 links. If they stretch to more than 12 1/16 inches, it’s time for a new chain. And while replacing a chain can be a DIY task, it might be best to leave it to the pros if you’re unsure.

The Role of Professional Bike Shops

Now, there’s no shame in admitting that some tasks are better left to the pros. Professional bike shops are equipped with specialized tools and experienced mechanics who can handle more complex maintenance tasks. But when do you need their help?

Major repairs like wheel truing, bearing adjustments, or hydraulic brake servicing are usually best left to professionals. Also, if you’re unsure about something or if your bike isn’t running smoothly despite your maintenance efforts, it’s a good idea to get a professional’s opinion.

Finding a reputable bike shop might seem daunting, but a good starting point is to look for reviews or ask fellow cyclists for recommendations. Once you’ve found a good shop, you can expect services ranging from basic tune-ups to comprehensive overhauls, all aimed at keeping your bike in the best shape possible.

Setting a Maintenance Schedule

Now that we have a good understanding of what bike maintenance involves, how often should you do it? The answer to this is not a one-size-fits-all, as it largely depends on how often you ride and the conditions under which you ride. However, it’s safe to say that regular maintenance is key to keeping your bike in the best possible shape.

Creating a maintenance schedule tailored to your bike usage and specific needs is a pretty smart move. It helps ensure that you don’t overlook any essential checks or fixes. Sounds like a plan, doesn’t it?

Remember, setting up a schedule doesn’t have to be complicated. It can be as simple as setting reminders on your phone or marking dates on your calendar.

Task Frequency
Basic clean After every ride
Tire pressure check Weekly
Brake check Monthly
Chain lubrication Monthly
Professional service Annually

Final Thoughts on Bike Maintenance

So there we have it, a comprehensive overview of bike maintenance. From the basic tasks you can do at home to the more in-depth ones that may require a professional, we’ve covered it all. But remember, knowledge isn’t power until it’s applied. So, why not use this guide to start taking better care of your bike?

Making bike maintenance a regular habit can significantly extend the lifespan of your bike, provide a safer ride, and ensure a smooth and enjoyable cycling experience. So why not get started?

  • Regular bike maintenance is essential for the longevity and safety of your bike.
  • Some tasks can be performed at home, while others may require professional help.
  • Setting a maintenance schedule based on how often you ride and your bike’s specific needs can help ensure that you don’t overlook any crucial maintenance tasks.
  • Regular maintenance can save you money in the long run by preventing costly repairs.

Night Riding: Essential Gear and Precautions

There’s something magical about cycling after dark. The tranquil streets, the cool breeze, and the serene beauty of the night sky offer a completely unique and thrilling experience. Familiar routes take on a new perspective, and the world seems calmer and more peaceful. But as enticing as night riding may be, it’s essential to be well-prepared and take the necessary precautions. Riding at night comes with its own set of challenges, particularly regarding visibility and safety.

Ready for an evening adventure on two wheels? Let’s gear up!

Understanding the Basics of Night Cycling

Daytime cycling and night riding are two different beasts. During the day, you have plenty of natural light, and obstacles on the road are easier to see. At night, reduced visibility can make it harder to spot potential hazards, and unpredictable road conditions can add to the challenge. Extra precautions are essential to ensure a safe and enjoyable ride.

Wondering what you need to do differently when cycling at night? Don’t worry, we’ve got you covered.

Essential Gear for Night Riding

Just like a superhero needs their suit, night cyclists need their gear. The right equipment will not only make your ride safer but also more enjoyable. And no, you don’t have to break the bank to get your hands on this gear. There are options available for every budget.

Curious about what gear you need for night riding? Stay tuned as we dive deeper into the essentials in the following section.

Illuminating the Path: Lights as a Priority

Have you ever tried navigating in the dark without a source of light? Quite challenging, isn’t it? When it comes to night cycling, lights are not just an accessory, they are an absolute necessity! A well-lit bike is crucial for two reasons: it allows you to see the path ahead and it makes you visible to other road users.

There are several types of bike lights available in the market, each with varying lumens, modes, and battery life. Lumens is a measure of the total amount of visible light emitted by a source, and in our case, more lumens equates to brighter light. Light modes usually include steady and flashing settings, each serving a specific purpose. While the steady mode is used to light up your path, the flashing mode is used to grab attention and signal your presence to others. And let’s not forget about battery life! Whether you prefer lights with rechargeable batteries or those that require regular battery changes, ensure that your lights have enough juice to last your entire ride.

Choosing the Right Light

So, how do you go about choosing the right light? Well, it all depends on where you’ll be cycling and how well-lit those areas are. If you’re traversing through well-lit streets, a light with lower lumens might suffice. But if your adventure takes you off-road or through poorly lit areas, you’ll need a light with higher lumens. Remember, your light should be bright enough to illuminate potential hazards on your path and visible enough to alert other road users of your presence.

There are also lights specifically designed for different parts of your bicycle. For instance, front lights are usually white and are brighter to illuminate the path ahead, while rear lights are red and used to signal your presence to those behind you. Don’t overlook the importance of side visibility too! Consider lights with a wide beam spread or add spoke lights to your wheels.

Proper Light Installation and Usage

Now that you have your lights, how do you use them effectively? First, ensure that they are correctly installed. Front lights should be mounted on the handlebar or the front fork, while rear lights should be attached to the seat post or the rear rack. Make sure the lights are firmly secured and aimed correctly – you wouldn’t want to blind oncoming traffic or waste your battery lighting up the sky, would you?

Remember, using your lights is just as important as having them. Always turn on your lights when visibility is low, not just when it’s dark. This includes times like dawn, dusk, and during inclement weather. And don’t forget to check your lights before you start your ride. It’s a simple step that could significantly increase your safety on the road.

The Visibility Trifecta: Reflective Gear, Hi-Vis Clothing, and Light-up Accessories

While lights play a significant role in visibility, they are only part of the equation. Enter reflective gear, hi-vis clothing, and light-up accessories! It’s like creating a visibility trifecta for your night rides.

Reflective gear works by bouncing back light to the source, making it highly effective when headlights hit it. This can include things like reflective vests, bands, and tapes that can be attached to both your bike and clothing. Hi-vis clothing, on the other hand, is designed to stand out against any background, making it easier for you to be spotted. This could be a bright neon jacket, helmet, or gloves.

And let’s not forget about light-up accessories! These fun additions can include things like illuminated backpacks, shoe clips, and helmet lights. Not only do they add an element of fun to your ride, but they also enhance your visibility. Remember, the goal is to be seen, and these accessories can significantly contribute to that.

Helmets and Protective Gear: Safety First

Lastly, we can’t talk about night riding without mentioning helmets and other protective gear. Helmets are a must, not just for night rides but for cycling in general. I mean, who would gamble with their safety, right? Apart from protecting your head in case of an accident, a helmet can also serve as an additional spot for mounting lights or a camera.

Consider also wearing protective gear like knee and elbow pads. They might not directly increase your visibility, but they provide an extra layer of safety, especially if you’re riding on unpredictable terrain. Remember, safety should never be compromised, no matter how experienced you are as a cyclist.

So, are you ready to conquer the night? With the right gear and precautions, night riding can be a thrilling and unforgettable experience. Stay safe, be seen, and enjoy the ride!

Navigating the Night: Planning Your Route

Have you ever thought about the importance of planning your route before embarking on a night ride? You should. It is an essential aspect of night cycling that should never be overlooked. Familiarity with the route you intend to take cannot be overemphasized. This allows you to anticipate turns, be aware of the road’s condition, and know where the street lights are and aren’t.

Furthermore, try as much as possible to avoid risky areas. These are places with high-speed traffic, poorly lit streets, or dangerous intersections. It’s always better to take a longer, safer route than a shorter, riskier one. Remember, the goal is not just to enjoy the ride, but to do so safely.

Weather Considerations: Adjusting to the Conditions

Just as important as planning your route is considering the weather. Weather conditions can significantly affect visibility and road conditions during night rides. For example, a rainy night can make the roads slippery and the visibility poor. On such nights, you might need to slow down, use your lights more, and wear waterproof gear.

On the other hand, a clear, starry night might require less light intensity but more warmth layers. Isn’t it fascinating how the weather can influence our night ride preparation? It’s always a good idea to check the weather forecast before heading out. That way, you can adjust your gear and tactics accordingly.

Weather Condition Visibility Level Appropriate Gear Adjustment
Rainy Poor High-intensity lights, reflective and waterproof gear
Clear and Starry Good Lower light intensity, warm clothing
Foggy Very Poor High-intensity lights, reflective and bright-colored gear
Snowy Poor High-intensity lights, reflective, waterproof, and warm gear
Windy Good Regular light intensity, wind-resistant clothing

Communication and Group Rides: Strength in Numbers

Another safety measure you can take when cycling at night is riding in a group. There’s strength in numbers, right? Group rides can increase your visibility to other road users. Plus, it’s always more fun to share the experience with friends.

But don’t forget, communication is key in a group ride. Make sure everyone understands the route, the pace, and the signals for stopping, turning, or alerting of hazards. This way, everyone stays safe and has a great time.

Going Beyond Gear: Defensive Riding Techniques

Have you ever thought about how your riding technique can contribute to your safety, especially during night rides? Well, it’s not just about the gear; it’s also about how you use it. Defensive riding is a proactive approach that can significantly increase your safety on the road. It involves anticipation, positioning, and communication.

Anticipation involves being aware of your surroundings and expecting the unexpected. It means always being ready for potential changes in road conditions or sudden moves by motorists. Sounds challenging, right? But with practice, it can become second nature.

Positioning is all about where you place yourself on the road. The key is to be visible while also giving yourself the best view of the road ahead. This might mean taking the full lane when necessary or positioning yourself where you can be easily seen by drivers.

Lastly, communication is crucial. This doesn’t mean having a chat with every motorist you meet. Instead, it’s about using signals to indicate your intentions. It’s simple, but it can make a world of difference.

Essential Maintenance for Night Rides

You wouldn’t hop into a car without checking it’s in working order, right? The same applies to your bicycle, especially when you’re heading out for a night ride. Regular maintenance checks are crucial to ensure your bike is in top shape and safe to ride. Pay particular attention to your brakes, tires, and lights.

Brakes are your primary safety feature, so they need to be in perfect working order. Check for worn brake pads and ensure the cables aren’t frayed or damaged. Your tires should be properly inflated, and check for any cuts or embedded debris that could cause a puncture. And of course, always test your lights before setting off – a dim or non-functioning light can be a serious safety hazard.

Here’s a handy checklist to guide you:

  • Brakes: Check for worn brake pads and inspect cables.
  • Tires: Check for proper inflation and inspect for cuts or debris.
  • Lights: Test all lights to ensure they are functioning correctly.

Final Thoughts: Balancing the Excitement and Safety of Night Rides

So, we’ve covered a lot, haven’t we? Night rides can offer a unique thrill and a fresh perspective on familiar routes. But as we’ve discussed, they also require extra preparation and precautions. From the essential gear to defensive riding techniques and pre-ride checks, there’s a lot to consider.

Remember, the thrill of night riding should never compromise your safety. Always prioritize being seen and stay alert to your surroundings. Equip yourself with the right gear, follow our tips, and you’ll be well on your way to safe and enjoyable night rides. Ready to take on the night?

The Value of a Good Helmet: How to Choose the Right One

Picture this: You’re cruising down a winding bike trail, the wind whipping past your face and the world blurring by. Now, imagine if you were to take a tumble. It’s not a pleasant thought, but it’s a possibility that every cyclist must consider. That’s where a good helmet comes in. It’s not just a piece of gear; it’s a vital safeguard that can mean the difference between a minor scrape and a serious injury. And the quality of the helmet plays a significant role in just how much protection it offers.

Understanding the role of helmets in cycling safety

So, how does a helmet protect you while cycling? Well, consider the helmet as your personal shock absorber. In the event of a crash, it’s designed to take the brunt of the impact, protecting your head and brain. It can help prevent everything from minor concussions to severe brain injuries. Sounds essential, doesn’t it?

Why investing in a good helmet is beneficial

Investing in a quality helmet goes beyond just safety. Remember, this is a piece of equipment you’ll be wearing for extended periods. A good helmet not only offers superior protection but is also more durable, comfortable, and effective. And when you’re tackling a challenging trail or hitting high speeds on the road, these factors can make all the difference.

Think about it: would you rather a helmet that cracks after a minor fall, or one that stands up to multiple impacts? A helmet that leaves you with a sweaty, uncomfortable head, or one that offers breathability and a snug fit? The answers seem pretty clear, don’t they?

Key Features to Look for in a Quality Helmet

In your quest to find the perfect helmet, there are several key features that you should consider. After all, a quality helmet can protect your head, and by extension, your life. But what makes a helmet ‘quality’? Let’s find out.

Material and Construction

The material a helmet is made of plays a pivotal role in determining its durability and safety level. Most helmets are made of polystyrene foam, encased in a plastic shell that absorbs impact. The shell, often made of hard plastic, is crucial as it helps distribute the force of an impact across the entire helmet, reducing the risk of head injury.

Additionally, the construction of the helmet is equally important. A quality helmet generally includes a robust outer shell, a shock-absorbing liner, and a secure strap. The liner is typically made of expanded polystyrene or similar material that crushes upon impact, reducing the force before it reaches your head.

The strap, often overlooked, is vital for keeping the helmet in place during a crash. The best helmets feature easily adjustable straps with a buckle that can withstand high impact forces without breaking.

Size and Fit

Have you ever heard the saying, “It’s not just about wearing a helmet, it’s about wearing it right“? Well, it’s true. A helmet that doesn’t fit properly can be as dangerous as not wearing one at all. It’s crucial to get a helmet that fits perfectly on your head.

So, how do you measure your head size for a helmet? Easy. Just wrap a flexible tape measure around the largest portion of your head—about 1 inch above your eyebrows. Or, if you don’t have a tape measure, use a string and measure it against a ruler. This measurement will give you the helmet size you need.

But it’s not just about size, the fit is equally important. A good helmet should sit level on your head, not tilted back or angled to one side. It should feel snug but not too tight, and shouldn’t move more than an inch in any direction.

Different Types of Helmets and Their Uses

Did you know that there are different types of helmets designed for different cycling activities? That’s right. Let’s explore some of the most common ones and their specific uses.

Road Helmets

Road helmets are designed for use on roads and paved trails. They are typically lightweight and well-ventilated, providing a balance of comfort and safety for long-distance cyclists. They often feature a more aerodynamic design to reduce wind resistance and maximize speed.

Mountain Bike Helmets

Mountain bike helmets, on the other hand, are designed for off-road use. They offer added protection for the back and sides of your head and typically have fewer vents. This design is intended to protect against the more varied types of impacts that can occur in mountain biking.

Type of Helmet Weight Ventilation Protection Use
Road Helmets Lightweight High Front, Top, Back Roads and Paved Trails
Mountain Bike Helmets Medium Medium Front, Top, Back, Sides Off-road Trails

Helmet Regulations and Standards

Have you ever wondered why there are so many rules and regulations surrounding helmets? Well, it’s all about your safety. The cycling industry has set stringent standards for helmets to ensure they offer maximum protection. These standards vary from country to country, but their goal remains the same – to protect the cyclist.

So, what does this mean for you as a cyclist? It is crucial to choose a helmet that meets or surpasses these standards. A helmet that doesn’t meet the standards might not provide the level of protection you need, putting you at risk of serious injury. Always check the product specifications or ask the seller if the helmet meets industry standards before purchasing.

The Life Span of a Helmet

Like most things in life, helmets have a lifespan. But unlike a carton of milk, a helmet doesn’t come with an expiry date. So, how do you know when it’s time to replace your helmet?

Generally, it is recommended to replace your helmet every 3 to 5 years. Why? Because the materials used in the helmet, particularly the EPS liner that absorbs impact, can degrade over time, reducing its effectiveness.

However, there are other factors that could shorten your helmet’s lifespan. For example, if your helmet has been involved in a crash, it’s time to get a new one, even if you don’t see any visible damage. The impact can compromise the helmet’s structure and its ability to protect you in future accidents.

Other signs that your helmet may need replacing include visible wear and tear, like cracks or loose parts, and if the fit has become loose over time. Remember, a helmet can only protect you if it’s in good condition and fits correctly.

Taking Care of Your Helmet

So, you’ve invested in a top-notch helmet. Now, how do you ensure it stays in the best shape possible? It’s simpler than you might think!

Firstly, clean your helmet regularly. This doesn’t mean you should toss it in the dishwasher or washing machine. Instead, use a mild soap and warm water to gently clean the exterior and interior of the helmet. This helps keep it free of sweat, dirt, and bacteria that can degrade the materials.

Remember to avoid harsh chemicals or solvents—they can weaken the helmet’s structure and reduce its effectiveness. Also, always store your helmet in a cool, dry place. Extreme temperatures and moisture can negatively affect the helmet’s materials.

Lastly, handle your helmet with care. Dropping it or throwing it around could cause unseen damage that compromises its ability to protect your head. Be gentle—it’s there to protect you!

Making the Right Choice

Choosing the right helmet isn’t just about selecting the most expensive or the most stylish one. It’s about investing in your safety and comfort. So, how do you make the right choice?

Consider your specific cycling needs and preferences. Are you a casual cyclist who enjoys a leisurely ride in the park? Or are you a serious mountain biker who needs a helmet that can withstand the rigors of the trail? Understanding your needs can help guide your decision.

Investing in a quality helmet might seem like a big upfront cost, but it’s a small price to pay for safety and peace of mind. Plus, a well-made helmet is designed to last, offering you value for your money in the long run.

  • Choose a helmet that fits well and is comfortable.
  • Look for a helmet that meets industry safety standards.
  • Consider your specific cycling needs and preferences.
  • Invest in quality—it’s worth it in the long run.
  • Clean your helmet regularly with mild soap and warm water.
  • Avoid exposing your helmet to extreme temperatures and moisture.
  • Handle your helmet with care—avoid dropping it or throwing it around.
  • Replace your helmet when necessary—it’s not meant to last forever.

Rest and Recovery After Cycling: Essential Tips

As an avid cyclist, you’ve probably heard the phrase “rest is as important as training” countless times. But what does this really mean? Simply put, it means that the time you spend off your bike, allowing your body to recover, is just as crucial to your performance and health as the time you spend pedaling. This may seem counterintuitive, especially to beginners who believe that constant cycling is the key to improvement. However, without proper rest and recovery, you may find yourself on a fast track to burnout or injuries.

The Importance of Rest and Recovery for Cyclists

Rest and recovery are key components of any training regimen, and cycling is no exception. But why is this so important? The answer lies in the way your body responds to exercise. When you cycle, you cause microscopic damage to your muscle fibers. During rest periods, your body repairs and strengthens these fibers, leading to muscle growth and improved performance. This process is known as supercompensation. In addition, rest days help prevent overtraining syndrome and injuries, both of which can derail your training and progress.

Signs You Need to Rest

Recognizing when to take a break is crucial for maintaining optimal performance and preventing injuries. But how do you know when it’s time to rest? Here are some common signs of fatigue and overtraining:

  • Decreased performance: If you’re finding it hard to maintain your usual pace or intensity, it may be a sign that you’re overdoing it.
  • Persistent muscle soreness: While some muscle soreness is normal after a hard workout, if the soreness persists for more than 72 hours, it may be a sign that your body needs more time to recover.
  • Disrupted sleep patterns: Overtraining can disrupt your sleep patterns, leading to insomnia or restless sleep. Good quality sleep is crucial for recovery, so any disruptions should be taken seriously.

Rest vs Active Recovery – What’s the Difference?

Have you ever wondered what the difference is between rest and active recovery? If you’re a cycling enthusiast, these two terms are critical to understand. Let’s break them down.

Rest refers to complete cessation of strenuous activity, giving your body time to heal and replenish energy stores. It’s a vital component of any training regimen and serves as a counterbalance to intense workouts. On the other hand, Active Recovery involves performing light exercises that keep your blood flowing without significantly taxing your muscles. It’s all about striking a balance between rest and light activity.

There’s a place for both rest and active recovery in a cyclist’s routine, and the choice between the two often depends on how intense your previous workout was. If you’ve pushed yourself to the limit, a rest day might be in order. If your previous session was less intense, active recovery could be beneficial.

The Science of Active Recovery

So, what makes active recovery so effective? It’s all about increased blood flow and nutrient delivery. When you engage in light exercise, your heart rate increases, pumping more blood around your body. This delivers essential nutrients to your muscles, aiding in the repair and rebuilding process.

Think of it like this: imagine your muscles are a construction site. After a heavy workout, there’s plenty of rebuilding to do. Active recovery is like keeping the supply trucks rolling in, ensuring your muscles have all the materials they need to rebuild stronger than before.

How to Plan Recovery Days

Now that we understand the importance of both rest and active recovery, how do we integrate them into our training schedule? It’s not as complicated as you might think. A good rule of thumb is to follow an intense workout day with a rest or active recovery day.

Remember, the goal of rest and active recovery days is to let your body recover, not to push it further. Make sure you’re not pushing yourself too hard on these days. It’s better to err on the side of caution and take it easy.

Sample Recovery Day Schedules

What does a recovery day look like? Here are a few examples:

  • Rest Day: Take it easy. Relax, read a book, watch a movie. Your only job today is to rest.
  • Active Recovery Day (After Light Workout): Engage in light activities like walking, gentle yoga, or leisurely cycling.
  • Active Recovery Day (After Intense Workout): Consider a short, easy bike ride or a swim. The goal is to get your blood flowing without adding stress to your muscles.

Remember, these are just examples. Your perfect recovery day might look different, and that’s okay. The key is to listen to your body and give it what it needs to recover and grow stronger.

Nutrition for Recovery

Have you ever considered the role of nutrition in your recovery process? It’s not just about getting enough rest and downtime, but also about fueling your body with the right nutrients. Essential elements like protein and carbohydrates play a significant role in muscle repair and replenishment of energy reserves after a grueling cycling session. Eating a balanced meal after your ride can help to kickstart the recovery process, rebuild your energy stores, and prepare your body for the next ride.

Hydration and Recovery

Now, let’s not forget about hydration. Hydration is just as important as nutrition in the recovery process. Why, you may wonder? Well, during a ride, your body loses a lot of fluids through sweating. These fluids need to be replaced to maintain the balance of electrolytes in your body and prevent dehydration. Drinking enough water or electrolyte drinks can help you recover faster and feel more energized for your next cycling session. It’s as simple as that!

Sleep and Recovery

Ever heard of the phrase “Sleep is the best medicine”? It couldn’t be more accurate when it comes to recovery. Sleep is the time when your body undergoes the most significant amount of muscle repair and hormonal balance. It’s when your body does its best recovery work! That’s why it’s crucial to ensure you’re getting enough quality sleep every night, especially after a demanding cycling session. So, the next time you’re tempted to skimp on sleep, remember, a good night’s rest could be the key to better cycling performance!

Foods and Drinks That Aid Recovery

Food/Drink Benefits
Bananas Rich in potassium, which helps maintain fluid levels in the body and regulate muscle contractions.
Chicken High in protein, which aids in muscle repair and growth.
Quinoa Packed with protein and fiber, aiding in muscle recovery and maintaining a healthy digestive system.
Chocolate Milk Provides a good balance of protein and carbohydrates for muscle recovery and energy replenishment.
Water Rehydrates the body and replenishes lost electrolytes.

The Role of Stretching and Foam Rolling in Recovery

Ever wondered why stretching and foam rolling is a ritual for most athletes, especially cyclists? It’s because they play a key role in recovery and injury prevention. Stretching helps to improve flexibility, enhance circulation, and reduce muscle tension. It’s like giving your muscles a gentle massage to relieve the tension built up from cycling.

On the other hand, foam rolling, also known as self-myofascial release (SMR), works deeper into your muscle tissue. It breaks up knots and releases tightness in the fascia (the protective layer surrounding your muscles, bones, and joints). And the best part? It can be done at home, anytime you need it.

  • Quad Roll
  • Glute Roll
  • Hamstring Roll
  • Lower Back Roll
  • IT Band Roll

Common Myths About Recovery

Do you believe that taking a day off will hinder your progress? Or that the more you cycle, the better you become? Well, it’s time to debunk these myths. Recovery is not a sign of laziness, it’s a crucial part of training. Overworking your body won’t make you a better cyclist, but it may lead to burnout or injury.

Another common myth is that you should ‘push through the pain.’ While it’s normal to feel some discomfort during training, intense or persistent pain is a clear sign that you need to rest and recover. Remember, pain is your body’s way of telling you that something is wrong.

How to Listen to Your Body

Learning to listen to your body is crucial for effective recovery. But what does this mean in practical terms? It means paying attention to how you feel during and after cycling. Are you feeling energized or drained? Are you experiencing muscle soreness or pain?

Here are some signs that you might be overdoing it and need a break:

  • Persistent muscle soreness or pain
  • Decreased performance
  • Disrupted sleep patterns
  • Changes in mood or motivation
  • Frequent illnesses or injuries

Cycling in Different Weather: Tips and Tricks

Have you ever noticed how the weather can significantly impact your cycling experience? A sunny day with a gentle breeze makes for a perfect ride, while a sudden downpour can turn your cycling journey into a challenging adventure. As a cyclist, understanding and being prepared for different weather conditions can not only enhance your ride but also ensure your safety. This blog post will equip you with the knowledge and tips you need to cycle through all kinds of weather conditions confidently!

Imagine being able to cycle through a light drizzle, feeling the cool rain against your skin, or pedaling your way through a snowy landscape, the crunch of the snow under your tires adding a unique rhythm to your ride. Sounds exhilarating, right? Let’s dive right in and discover how you can enjoy these experiences safely!

Understanding Weather Challenges for Cyclists

Every weather condition presents unique challenges to cyclists. A hot, sunny day can lead to dehydration and sunburn, while a rainy day can make the roads slippery, increasing the risk of accidents. Windy conditions can make it harder to pedal and maintain balance, and cycling in the snow, while it can be a beautiful experience, comes with the risk of frostbite and hypothermia. It is vital for you as a cyclist to understand these challenges and potential risks to ensure your safety.

Remember, the key to overcoming these challenges is preparation and understanding. Knowledge is power, especially when it comes to dealing with the unpredictability of weather!

Importance of Weather Preparation for Cyclists

Being prepared for varying weather conditions isn’t just about comfort, it’s about safety. Proper preparation can mean the difference between an enjoyable ride and a potentially hazardous situation. For instance, wearing appropriate gear can protect you from the elements, and understanding how to navigate in different weather can prevent accidents.

Proper preparation not only enhances your safety but also allows you to fully enjoy and appreciate the unique experiences that come with cycling in different weather conditions. So, are you ready to embark on your weather-resilient cycling journey?

Weather-specific Cycling Tips

Have you ever wondered how to adjust your cycling routine to different weather conditions? It’s not as daunting as it may seem. With the right knowledge, you can transform weather challenges into enjoyable and safe cycling experiences. Let’s explore some weather-specific tips for sunny and rainy conditions.

Sunny Weather Cycling Tips

Let’s start with sunny weather, which, while beautiful, can pose some unique challenges for cyclists. The first thing to remember is the importance of hydration. The sun can dehydrate you quickly, especially during long rides, so always carry enough water with you.

Next, we can’t stress enough the importance of sunscreen. UV rays from the sun can harm your skin, and when you’re cycling, you’re directly exposed to them. So, apply a good quality sunscreen before heading out.

Finally, consider your clothing. Light-colored, loose-fitting clothing is ideal for sunny weather as it reflects sunlight and allows for better air circulation. A hat and sunglasses are also recommended to protect your eyes from the sun’s glare. Remember, the goal is to stay as cool and protected as possible.

Rainy Weather Cycling Tips

Now, for those rainy days. First, invest in some waterproof gear. This can include a waterproof jacket, pants and shoe covers. Wearing this gear can keep you dry and prevent chills.

It’s also important to adjust your riding techniques in the rain. Wet roads can be slippery, so be sure to reduce your speed and take corners more gently to avoid skidding. Also, remember that rain can affect visibility, both for you and for drivers, so use lights to make sure you’re seen.

Essential Cycling Gear for Different Weather

Having the right gear can make a world of difference when cycling in varying weather conditions. Let’s go over some key items you should consider.

For sunny weather, as mentioned, don’t forget your sunscreen, hat, and sunglasses. A lightweight, breathable jersey is also a good choice, as it can help to keep you cool. And always remember to bring enough water.

For rainy weather, waterproof clothing is a must. This includes a waterproof jacket and pants, as well as shoe covers. A helmet with a visor can also help to keep rain out of your eyes. And don’t forget lights and reflective gear to improve your visibility.

Health Considerations while Cycling in Different Weathers

Ever wondered how cycling in varying weather conditions impacts your health? Let’s take a closer look. When it’s hot, for instance, cyclists are at risk of heat stroke. It’s a serious condition that can occur when your body overheats due to excessive exposure to high temperatures or physical exertion in high temperatures. On the flip side, cycling in extreme cold can lead to frostbite. This condition occurs when your skin and the tissue beneath it freeze. Not a pleasant experience, right?

That’s why it’s so important to take health considerations into account when planning to cycle in different weather conditions. Doing so will not only protect your health but also make your cycling experience more enjoyable.

Weather Forecasting and Planning Rides

Imagine you’re all set for a cycling trip. You’ve got your gear ready, your energy levels are high, and you’re raring to go. But then, the weather decides to play spoilsport. It’s a scenario all too familiar for cyclists, isn’t it? This is why understanding weather forecasts and using them to plan your rides is a must for every cyclist.

Being aware of the weather forecast allows you to plan your rides effectively and be prepared for any weather conditions that may arise. If the forecast predicts sunny weather, you can pack your sunglasses and sunblock. If it’s going to rain, you can carry your waterproof gear. Simple, right? But remember, the weather can be unpredictable. So, it’s always a good idea to have a flexible plan based on the weather.

Weather Condition Effects on Cycling Tips
Sunny Increased risk of dehydration and sunburn Stay hydrated, use sunscreen, wear sunglasses and a hat
Rainy Reduced visibility and road traction Use waterproof gear, adjust riding techniques, be extra cautious
Windy Makes cycling more strenuous, especially against the wind Lean into the wind, keep a low posture to reduce resistance
Snowy Reduced visibility, slippery roads, risk of frostbite Wear warm, layered clothing, use winter cycling tyres, avoid riding in heavy snowfall

Learning from Experienced Cyclists

Ever wondered how experienced cyclists manage to ride comfortably in all kinds of weather? It’s all about adaptability and learning from experience. They’ve been there, done that, and have a ton of wisdom to share.

One key piece of advice that almost every seasoned cyclist will give you is to respect the weather. This means understanding the potential risks and knowing how to mitigate them. For example, in rainy weather, they suggest slowing down to avoid skidding, while in sunny conditions, they emphasize the importance of staying hydrated and protecting yourself from the sun.

Another nugget of wisdom is the importance of the right gear. Experienced cyclists understand that having the appropriate clothing and equipment can make a significant difference in comfort and safety. So, listen to them and invest in high-quality, weather-appropriate cycling gear.

Final Considerations for Cycling in Different Weather Conditions

So, what have we learned about cycling in different weather conditions? Well, a lot! But let’s recap the main points.

Firstly, preparation is key. Being aware of the potential challenges each weather condition presents and knowing how to deal with them can make your cycling experience safer and more enjoyable. Secondly, having the right gear is essential. It not only protects you from the elements but also enhances your comfort and performance. Lastly, it’s important to listen to your body. If you’re feeling too hot, cold, or uncomfortable, it’s okay to take a break or adjust your plans.

Encouragement for Weather-Resilient Cycling

Starting your cycling journey can feel a bit intimidating, especially when you have to deal with different weather conditions. But remember, every cyclist has been there. It’s all part of the journey.

Don’t let the weather deter you. Instead, embrace it as a challenge to overcome. With the right preparation and gear, you can enjoy cycling in all kinds of weather.

So, are you ready to take on the weather? Put on your helmet, hop on your bike, and start pedaling!

Key Takeaways

  • Preparation is crucial when cycling in different weather conditions.
  • Investing in the right gear can enhance your comfort and safety.
  • Listening to your body is important. Don’t push yourself too hard, especially in extreme weather.
  • Embrace the weather as part of your cycling journey. It’s a challenge to overcome, not a deterrent.