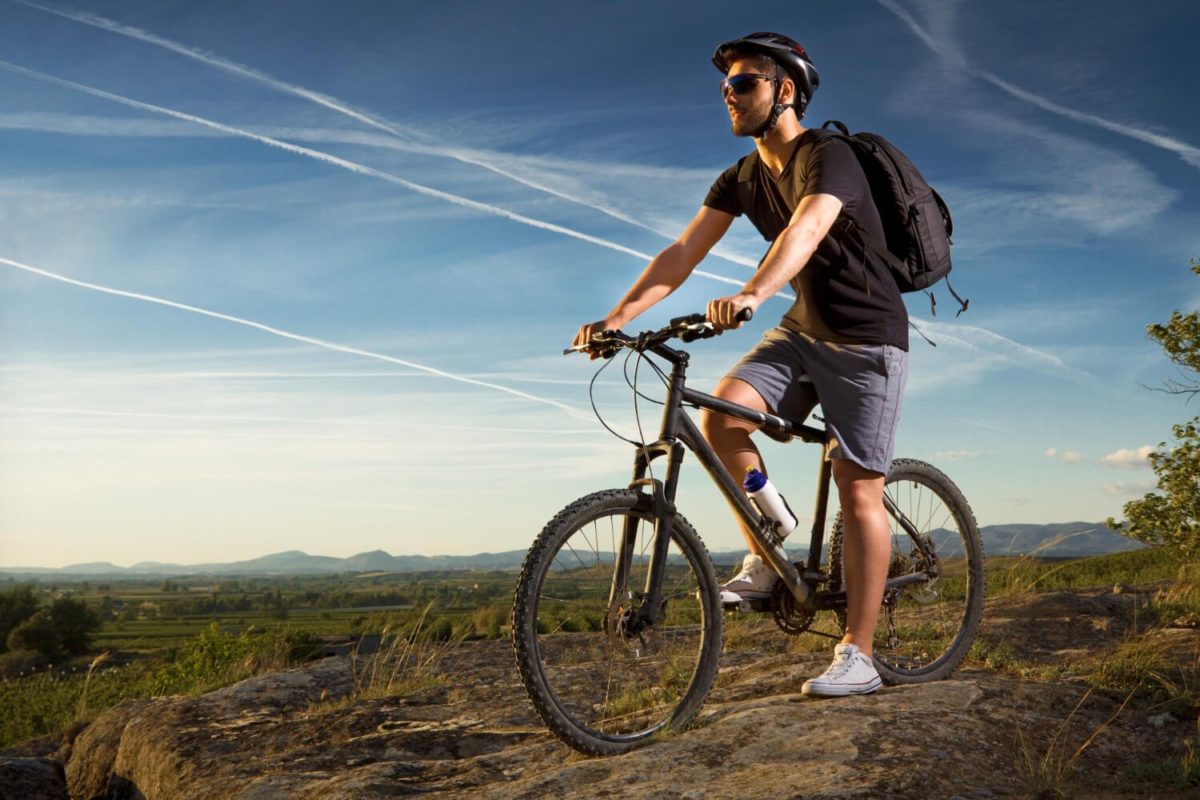
Biking Uphill Techniques: Mastering the Climb

Have you ever found yourself gasping for breath and struggling to keep the pedals moving while cycling uphill? If you have, you’re not alone. Biking uphill is often seen as a daunting task, but it doesn’t have to be. With the right techniques and strategies, you can transform this challenge into an enjoyable experience. This post is dedicated to all the novice cyclists and biking hobbyists out there who are looking to improve their uphill biking game. Let’s dive right in and start mastering the climb!

Understanding the Basics of Biking Uphill

Before we get into the nitty-gritty of uphill biking techniques, it’s important to understand why biking uphill feels so hard. Several factors come into play here – gravity, friction, the weight of your bike, and most importantly, your own weight. Picture yourself fighting against these forces as you pedal uphill. Sounds tough, right? But don’t worry! With a solid understanding of the mechanics of biking uphill, you can learn to use these forces to your advantage rather than letting them hinder your progress.

The Importance of the Right Gear

Ever tried to pedal uphill in high gear? If yes, you’d know it’s comparable to attempting to move a mountain! On steep inclines, using low gears makes pedaling significantly easier. But why is that? Well, it’s all about the transfer of power. In low gear, each pedal stroke gives you less distance, but you use less energy, which is crucial when biking uphill. So next time you’re faced with a steep climb, remember to shift down to a lower gear—it’s a game-changer!

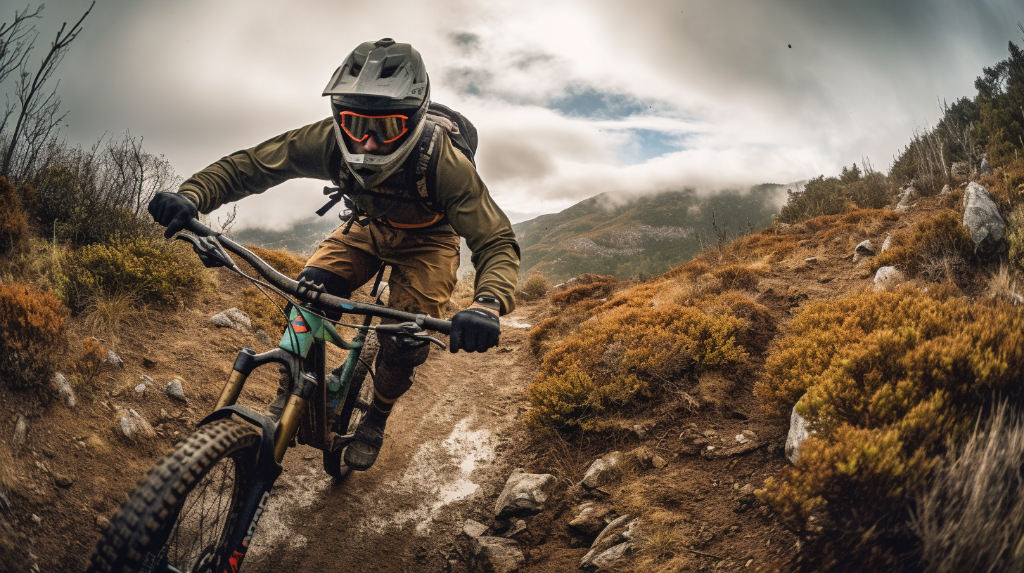
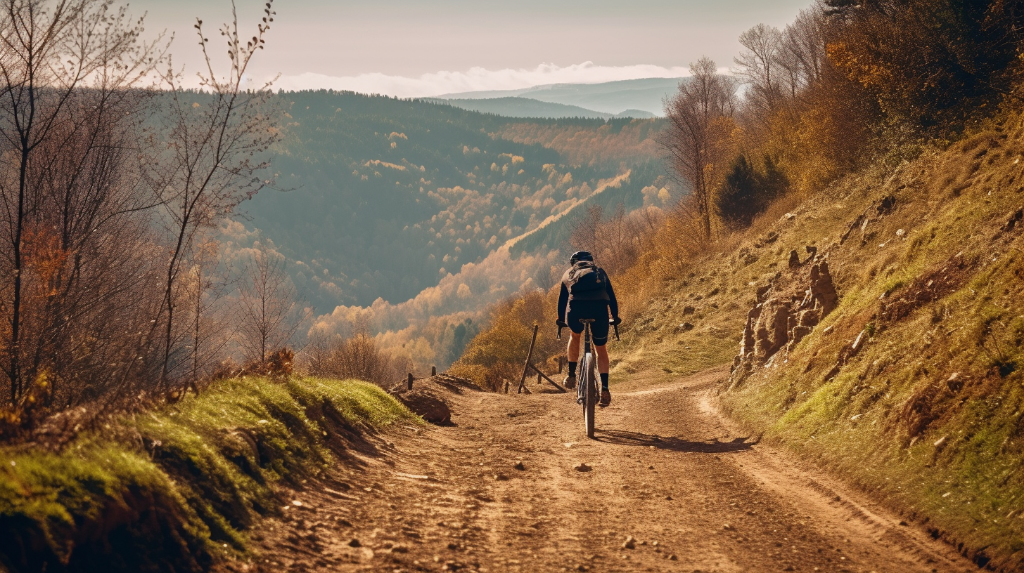
Essential Uphill Biking Techniques

So, you’re all geared up and ready for the climb, but do you know the techniques to make your uphill biking easier and more efficient? There are several methods that you can use, each with its own benefits and usage scenarios. Let’s dive right into them, shall we?

Seated Climbing

Seated climbing is exactly what it sounds like — you remain seated on your bike. This technique is beneficial as it conserves your energy and allows for steady, consistent pedaling. It’s ideal for long, gradual ascents where you aim to maintain a consistent speed and rhythm. How do you do it? It’s all about finding a comfortable position on your saddle, keeping your upper body relaxed, and focusing on a smooth and steady pedal stroke.
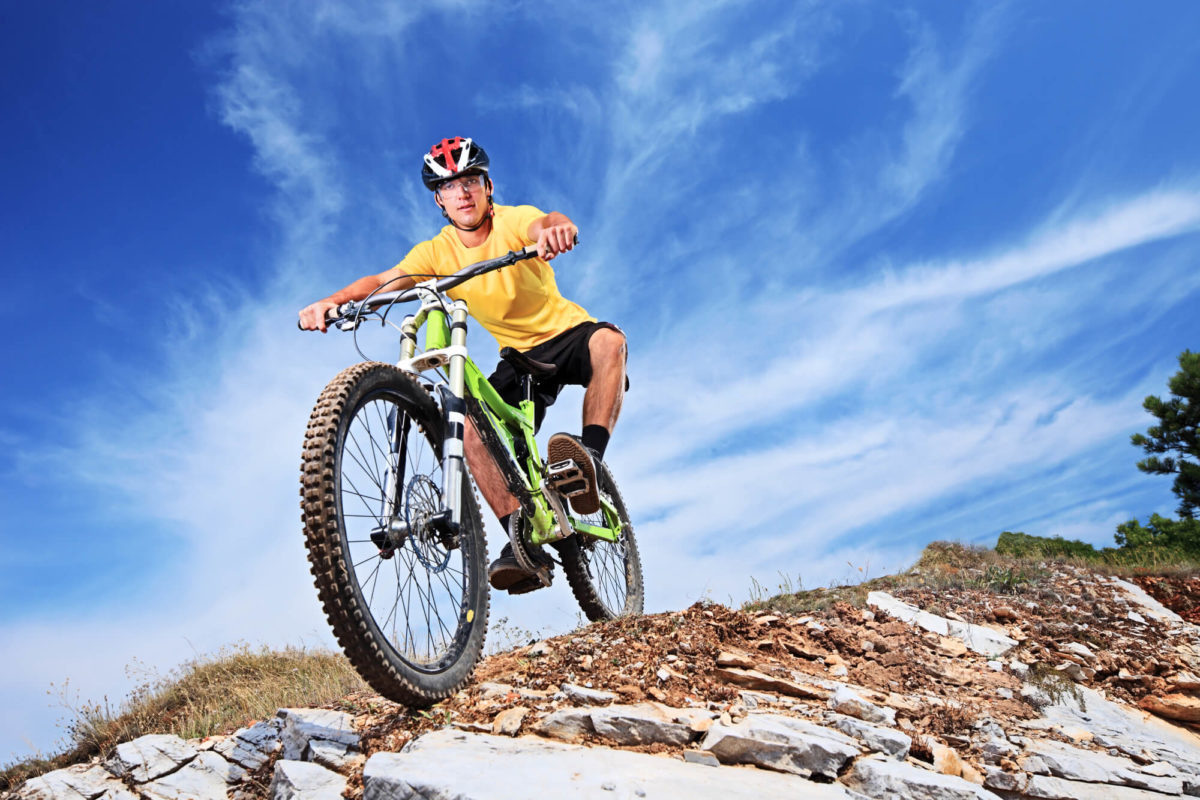
Standing Climbing

Then there’s standing climbing, where you rise from your seat and pedal while standing. This technique allows for more power but can be more tiring. It’s best used for short, steep climbs where you need to generate extra power to overcome the gradient. When standing, remember to shift your weight forward to maintain traction on the rear wheel and use your body weight to help drive the pedals down.

Attack Position

Lastly, we have the attack position. This is a more aggressive biking stance used when you need to conquer a challenging section of the climb. In this position, you lean forward and stand on the pedals, but without fully extending your legs. This posture allows for quick, powerful bursts of speed. Remember, this technique is not for prolonged use as it can quickly drain your energy.

Now, you might be thinking, “How do I remember all these techniques?” Well, worry not! Here’s a simple list that summarizes these three techniques and their uses.

  • Seated Climbing: Best for long, gradual ascents. Conserves energy, allows for steady, consistent pedaling.
  • Standing Climbing: Ideal for short, steep climbs. Allows for more power but can be tiring.
  • Attack Position: Used for challenging sections of the climb. Allows for quick, powerful bursts of speed but can quickly drain energy.

Remember, it’s all about choosing the right technique for the right situation. So, next time you’re faced with an uphill climb, why not give these techniques a shot?

The Role of Stamina and Fitness in Uphill Biking

Have you ever wondered why some cyclists seem to breeze up hills while others struggle? The answer often comes down to stamina and physical fitness. It’s no secret that biking uphill can be strenuous, especially if you’re not used to it. The steeper the hill, the harder your muscles have to work. And let’s not forget about the toll it takes on your cardiovascular system.

But don’t let that intimidate you! Improving your physical condition can significantly make uphill biking less strenuous. Endurance exercises, for example, can help you build stamina over time. Similarly, strength training can improve your muscle power, enabling you to pedal harder and faster. By improving your fitness level, you’re not only making the climb less difficult but also more enjoyable. Isn’t it exciting to think about how much more you could achieve with a bit more training?

Training Regimen for Uphill Biking

Now, you might be wondering, “What kind of training should I do to improve my uphill biking?” We’re glad you asked! Whether you’re a novice cyclist or a biking enthusiast looking to challenge yourself, we have a simple yet effective training regimen for you.

This regimen focuses on both stamina and strength training, providing a balanced approach to fitness. Remember, consistency is key. While you may not see immediate results, sticking to the regimen will gradually improve your performance and make uphill biking a breeze. Ready to get started?

Exercises Frequency Duration
Endurance Cycling 3-4 times a week 30-60 minutes
Strength Training (Legs and Core) 2-3 times a week 20-30 minutes
High Intensity Interval Training (HIIT) 1-2 times a week 15-20 minutes
Stretching and Flexibility Daily 10-15 minutes

Remember, it’s crucial to listen to your body and adjust the regimen as needed. And don’t forget to warm up before each session and cool down afterward. With dedication and consistency, you’ll be conquering hills in no time!

Tips on Maintaining a Steady Pace

Ever wondered how seasoned cyclists effortlessly conquer those steep hills? The secret lies in maintaining a steady pace. It’s not just about speed; it’s about controlling your heart rate, monitoring your breathing, and using your gears effectively. Let’s dive into these aspects.

Controlling your heart rate is crucial. Remember, the goal is to maintain a pace that allows you to climb without exhausting yourself halfway up. Keep a close eye on your heart rate, and adjust your pace accordingly. A heart rate monitor can be an invaluable tool in this regard.

Monitoring your breathing is another essential aspect. Breathing too fast can lead to hyperventilation, while breathing too slow might not provide your muscles with the necessary oxygen. Try to maintain a steady, rhythmic breathing pattern.

Lastly, using your gears effectively can significantly ease your uphill biking experience. Lower gears are generally better for uphill climbs as they make pedaling easier, letting you maintain a constant and efficient pace.

Common Mistakes to Avoid

Climbing those daunting hills might seem intimidating at first, but avoiding some common mistakes can make the task much easier. So, what are these mistakes, and how can you avoid them?

  • Not using gears properly: As mentioned earlier, using lower gears can make pedaling uphill easier. If you’re struggling with your climb, check your gear setting.
  • Incorrect body posture: Leaning too far forward can put unnecessary strain on your arms and shoulders. Try to maintain a balanced body posture.
  • Overexertion: Remember, the goal is not to reach the top as quickly as possible, but to do so without exhausting yourself. Maintain a steady pace, and take breaks if necessary.

Wrapping Up: Every Climb Makes You Stronger

Uphill biking is indeed a challenge, but remember – every climb makes you stronger. With the right techniques and regular practice, you can turn this challenge into a rewarding experience.

The importance of correct techniques cannot be overstated. From understanding the basics of biking uphill to mastering advanced techniques, everything plays a role in your uphill biking journey. But it’s not just about techniques and strategies. Your physical fitness and stamina also play a crucial role.

So, are you ready to conquer those hills? Remember, it’s not just about reaching the top – it’s about enjoying the journey and seeing every climb as an opportunity for growth and improvement. Happy biking!

Bike Sizing and Fit: Ensuring Your Bike Fits Properly

Whether you’re a novice cyclist just getting started or a seasoned hobbyist, one thing that’s absolutely crucial in cycling is ensuring that your bike is the right size and fit. You might wonder, why is this so important? Well, a bike that’s not properly fitted to your body can lead to discomfort, health issues, and even a loss of performance. Let’s dive into the importance of bike fitting and sizing!

Understanding the Basics of Bike Sizing

First thing’s first, what exactly does bike sizing entail? Well, there are a few key elements to consider. The frame size is the distance from the center of the crank (where the pedals attach) to the top of the frame at the seat tube (where the seatpost enters the frame). The saddle height is the distance from the center of the bottom bracket to the top of the saddle. And handlebar positioning involves the height and reach of your handlebars, which can greatly affect your comfort and control on the bike. Each of these aspects plays a critical role in ensuring your bike fits you perfectly.

Types of Bikes and Their Sizing Standards

Now, you might be thinking, a bike is a bike, right? Well, not exactly. Different types of bikes come with different sizing standards. For example, road bikes, mountain bikes, and hybrid bikes all have unique sizing considerations. So, understanding the type of bike you have or are planning to buy is essential when determining the right size for you.

How to Measure for Your Bike Size

Ever wondered how to measure yourself for a perfect bike fit? Well, you’re in luck because we’re about to give you a step-by-step guide. It’s crucial to get the measurements right because they can significantly impact your cycling experience.

Measuring Your Inseam

First off, let’s tackle the inseam. This measurement is important because it helps determine the height of your bike’s standover, seat, and frame. So how do you go about it?

Start by standing flat on the floor, back against a wall, and feet about 6-8 inches apart. Use a book or a flat, level object and hold it snugly up against your crotch – mimicking the pressure of your bike saddle. Measure from the top of the book to the floor. That’s your inseam measurement!

Measuring Your Height

Now, let’s move on to your height. This measurement is used to determine the right bike frame size for you. To get an accurate measurement, stand straight against a wall, barefoot, and heels touching the wall. Make a small mark on the wall level with the top of your head, then measure from the floor to the mark. Simple, isn’t it?

How to Determine Your Bike Size

Now that you have your inseam and height measurements, the next step is to use these figures to determine your bike size. Each bike type has a different sizing chart which takes into account these measurements. It’s important to refer to the bike manufacturer’s size guide as this can vary between brands.

Remember, while these measurements offer a good starting point, they’re just that – a starting point. The best way to ensure a perfect fit is to try the bike out. If it doesn’t feel right, it probably isn’t. Trust your instincts!

Bike Type Inseam (Inches) Height (Inches) Bike Size
Road Bike 27-28 66-70 Small
Road Bike 29-30 70-74 Medium
Road Bike 31-32 74-78 Large
Mountain Bike 25-26 63-66 Small
Mountain Bike 27-28 66-70 Medium
Mountain Bike 29-30 70-74 Large
Hybrid Bike 27-28 66-70 Small
Hybrid Bike 29-30 70-74 Medium
Hybrid Bike 31-32 74-78 Large

And there you have it! You are now closer to finding a bike that fits like a glove. Remember, a well-fitted bike isn’t just about comfort; it’s about maximizing your performance and ensuring every ride is a joy, not a chore. Happy cycling!

Adjusting Your Bike for a Better Fit

Ever bought a bike that seemed to be the perfect size, but still didn’t feel quite right? Well, you’re not alone. Bike fitting is not just about the size, it’s also about how well-adjusted the bike is to meet your specific needs. You see, two people of the same height can have different leg lengths, arm lengths, and torso lengths. All these factors can affect how you fit on your bike. So, even if your bike is the correct size, you might still need to make some adjustments to get the perfect fit.

After all, we want our rides to be comfortable and efficient, don’t we?

Adjusting Saddle Height and Position

Let’s start with the saddle. A properly adjusted saddle can greatly enhance your cycling comfort and performance.

First, let’s talk about saddle height. When your foot is at the bottom of the pedal stroke, you should have a slight bend in your knee. If your leg is completely straight or you need to stretch to reach the pedal, your saddle is too high. If your knee is significantly bent, your saddle is too low.

Now, saddle position. The saddle can slide forwards or backwards on its rails. A good starting point is to have the saddle positioned so that when the crank arms are horizontal, a plumb line dropped from the front of your knee cap will fall directly over the pedal axle.

Remember, the goal here is to achieve a balance between comfort and efficiency. So, feel free to experiment with different saddle heights and positions until you find what works best for you.

Handlebars and Brake Levers Adjustment

Next up, handlebars and brake levers. The height and reach to your handlebars affects your comfort, control and how much power you can put into the pedals.

Adjust the handlebar height so it’s level with or slightly above the height of the saddle. This should allow you to reach the handlebars comfortably without straining your back, neck, and wrists.

As for the brake levers, they should be positioned so you can reach them easily with your fingers. If you have to stretch too far to reach the brake levers, it can lead to discomfort and slower reaction times.

Again, these are just starting points. Feel free to adjust the handlebars and brake levers to suit your preferences and riding style.

Checklist for Adjusting Your Bike for a Better Fit

  • Seat Post: Is the height right?
  • Saddle: Is it in the correct position? Is the angle comfortable?
  • Handlebars: Can you reach them comfortably? Are they the right height?
  • Brake Levers: Can you reach them easily?
  • Pedals: Are they in line with your knees?
  • Overall Comfort: Are there any discomforts while riding?

Remember, a well-adjusted bike not only makes your ride more comfortable but also improves your performance and reduces the risk of injury. So, do not underestimate the importance of bike fit. After all, cycling is meant to be enjoyed, and a well-fitted bike is a crucial part of that enjoyment!

Common Mistakes in Bike Sizing and Fit

When it comes to bike sizing and fit, there are several common mistakes that many people make. One of the most frequent ones is choosing a bike based solely on the height of the saddle. While saddle height is important, it’s not the only factor to consider. The bike’s frame size, handlebar position, and even the type of bike can all affect the overall fit and comfort.

Another common mistake is not considering the type of cycling you’ll be doing. A bike that’s perfect for mountain biking might not be the best fit for road cycling. It’s vital to choose a bike that’s suited to your specific cycling needs and preferences.

When to Seek Professional Help

While it’s entirely possible to size and fit a bike on your own, there are times when it might be best to seek help from a professional. If you’re experiencing persistent discomfort or pain while cycling, or if you’re not seeing any improvement in your performance despite making adjustments, then it might be time to consult with a professional.

A professional bike fitter can provide a comprehensive fit, taking into account not just your body measurements, but also your flexibility, strength, and cycling style. They can also provide valuable advice and recommendations, helping you to get the most out of your cycling experience.

  • Constant discomfort or pain while cycling
  • Feeling stretched or cramped on the bike
  • Difficulty reaching the handlebars or pedals
  • Persistent saddle sores or chafing
  • Frequent numbness in your hands, feet, or buttocks

Final Thoughts on Bike Sizing and Fit

Ensuring a well-fitted bike takes time and effort, but it’s an investment that’s well worth it. A bike that fits you perfectly can significantly enhance your comfort and performance, making your cycling experience more enjoyable.

Remember, cycling should be a pleasure, not a pain. So take the time to get your bike size and fit right. You won’t regret it.

Stay Safe on the Trails: Injury Prevention in Mountain Biking

Mountain biking is a thrilling outdoor activity that offers numerous health benefits and an opportunity to explore nature in an exciting way. However, like any sport, it comes with its share of risks. From minor scrapes and cuts to more severe injuries like fractures, the rugged terrain and high speeds can pose significant dangers. That’s why understanding injury prevention in mountain biking is crucial. By recognizing potential risks and implementing effective preventative measures, riders can enhance their safety and enjoy the sport with peace of mind.

The Prevalence of Injuries in Mountain Biking

Mountain biking is inherently risky, with a variety of injuries that can occur. Common issues include overuse injuries from repetitive strain, acute injuries from falls or collisions, and even severe injuries like concussions. Moreover, statistics show that mountain biking has a high injury rate compared to other outdoor sports. This underscores the importance of preventive measures. It’s not just about reacting to injuries when they happen, but proactively taking steps to prevent them.

Basic Safety Measures Every Mountain Biker Should Follow

When it comes to mountain biking, safety should always be a top priority. To start, it’s essential to have proper protective gear. This includes a high-quality helmet, knee and elbow pads, gloves, and suitable clothing. But safety doesn’t stop at gear. Other key practices include choosing appropriate trails for your skill level, keeping your bike in good condition, and always being aware of your surroundings. Remember, the goal is not to eliminate risk completely – that’s impossible in any sport. Rather, it’s about managing those risks effectively to reduce the likelihood of injury.

Essential Protective Gear for Mountain Biking

It is widely acknowledged that protective gear plays a crucial role in preventing injuries during mountain biking. Indeed, the right gear can make a significant difference in reducing the severity of injuries or even preventing them altogether. So, what type of protective gear is essential for mountain biking?

Helmets and Head Protection

Without a doubt, a helmet stands as the most vital piece of protective gear. A well-fitted, high-quality helmet can save a rider from severe head injuries. But what should you consider when choosing a helmet?

Firstly, it’s important to ensure that the helmet complies with safety standards. Secondly, the helmet must fit properly — it should sit level on your head and not rock back and forth or side to side. Lastly, consider features like ventilation, weight, and comfort.

Body Armor and Protective Clothing

Besides helmets, other essential protective items include gloves, knee pads, and elbow pads. Gloves not only protect your hands in case of a fall, but they also provide a better grip and reduce fatigue. Knee and elbow pads offer valuable protection against impacts and abrasions.

Mountain biking specific clothing can also add a layer of safety. Look for clothes that are durable, offer protection, yet are still comfortable and breathable. Remember, the goal is to protect yourself without hindering your ability to ride.

Eye Protection

When it comes to mountain biking, eye protection is often overlooked. However, a good pair of sunglasses or goggles can protect your eyes from dust, insects, and harmful UV rays. Plus, they can improve visibility in various light conditions, which can make your ride safer.

Bike Maintenance and its role in Injury Prevention

Regular bike maintenance is another critical aspect of injury prevention. A well-maintained bike is not only more enjoyable to ride but also safer.

Ensuring your brakes are functioning properly, your tires are inflated to the correct pressure, and your chain is well lubricated can prevent accidents caused by equipment failure. Regular checks can help you spot potential issues before they become serious problems. Remember, a safe ride begins with a safe bike.

Proper Riding Techniques to Avoid Injuries

Mountain biking is an exhilarating sport that tests your stamina, balance, and agility. However, the sport’s demanding nature can lead to injuries if not performed with the correct techniques. Proper body positioning and control are crucial in preventing common injuries. But what does that mean?

When riding, it’s important to maintain a neutral body position. This posture allows you to react quickly and balance better when encountering obstacles. Your elbows should be slightly bent, never locked. This positioning allows you to absorb bumps and reduces the risk of elbow injuries. Your fingers should cover the brakes at all times, allowing quick reactions to sudden changes in terrain or unexpected obstacles.

Control is another fundamental aspect of safe riding. This includes controlling your speed, particularly on downhill sections where it can be tempting to let gravity take over. Remember, the faster you go, the harder it is to react to obstacles. So, control your speed to match your ability and the trail conditions.

Importance of Warm-Up and Cool-Down Routines

Just like any other physical activity, mountain biking demands a lot from your body. Therefore, warming up before a ride and cooling down afterwards is critical in injury prevention. But why are these routines so important?

A good warm-up increases your heart rate, warms your muscles, and improves your flexibility. These changes enhance your performance and reduce the risk of injuries. On the other hand, a cool-down routine helps your body to recover and reduces muscle stiffness, thereby preventing potential injuries.

  • Warm-Up: Stretching exercises targeting the legs, arms, and back. Five minutes of light cycling can also be effective.
  • During Ride: Regular hydration and nutrition breaks.
  • Cool-Down: Light cycling for five minutes, followed by stretching exercises.

Appropriate Trail Selection

Do you think choosing the right trail for your mountain biking adventure can prevent accidents and injuries? The answer is a resounding yes. The trail you choose to ride on plays a significant role in your safety.

Mountain biking trails vary widely in terms of technical difficulty, terrain type, and elevation changes. It’s essential to select a trail that matches your skill level. Riding on a trail that is too difficult for you can lead to accidents, as you may encounter obstacles or technical features that you’re not prepared to handle.

A good practice is to research the trail beforehand. Many websites and apps provide detailed descriptions and difficulty ratings of mountain biking trails. Also, don’t be afraid to start small and gradually take on more challenging trails as your skills improve. Remember, safety should always come first.

Nutrition and Hydration for Injury Prevention

The importance of proper nutrition and hydration in mountain biking cannot be overstated. It plays a crucial role in injury prevention and recovery. When your body is well-nourished and hydrated, it is better equipped to handle the physical demands of mountain biking, thus reducing the risk of injuries.

Good nutrition should include balanced meals rich in proteins for muscle repair, carbohydrates for energy, and vitamins and minerals for overall health. Mountain bikers should consider consuming easily digestible foods before a ride to prevent digestive issues during the ride.

Hydration is equally critical. Dehydration can lead to fatigue, decreased coordination, and muscle cramps, all of which increase the risk of accidents and injuries. Mountain bikers should aim to stay well-hydrated before, during, and after a ride. But how much water should you drink? It depends on the length and intensity of your ride, but a good rule of thumb is to drink enough to quench your thirst and maintain clear urine.

Importance of Rest and Recovery

Rest and recovery are often overlooked aspects of injury prevention in mountain biking. Adequate rest allows your body to repair tissues damaged during a ride, reducing the risk of overuse injuries. It also helps to restore energy levels, improving your performance on subsequent rides.

Recovery activities, such as light stretching and foam rolling, can help to alleviate muscle tension and promote faster healing. Proper sleep is another critical aspect of recovery. During sleep, your body produces growth hormones that help repair and build tissues, making it a vital part of the recovery process.

First Aid Knowledge for Mountain Bikers

While the goal is always to prevent injuries, accidents can still happen. Therefore, every mountain biker should have basic first aid knowledge. This includes knowing how to handle common cycling injuries like cuts, bruises, sprains, and fractures until professional medical help can be reached.

Having a first aid kit on hand is also essential. It should include items like bandages, antiseptic wipes, tweezers, and a CPR mask. Remember, having these items is only useful if you know how to use them. So, consider taking a basic first aid course or refreshing your first aid knowledge regularly.

Injury First Aid
Cuts and scrapes Clean the wound with water and apply an antiseptic. Cover with a bandage.
Sprains Apply the RICE method: Rest, Ice, Compression, and Elevation.
Fractures Immobilize the injured area and seek immediate medical attention.
Dehydration Rest in a cool place and slowly drink water or a sports drink.

Conclusion: Making Safety a Priority in Mountain Biking

In conclusion, safety should always be a priority in mountain biking. This includes everything from wearing appropriate protective gear, maintaining your bike, choosing the right trail, using correct riding techniques, and having basic first aid knowledge. Also, do not underestimate the role of proper nutrition, hydration, and rest in preventing injuries. By taking these measures, you can enjoy the thrill of mountain biking while minimizing the risk of injuries. After all, isn’t it better to be safe than sorry?

Road Bike vs Commuter Bike: Which is Right for You?

Ever wondered why certain bikes seem to glide effortlessly on tarmac roads while others seem more at home on city streets? Well, it all comes down to the type of bike you’re riding. The decision between a road bike and a commuter bike goes beyond just aesthetics. It can significantly impact your cycling experience, enjoyment, and safety. It’s all about finding the right fit for your needs, lifestyle, and personal preferences. So, how do you decide? Let’s dive right in!

Understanding the Basics: Road Bikes and Commuter Bikes

Before we go any further, let’s get to know these two types of bikes a little better. A road bike, as its name suggests, is specifically designed for cycling on paved roads. It’s all about speed and efficiency. It’s lightweight, has thin tires, a narrow saddle, and drop handlebars to allow for a more aerodynamic riding position. Sounds pretty sporty, right?

On the other hand, we have commuter bikes. These are your everyday bikes, designed to get you from point A to point B comfortably, whether it’s for your daily commute, errands, or a relaxed weekend ride in the park. They are typically heavier than road bikes, with wider tires, a more upright seating position, and often come with features like mudguards and pannier racks for added convenience.

Anatomy of a Road Bike

What makes a road bike a road bike? It’s all in the details. The frame material is usually aluminum or carbon fiber, both of which are lightweight yet sturdy. The gear system is designed for speed and efficiency, often providing a wide range of gears to tackle varying terrain. The tires are slim and high-pressure for less rolling resistance, and the seating position is forward-leaning to reduce air drag. All these features combine to make the road bike a speed machine. But remember, with great speed comes less comfort and utility. It’s a trade-off that you need to consider.

Anatomy of a Commuter Bike

Have you ever wondered what makes a commuter bike stand out from the rest? It’s all about the design and functionality that caters to everyday use and comfort. Let’s take a closer look.

Frame and Design

Commuter bikes typically feature a robust and durable frame, often made from steel or aluminum. The design prioritizes stability and comfort over speed, making them perfect for navigating through city traffic. The upright seating position reduces strain on the rider’s back and shoulders, making it ideal for longer rides. Additionally, most commuter bikes come with mounting points for accessories like racks and fenders, adding to their practicality.

Versatility and Comfort

One of the key strengths of commuter bikes is their versatility. Whether you’re riding on paved roads, gravel paths, or even mildly rough trails, these bikes can handle it all. The wide tires provide better stability and cushioning, making your ride smooth and comfortable. Moreover, the versatile design allows for various uses, from commuting to work, running errands, or simply enjoying a leisurely ride in the park. Sounds like a good deal, doesn’t it?

Key Differences Between Road Bikes and Commuter Bikes

While both road bikes and commuter bikes serve their own purpose, there are significant differences in their speed, performance, comfort, utility, durability, and maintenance. Let’s break it down.

Road Bikes Commuter Bikes
Speed High Moderate
Performance Optimized for speed and efficiency on paved roads Designed for comfort and versatility on various terrains
Comfort Aerodynamic position can be less comfortable on longer rides Upright seating position offers greater comfort, especially for longer distances
Utility Limited; primarily for fitness and racing High; can be used for commuting, touring, and errands
Durability May require more maintenance due to lightweight materials and high-performance components Typically more robust and require less maintenance

The Pros and Cons of Road Bikes

When it comes to road bikes, there’s a lot to love, but they’re not without their drawbacks. Can you imagine the thrill of speed as you glide on the tarmac? Or perhaps the thought of high maintenance costs makes you wince?

Let’s take a closer look at the advantages and disadvantages of owning and riding a road bike:

  • Pros:
  • Speed: Road bikes are designed for speed. Their sleek design and lightweight frame make them an ideal choice for those who love fast-paced cycling.
  • Performance: With their high-quality components and efficient design, road bikes offer superior performance, especially on paved surfaces.
  • Exercise: Given their design and the effort needed to ride them, road bikes can provide an excellent workout.
  • Cons:
  • Comfort: Road bikes, with their aggressive riding position, may not provide the most comfortable ride, especially for long distances.
  • Maintenance: High-performance components might require more frequent maintenance and can be costly to replace.
  • Versatility: Road bikes are not well-suited for off-road or uneven surfaces.

The Pros and Cons of Commuter Bikes

Commuter bikes, on the other hand, offer a different set of perks and challenges. Ever thought about the convenience of having a bike that can handle various terrains? Or are you worried about it not being fast enough for your liking?

Let’s dissect the benefits and drawbacks of owning and riding a commuter bike:

  • Pros:
  • Versatility: Commuter bikes are designed to handle a variety of terrains and conditions, making them a flexible choice for everyday use.
  • Comfort: With their upright seating position and wider tires, commuter bikes are generally more comfortable for long rides.
  • Utility: Many commuter bikes come equipped with useful features like racks and fenders, adding to their practicality.
  • Cons:
  • Speed: Commuter bikes are not as fast as road bikes due to their heavier weight and design.
  • Size: Commuter bikes can be bulkier, making them harder to store or transport.
  • Effort: Riding a commuter bike can require more effort, especially over longer distances or at higher speeds.

Deciding Which Bike is Right for You

Choosing between a road bike and a commuter bike might seem like a daunting task, but it all comes down to your personal needs and preferences. What are your cycling goals? Do you primarily cycle for fitness or do you use your bike for daily commuting?

Consider your lifestyle. If you’re a fitness enthusiast who enjoys long-distance, high-speed cycling on paved surfaces, a road bike is likely the better choice. However, if you’re a city dweller who uses your bike for daily commuting or running errands, a commuter bike’s versatility and comfort might be more appealing.

Don’t forget to factor in your budget. While both types of bikes come in a wide range of prices, road bikes tend to be pricier due to their specialized features and lightweight materials. Commuter bikes, on the other hand, are often more affordable and durable, making them a great choice for everyday use.

Lastly, think about the terrain you’ll be cycling on. Road bikes are ideal for smooth, paved surfaces, while commuter bikes can handle a wider variety of terrains.

Final Thoughts: Road Bike vs Commuter Bike

At the end of the day, the decision between a road bike and a commuter bike is a personal one. It’s all about finding a bike that fits your lifestyle, meets your cycling goals, and brings you joy. There’s no one-size-fits-all answer – what matters is that you choose a bike that best suits you.

It’s important to remember that both types of bikes have their unique advantages and are designed for different purposes. Therefore, your decision should be based on how and where you plan to use your bike.

Whether you’re a speed-loving fitness cyclist or an urban commuter, there’s a bike out there that’s perfect for you. So why wait? Start your cycling adventure today and experience the joy and benefits of this wonderful outdoor activity. Remember, the journey is just as important as the destination. Happy cycling!

Best Hydration Pack For Mountain Biking

When it comes to mountain biking, you’ll be faced with a lot of danger and adventure. One hidden risk you might not be aware of is dehydration. To prevent this from happening, you might want to look into the best hydration pack for mountain biking.

Front Bike Rack Buying Guide – Front Mount Bicycle Rack

The bicycle is one of the most invaluable modes of transportation to man. Not only does it improve your health but it can conveniently bring you from Point A to Point B without releasing toxic emissions. Of course, the bike is not perfect, it still has its own drawbacks, one of which is storage space.

Lower Back Pain From Cycling – Explanation, and Prevention

After a bike ride, do you find yourself as if needing a cane to walk? Okay, maybe it isn’t that bad but you might be experiencing significant pain in your lower back. If this is the case, don’t worry you are not alone. Many people experience some type of pain or lower back pain from cycling after a ride, however, if it is consistent or is getting worse, you might need to do some adjustments or make some changes to prevent this from happening.

What kind of bike should I get? – Complete Guide

A bicycle is one of the best inventions of the 19th century. It’s a mode of transportation, it helps in keeping you healthy, and is a popular outdoor activity. With so many benefits of cycling, it’s no wonder more and more people are getting a bike, which then leads to the most important question, “What kind of bike should I get?”

Hybrid vs Mountain Bike – Comparison and Differences

Bicycles have been around since the 1800s and have long become a very valuable mode of transportation. But it’s only in the past few years that cycling has become more than just a way to travel from Point A to Point B, a means of exercise, or leisure activity. Cycling has become trendy! And with its increase in popularity comes innovation, more bike models to suit the discerning buyer.

How to Bike With Your Dog – Do’s and Don’ts

Do you have an energetic dog you can barely keep up with? Literally, you can’t keep up during walks or runs? Then maybe you should try riding a bike with your dog! Learning how to bike with your dog can be very rewarding. Not only does it help burn off your dog’s excess energy but it can also be a good bonding activity with your furry best friend.