A Beginner’s Guide to Bike Brakes

Have you ever considered the importance of the humble bike brake? It’s more than just a lever you pull when you want to stop. Bike brakes are a fundamental aspect of cycling, playing a crucial role in the safety and control of the bicycle. For every cyclist, regardless of skill level, understanding how bike brakes work and how to maintain them is essential. Whether you’re a seasoned pro or just starting out, this guide will give you a comprehensive overview of bike brakes and their functionality.

Imagine cycling down a steep hill without brakes. Sounds terrifying, right? Let’s avoid that scenario and dive right into the fascinating world of bike brakes!

The Role of Brakes in Cycling

What is the role of brakes in cycling, you ask? Well, they play a pivotal role in controlling your speed and maintaining stability. Brakes are your trusted companions during steep downhill rides, enabling you to manage your descent without losing control. And, of course, they’re the heroes that bring your bike to a complete stop when needed, safeguarding you from potential accidents. In essence, bike brakes are your first line of defense when it comes to cycling safety.

Types of Bike Brakes

Now that you understand the importance of bike brakes, it’s time to get to know them a bit better. There are several types of bike brakes commonly found on bicycles today. These include rim brakes, disc brakes, and drum brakes, each with its unique characteristics and functionality.

Rim brakes are the traditional and most common type of bike brake. They work by applying pressure from brake pads directly to the rim of the bicycle’s wheel. Then we have disc brakes, which are gaining popularity for their superior stopping power and reliability, especially in wet conditions. They work by squeezing brake pads onto a disc rotor attached to the wheel hub. Lastly, we have drum brakes. Enclosed within the wheel hub, they are resistant to bad weather and require less maintenance, but are often heavier and provide less stopping power than the other types.

So, which one is the best? Well, it depends on your specific needs and cycling conditions. Each type has its advantages and disadvantages, and understanding these can help you make an informed decision.

Dive into the Mechanism

Ever wondered what’s behind the swift halt when you pull the brake lever of your bike? Or how exactly your bike manages to decelerate smoothly from top speed? Well, it’s all about the intricate mechanism of bike brakes. Each type of bike brake has its unique design and function, contributing to the overall control and safety of your cycling experience.

The Inner Workings of Rim Brakes

Let’s start with the most common type of bike brake, the rim brake. The key components of this system are the brake levers, brake cables, and the brake pads. When you squeeze the brake lever, it tightens the brake cable, which in turn pulls the brake pads towards the rim of the bike wheel. The resulting friction between the brake pads and the wheel rim slows down the bike, eventually bringing it to a stop. The simplicity of this system is what makes it popular among casual cyclists and those who prefer lighter bikes.

The Science Behind Disc Brakes

Next up, we have disc brakes. These are typically found on mountain bikes and high-performance road bikes. Disc brakes consist of a metal disc, or “rotor,” attached to the wheel hub, and a brake caliper that holds the brake pads. When you apply the brake, hydraulic fluid or a cable forces the brake pads onto the rotor, creating friction and slowing down the bike. The materials used to make disc brakes are usually more durable than those used in rim brakes, which is why they’re the go-to choice for rugged terrains and extreme cycling conditions.

Pros and Cons of Each Type

Choosing the right type of brake for your bike depends on several factors, including your biking style, the terrain you usually ride on, and your budget. Let’s take a look at the advantages and disadvantages of each type of brake to help you make an informed decision.

Type of Brake Pros Cons
Rim Brakes Lightweight, easy to maintain and repair, less expensive Less effective in wet or muddy conditions, can wear out the wheel rim over time
Disc Brakes Excellent in all weather conditions, long-lasting, more stopping power Heavier, more expensive, harder to repair
Drum Brakes Protected from dirt and water, durable Can be heavy, not as efficient as other types

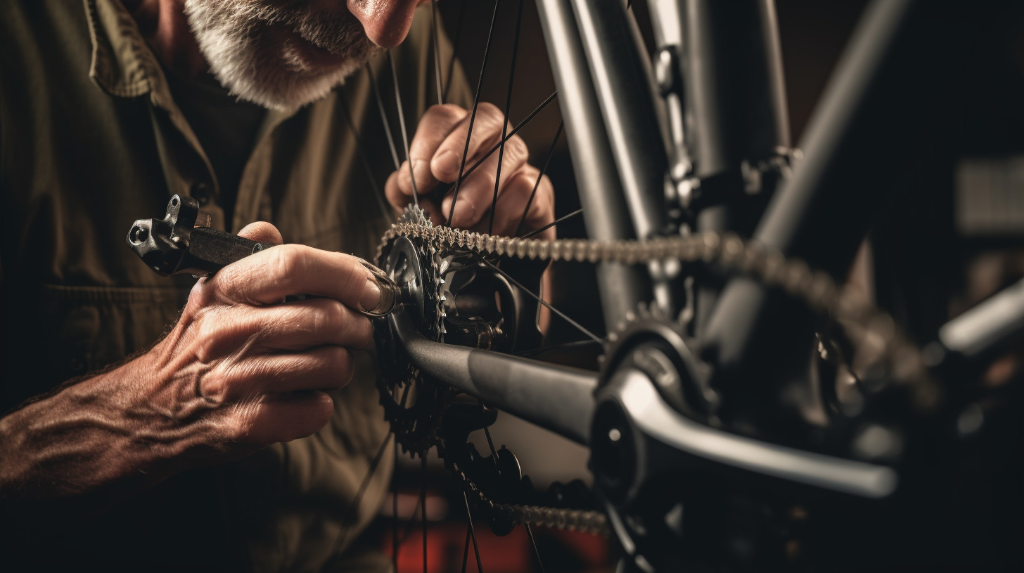
Essential Maintenance Tips

Have you ever thought about how essential it is to maintain your bike brakes regularly? After all, they’re the key to your safety on the road. Whether you’re a casual rider or a seasoned cyclist, keeping those brakes in top shape should be your top priority. And guess what? You don’t need to be a professional mechanic to do it!

Knowing how to take care of your brakes not only ensures your safety but also saves you money in the long run. Regular maintenance can prevent serious damage and costly replacements. So, are you ready to get your hands a little dirty?

A List of Maintenance Tips for Each Type of Brake

  • Rim brakes: Keep the brake pads and the rim surface clean. Also, inspect the brake pads for wear regularly. Replace them if you see any deep grooves or if they’ve become too thin.
  • Disc brakes: Clean the rotor with a specific disc brake cleaner to get rid of dirt and oil. Also, check the brake pads for uneven wear or contamination. Remember to replace the brake pads if needed.
  • Drum brakes: Regularly check the brake cables for any signs of fraying or damage. Also, lubricate the pivot points to ensure smooth operation.

DIY Brake Adjustment

It’s a sunny day, and you’re all set for a bike ride. But wait, something feels off. Your bike isn’t stopping as quickly as it should. Sounds familiar? It’s probably time to adjust your brakes.

Don’t worry, adjusting your bike brakes is not as daunting as it sounds. With a few simple steps, you can ensure optimal performance and safety. So, what are you waiting for? Let’s get started!

A List of Steps for Adjusting Each Type of Bike Brake

  • Rim brakes: First, loosen the brake cable bolt. Squeeze the brake lever to see how much movement there is before the brake engages. Adjust the cable tension and re-tighten the bolt. Check the brake pads’ alignment with the rim and adjust if necessary.
  • Disc brakes: Loosen the caliper bolts slightly. Squeeze the brake lever and hold it while you re-tighten the bolts. This centers the caliper over the rotor. If the brakes still feel spongy, you might need to bleed the brake system.
  • Drum brakes: Adjust the brake cable tension at the brake lever. If the brake feels too tight or too loose, adjust the tension accordingly. Also, make sure the brake shoes are in good condition and replace them if they are worn out.

Shopping for Bike Brakes

Have you ever found yourself puzzled in a bike shop, wondering what kind of brakes to get for your bicycle? Worry no more, because in this section, we’ll give you some insights on what to look for when buying bike brakes.

First off, understanding your biking style is crucial. Are you an urban rider, a mountain biker, or a road cyclist? Each riding style requires a specific type of brake for optimal performance. For instance, if you’re into mountain biking, disc brakes might be your best bet due to their excellent performance in muddy or wet conditions. On the other hand, if you’re a casual urban rider, rim brakes could be more than enough for your needs.

Next, don’t forget to consider the longevity and maintenance of the brakes. Some brakes, like disc brakes, might require less frequent maintenance, while others, like rim brakes, might need more regular attention. Think about how much time and effort you’re willing to put into brake maintenance when making your decision.

Lastly, always ask questions. Don’t hesitate to ask the salesperson about the pros and cons of each brake type, their compatibility with your bike, and the cost of maintenance. Remember, there’s no such thing as a silly question when it comes to your safety!

Wrap-up: Your Bike’s Braking System

And there you have it! We’ve journeyed through the fascinating world of bike brakes, understanding their crucial role in cycling, how different types work, their pros and cons, and how to maintain them. You’re now equipped with the knowledge to enhance your biking experience and safety.

But remember, learning doesn’t stop here. It’s always beneficial to further educate yourself about bike maintenance and safe biking practices. There are countless resources available online, from tutorial videos to in-depth articles and forums where you can interact with other biking enthusiasts.

So why not take this newfound understanding of bike brakes and use it to elevate your cycling experience? After all, a well-maintained bike is a joy to ride, and knowing that your brakes are reliable can give you the confidence to tackle any trail or road ahead. Isn’t that what biking is all about?

Road vs. Mountain Biking: A Comparison

For many, cycling is more than just a hobby—it’s a passion. It’s a form of exercise, a means of transportation, and a fantastic way to appreciate the great outdoors. Road and mountain biking are two of the most popular forms of cycling, each offering its own unique experience and challenges. Whether you prefer the smooth asphalt under your wheels or the rugged off-road trails, both types of biking offer a great way to stay active and enjoy the outdoors. But how do they differ and which one is right for you? Let’s jump right in and find out.

If you’re new to the cycling world, you might be wondering what the differences are between road and mountain biking. Well, buckle up because we’re about to explore these two exciting forms of cycling.

Understanding Road Biking

First off, let’s talk about road biking. It’s all about speed, distance, and endurance. Road bikes are designed with these key elements in mind. They typically feature smooth, thin tires and lightweight frames to reduce friction and weight, making it easier for you to maintain a high speed over long distances. The sleek, aerodynamic design of road bikes is perfect for paved surfaces and open roads. Sounds exciting, right?

Grasping Mountain Biking

On the other hand, mountain biking is a whole different beast. It’s all about navigating through rough terrains and challenging trails. Mountain bikes are built to withstand the demands of off-road biking. They often come with heavy, durable frames, wide tires for better grip, and advanced suspension systems to absorb the impact of rough terrains. If you’re all about adventure and love the thrill of taking on challenging tracks, mountain biking might be the perfect fit for you.

Comparing the Skills Required

Ever wondered what kind of skills you need to be a road biker or a mountain biker? Well, it’s not just about riding a bike. It requires a unique set of skills for each type of biking. Let’s dive into the specifics.

Road Biking Skills

For road biking, it’s all about balance, endurance, and speed control. Sounds simple, right? Not quite.

Balance is crucial as you’ll often be riding in a streamlined position to increase your speed, and this requires a good sense of balance to keep your bike steady. Not to mention, you’ll also need to maintain your balance while navigating through traffic and other obstacles you might encounter on the road.

Endurance is another key skill. Road biking often involves long distances, and you’ll need the stamina to keep pedaling. It’s not just about physical endurance though, but also mental endurance to push through when the going gets tough.

Speed control is also vital. Knowing when to speed up, slow down, and maintain a steady pace can make all the difference in your road biking experience. It’s not about going as fast as you can, but rather about managing your speed effectively to conserve energy and reach your destination safely.

Mountain Biking Skills

Mountain biking, on the other hand, demands a different set of skills. It’s about balance, strength, agility, and terrain navigation.

Just like road biking, balance is critical for mountain biking. But it’s even more challenging here as you’ll be navigating uneven, rocky terrains, often at high speeds. You’ll need to quickly adjust your balance to prevent falls and keep your bike steady.

Strength is another important skill for mountain biking. You’ll need strong legs to pedal uphill and strong arms to control your bike on steep descents and over obstacles. But remember, it’s not just about physical strength. You’ll also need mental strength to tackle challenging trails and push your limits.

Agility and terrain navigation are equally important. Mountain biking involves quick turns, jumps, and avoiding obstacles, requiring quick reflexes and agile movements. Understanding the terrain and choosing the right path is also crucial to avoid dangerous falls and ensure a smooth ride.

Equipment and Gear

Aside from skills, you’ll also need the right gear and equipment for road and mountain biking. It’s not just about the bike, but also about the protective gear, clothing, and accessories that can enhance your biking experience and keep you safe. Let’s break it down.

Road Biking Mountain Biking
Helmets Aerodynamic, lightweight, well-ventilated Full-face protection, sturdy, impact-resistant
Clothing Tight-fitting, breathable, padded shorts for comfort Loose-fitting, durable, padded shorts for protection
Accessories Water bottles, speedometer, light reflectors Hydration packs, GPS, knee and elbow pads

Remember, the right gear can make a huge difference in your biking experience. So, invest in good-quality equipment that suits your biking style and needs.

Health Benefits of Biking

Have you ever wondered about the health benefits that come with biking? It’s not just about feeling the wind on your face or the thrill of reaching top speeds. Both road and mountain biking offer a multitude of health advantages that can enhance your overall well-being.

Firstly, biking is a fantastic cardiovascular workout. Whether you’re cruising on flat pavement or tackling a steep, rocky trail, your heart and lungs are getting a great workout. Regular biking can help improve cardiovascular health, reducing the risk of heart disease and stroke. Isn’t that something worth pedaling for?

Secondly, biking is excellent for building muscle strength. With road biking, you’ll primarily work your lower body and core. Mountain biking, with its need for standing and maneuvering, engages even more muscle groups, including your arms and upper body. It’s like a mobile gym!

Lastly, let’s not forget the mental health benefits. Biking can help reduce stress and improve mood. The combination of physical exercise, fresh air, and the feeling of freedom can be a powerful mood booster. It’s a fun way of exercising that can help keep your mind sharp and spirits high.

Which Type Suits You?

Now that we’ve covered the health benefits, you might be wondering which type of biking is for you. Road biking or mountain biking? The answer depends on several factors, including your lifestyle, fitness level, and the environment where you live.

Road biking might be your cup of tea if you love speed, long rides, and have access to smooth, paved roads. It requires less technical skill compared to mountain biking and can be a great way to commute or explore urban and suburban landscapes.

On the other hand, if you’re a thrill-seeker who loves challenges and doesn’t mind getting a little dirty, mountain biking could be for you. It’s a fantastic way to connect with nature and explore off-the-beaten-path trails. Plus, it can provide a full-body workout and improve your balance and agility.

In the end, the choice is yours. The most important thing is to choose the type of biking that you’ll enjoy and stick with.

  • Do you prefer speed or technical challenges?
  • Are you looking for a way to commute or a sport to enjoy during your free time?
  • Do you have easy access to paved roads or off-road trails?
  • Are you motivated more by endurance or strength training?
  • Do you enjoy being part of a group or do you value solitude?
  • Are you attracted to urban exploration or the call of the wild?

Training and Getting Started

Ever wondered how to take the first pedal strokes in the world of cycling? Whether you’re leaning towards road or mountain biking, the first step is to find a bike that suits you. You may want to visit a local bike shop where experts can help you find the right size and type of bike.

For those starting with road biking, investing in a basic road bike and getting comfortable with the speed and balance is crucial. On the other hand, if you’re drawn to the rugged terrains, a mountain bike with a good suspension system is the way to go.

Once you have your bike, it’s time to start training. Remember, it’s not about how far or fast you can go at first, but about building up your endurance and confidence. Start with short, manageable rides and gradually increase your distance. Don’t forget to learn the essential bike maintenance skills too – like fixing a flat tire!

And where to ride? For road bikers, local roads and bike paths are perfect. Mountain bikers might want to start with simple trails and gradually try out more challenging ones.

The Cycling Community

Did you know that one of the best parts of biking is the vibrant and supportive community that comes with it? It’s true! Whether you’re into road biking or mountain biking, there’s always a group of fellow riders who share your passion.

Local clubs and races are great places to meet likeminded individuals. They provide a platform to learn from each other, share experiences and, of course, have fun. Plus, joining a club or participating in a race can give that extra motivation to improve your skills.

And let’s not forget about the wider cycling community online. There’s a wealth of blogs, forums, and social media groups where you can connect with cyclists from around the world, ask questions, and share your own biking adventures.

  • Meetup: A great platform to find local biking groups and events.
  • BikeRadar: A comprehensive online resource with bike reviews, tips, and forums.
  • TrailForks: A handy site for finding mountain bike trails worldwide.
  • Local Bike Shops: They often have information on local clubs and events.
  • Strava: An app where you can track your rides, join challenges, and connect with other cyclists.

Final Thoughts

In conclusion, both road and mountain biking offer unique experiences and benefits. Whether you crave the speed and distance of the road, or the thrill and challenge of the trail, cycling is a fantastic way to get outdoors, stay active, and join a vibrant community. The best part? You don’t have to choose one over the other. Many cyclists enjoy both types of biking. So why not give both a try and discover your own cycling passion? Remember, the journey is just as important as the destination. Happy biking!

How to Improve Your Cycling Stamina

Whether you’re an avid cyclist or just starting your two-wheeled journey, one thing’s for sure – cycling stamina matters. It’s more than just the ability to pedal harder; it’s about the endurance to keep going, even when the ride gets tough. Stamina is a vital aspect of cycling, whether you’re tackling a steep hill, going for a long ride, or simply trying to improve your fitness.

The Role of Cardio in Cycling Stamina

Ever wondered why your heart beats faster when you’re cycling? That’s because cardiovascular fitness plays a pivotal role in cycling stamina. In simple terms, the fitter your cardiovascular system, the better your body can pump blood and oxygen to your muscles, letting you cycle for longer. So, what’s the secret to improving this? Well, it’s a mix of aerobic and anaerobic endurance.

Aerobic endurance is all about how well your body can use oxygen to fuel your muscles during long, low-intensity rides. On the other hand, anaerobic endurance kicks in during high-intensity, shorter rides when your body needs energy fast. Balancing these two types of endurance can significantly improve your cycling stamina.

Understanding the Importance of Muscle Endurance

Speaking of muscles, did you know they’re your best ally when it comes to cycling? That’s right! Especially your leg muscles – your quads, hamstrings, and calves. These are the key players that keep you pedaling, allowing you to conquer longer rides.

But how do you build muscle endurance? Well, it’s not just about lifting weights. Training your muscles to resist fatigue over longer periods involves regular, consistent cycling, focusing on time in the saddle rather than speed. So, next time you’re on your bike, remember – slow and steady does indeed win the race!

The Influence of Mental Stamina on Cycling

When it comes to stamina, it’s not just about the physical. Your mind plays a massive role too. Ever noticed how you can push through the last few miles of a ride, even when your body is screaming to stop? That’s mental stamina at work.

Building mental stamina can be as simple as setting small, achievable goals for each ride or practicing mindfulness. Remember, your mind is a powerful tool. With the right mindset, you can push through those challenging rides and come out stronger on the other side.

Practical Ways to Boost Cycling Stamina

Wondering how to take your cycling to the next level? We’ve got you covered! Building cycling stamina doesn’t have to be a mystery. Let’s explore some practical ways to improve your endurance on the bike.

Incorporate Cross-Training Activities

Did you know that other physical activities can significantly improve your cycling stamina? That’s right! Cross-training activities such as swimming, running, or yoga can be incredibly beneficial. These exercises not only build overall strength and stability, but they also enhance your body’s ability to withstand longer periods of physical stress.

Take swimming for instance. It’s a full-body workout that increases your lung capacity and strengthens your core. A strong core is essential for maintaining balance on the bike and preventing fatigue. So why not dive in?

Gradually Increase Your Cycling Distance

The principle of progressive overload is a game-changer when it comes to improving cycling stamina. It involves gradually increasing your cycling distance over time, thereby pushing your body to adapt to the increasing demands. This results in enhanced endurance and stamina.

Remember, the key here is gradual increase. It’s not about pushing yourself to extremes but about consistent, incremental progress. So, are you ready to go the extra mile?

Optimize Your Cycling Technique

Improving your cycling technique can do wonders for your stamina. Efficient pedaling and proper posture can help conserve energy, enabling you to cycle longer distances without tiring. Sounds simple, right? But it makes a world of difference.

For instance, maintaining a neutral spine and a relaxed grip can prevent unnecessary strain and fatigue. Similarly, optimizing your pedaling technique can ensure that you’re using your energy efficiently. So, are you ready to ride smarter, not harder?

The Impact of Nutrition on Cycling Stamina

Food Benefits for Cyclists
Bananas Great source of quick energy and potassium, which aids in muscle function
Oats Slow-release carbohydrates provide sustained energy
Lean meats High in protein for muscle recovery and repair
Beetroot Increases blood flow and enhances oxygen supply to the muscles
Almonds Rich in Vitamin E, which helps prevent muscle damage

Did you know that your diet can directly impact your cycling performance? Eating a balanced diet rich in carbohydrates, proteins, and healthy fats can significantly boost your stamina. Consuming certain foods can enhance energy levels, aid in muscle recovery, and prevent fatigue. So, next time you plan your meals, remember to fuel your body right for your next cycling adventure!

Understanding the Role of Rest and Recovery

Wait a minute! Did you think that improving your cycling stamina was all about just pushing harder and biking more? Well, not really! In fact, one of the most under-discussed but equally crucial aspects of enhancing your stamina is understanding the importance of rest and recovery. Yes, you read that right! Your body needs time to recover from the strain of intense workouts and long-distance cycling. This is when your muscles repair themselves and become stronger.

Overtraining can actually be detrimental to your stamina. It can lead to chronic fatigue, decreased performance, and even injuries. Hence, it is essential to listen to your body and give it ample rest. Remember, rest days are not wasted days. They are a part of your training process and contribute to improving your stamina in the long run. So, if you feel fatigued or experience a decrease in performance, it might be a sign that you need to take a break.

Regular Hydration: A Key To Enhanced Stamina

Have you ever felt drained out while cycling and wondered why? One possible reason could be dehydration. Staying hydrated plays a significant role in maintaining your energy levels while cycling. Water is essential for various bodily functions, including the efficient transport of nutrients, regulation of body temperature, and prevention of muscle fatigue.

Dehydration can lead to decreased performance, muscle cramps, fatigue, and even dizziness. Hence, it is important to drink enough water before, during, and after your cycling sessions. A good practice is to drink small amounts of water at regular intervals during your ride rather than gulping down a large amount all at once.

But how do you know if you are dehydrated? Here are some signs to look out for:

  • Dry mouth and lips
  • Feeling thirsty
  • Headache
  • Feeling tired or lethargic
  • Decreased urination or darker urine
  • Feeling dizzy or lightheaded

Remember, hydration is not just about drinking water. You also lose electrolytes through sweat while cycling. Therefore, including electrolyte-rich drinks in your hydration strategy can be beneficial.

Essential Cycling Gear for Stamina Building

Have you ever pondered on the impact of the right cycling gear on your stamina? Well, it’s substantial! The appropriate gear can make your rides more efficient and comfortable, thereby enhancing your endurance. Let’s look at a few examples.

Firstly, a well-fitted helmet is not just a safety measure, but it can also reduce fatigue by cutting down wind resistance. Secondly, the right pair of cycling shoes can enhance your pedaling efficiency, thus conserving your energy for those longer rides. Lastly, wearing the correct clothing, preferably moisture-wicking and breathable, can keep you comfortable and focused on the journey rather than discomfort.

Setting Realistic Goals and Tracking Progress

Setting goals might sound cliché, but it’s a proven way to motivate oneself and stimulate progress. However, the key lies in setting realistic and achievable goals. Perhaps you could start by aiming to cycle a certain distance without stopping or aim to keep a steady pace for a specific period. Tracking these goals and your progress towards them can provide a sense of accomplishment and spur you to push your limits further.

So, how do you track your progress? There are numerous apps and tools available to help you in this regard. Here’s a list of some popular ones:

  1. Strava
  2. MapMyRide
  3. Garmin Connect
  4. Wahoo Fitness
  5. Endomondo

These tools not only track your distance and speed but also provide valuable data on your heart rate, calories burned, and more. Remember, the data from these apps should serve to motivate you, not stress you out. So, use them wisely!

Final Thoughts

Building cycling stamina is not just about pushing harder but also about training smarter. From understanding the role of cardio and muscle endurance in cycling, incorporating cross-training activities, optimizing your cycling technique, to prioritizing nutrition, hydration, rest, and recovery – every aspect plays a vital role in enhancing your stamina.

Equipped with the right gear and a reliable way to track your progress, you’re all set to embark on this exciting journey. Remember, the road to improved stamina is not a sprint, but a marathon. So, take your time, listen to your body, and enjoy the ride. You’re stronger than you think!

Happy cycling!

Group Ride Etiquette: What You Need to Know

There’s a unique camaraderie that comes with cycling in a group. It’s a shared experience that bonds individuals, where the collective energy of the group can help you push through challenging routes and long distances. But just like any other social activity, group rides come with their own set of rules – the etiquette.

Understanding and following group ride etiquette is not just about being polite, it’s about ensuring safety, creating a harmonious riding environment, and promoting a more enjoyable and productive experience for everyone involved. So, what exactly is this etiquette we keep mentioning, and why is it so important?

Understanding the Basics of Group Ride Etiquette

Group ride etiquette refers to the set of unwritten rules or guidelines that cyclists follow when riding in a group. It’s a kind of ‘road manners’ for cyclists, if you will. This etiquette helps maintain order within the group, ensures everyone’s safety, and makes the ride smoother and more enjoyable. Imagine a group ride without any rules – chaos, right?

But it’s not just about keeping things orderly. Group ride etiquette is also about respect – respect for your fellow riders, respect for other road users, and respect for the rules of the road. Following proper etiquette shows that you’re a responsible cyclist, and that’s something that benefits everyone on the road. So, how does communication fit into all this?

Importance of Communication in Group Rides

Communication is key in any group activity, and cycling is no exception. Clear and timely communication helps prevent accidents, keeps the group together, and makes the ride more enjoyable for everyone. It’s not just about shouting out directions or warnings (although that’s certainly part of it), it’s also about signalling your intentions, acknowledging others, and sometimes, just a simple nod or wave to show that you’re part of the group.

So, now that we’ve laid out the basics, are you ready to dive into the world of group ride etiquette? Let’s get rolling!

Key Elements of Group Ride Etiquette

Now that we have a basic understanding of group ride etiquette, let’s dive deeper into the key elements that make up the etiquette framework. It’s not just about riding your bike; it’s about being part of a community and respecting other members of that community. And guess what? It isn’t as difficult as you might think!

Staying in Formation

Ever wondered why cyclists ride in a particular formation during group rides? It’s not just for the sake of aesthetics. Staying in formation is a key element of group ride etiquette. It promotes not only safety but also efficiency, especially during long rides.

By maintaining a steady formation, cyclists can take advantage of the aerodynamics of group riding. The lead cyclist breaks the wind, making it easier for the riders behind. Plus, a tight and orderly formation helps prevent accidents caused by sudden swerves or unexpected stops. Sounds pretty sensible, right?

Sharing the Road

Sharing the road is another critical aspect of group ride etiquette. Remember, as a cyclist, you’re not the only one using the road. There are other riders, motorists, and sometimes pedestrians as well.

So, how do we share the road effectively? Stay alert, maintain your lane, and respect traffic rules. Avoid hogging the road or riding three abreast in a busy traffic situation. It’s all about mutual respect and consideration – that’s what sharing the road is all about.

Learning the Common Hand and Verbal Signals

Communication is crucial in group rides, and hand and verbal signals are the most effective ways to communicate with your fellow riders. But what are these signals, and what do they mean? Let’s find out.

Understanding Hand Signals

Hand signals are the universal language of cyclists. They help convey intentions to fellow riders and even motorists, promoting safety. But remember, these signals are effective only when everyone understands them.

  • Left arm straight out: Signifies the cyclist is turning left.
  • Right arm straight out: Signifies the cyclist is turning right.
  • Left arm down with palm to the rear: Indicates the cyclist is stopping or decreasing speed.
  • Pointing to the road: Used to indicate road hazards like potholes or debris.
  • Patting the hip: Instructs the following cyclist to take the lead.

These are just a few examples; there are more signals that you’ll learn as you gain more experience in group riding. Remember, effective communication is key to a safe and enjoyable group ride.

Advanced Etiquette for Group Rides

Have you ever wondered about the unwritten rules that experienced cyclists seem to follow during their group rides? It’s all about advanced etiquette. These are the subtle yet significant practices that make a group ride smoother and more enjoyable for all. These are the practices that separate the rookies from the veterans. Intriguing, isn’t it?

Advanced etiquette includes aspects like knowing when and how to take the lead, when to save energy and ride in the draft, and how to rotate positions in a paceline. It’s about understanding the dynamics of the group and adapting your riding style to match it. This isn’t something you learn overnight, but with experience and guidance, you can master these aspects to make every group ride an enjoyable experience.

Dealing with Unexpected Situations

Ever had a flat tire in the middle of a group ride? Or witnessed a fellow rider experiencing a medical emergency? These are the kind of unexpected situations that can occur during group rides, and knowing how to handle them is critical.

First and foremost, don’t panic. Keeping a cool head is essential for managing any unexpected situation. Whether it’s a mechanical failure or a medical emergency, the first step is to alert others in the group. Use clear, loud verbal signals to communicate the issue.

For mechanical failures, it’s important to move off the road to a safe spot before attempting any repairs. If it’s a medical emergency, call for medical help immediately. Remember, safety comes first, always.

Etiquette Beyond the Bike

Did you know that group ride etiquette extends beyond the bike? Yes, that’s right! How you behave during breaks and at rest stops also matters. It’s all about respect and consideration for others.

When you stop for a break, make sure you’re not blocking the path for other cyclists or road users. Keep your bike and gear neatly arranged to avoid creating obstacles or tripping hazards. When at rest stops, be courteous and patient. Don’t hog the amenities or linger longer than necessary. Remember that everyone is there to enjoy their ride and a little courtesy goes a long way.

Summary of Key Etiquette Rules

Rule Description
Stay in Formation Ride in a single file or double line formation as the situation requires.
Communicate Clearly Use hand and verbal signals to communicate your intentions to the group and other road users.
Share the Road Respect other road users and give way when necessary.
Handle Emergencies Calmly In case of a mechanical failure or medical emergency, alert the group and handle the situation calmly.
Respect Rest Stops During breaks, keep your gear organized and don’t linger longer than necessary at rest stops.

Building a Positive Cycling Community

Ever wondered how a friendly and cooperative cycling community is built? You guessed it; it’s all about etiquette. The importance of group ride etiquette goes beyond individual safety and efficiency. It’s the backbone of a positive and respectful cycling culture.

When everyone understands and respects the unwritten rules, it creates an environment of mutual respect and camaraderie. It’s not just about making the rides smoother; it’s about fostering a sense of community. It’s about looking out for each other, sharing the road, and creating a positive experience for everyone involved. Remember, a little courtesy goes a long way!

Concluding Thoughts

So there you have it! Group ride etiquette is truly the key to a safe, efficient, and enjoyable cycling experience. It’s not just about following rules; it’s about contributing to a respectful and friendly cycling culture. But let’s not forget, learning is a continuous process. As we continue to ride and interact with other cyclists, we’ll inevitably learn more about the nuances of group ride etiquette.

Think about it, isn’t it amazing how a set of unspoken rules can transform a group of individual cyclists into a well-oiled machine, working together to conquer the road? That’s the beauty of group ride etiquette. And it’s up to us, the cycling community, to carry the torch and pass on these traditions to the next generation of cyclists.

  • Importance of group ride etiquette
  • Understanding the basics of group ride etiquette
  • Key elements of group ride etiquette
  • Learning the common hand and verbal signals
  • Handling unexpected situations during a ride
  • Etiquette off the bike
  • Building a positive cycling community

The Advantages of Using a Bike Trainer

Ever wondered how you could keep up with your cycling routine despite the changing seasons? Or perhaps you’ve thought about how to start cycling without the intimidation of busy roads? That’s where a bike trainer comes in handy. A bike trainer is a piece of equipment that allows you to ride your bicycle while it remains stationary. It’s an incredibly useful tool for both seasoned cyclists and beginners, offering a range of benefits that we’ll explore throughout this article.

Understanding a Bike Trainer

Now, you might be wondering what exactly a bike trainer is. Essentially, it’s a piece of equipment that holds your bike in place while you pedal. This allows you to cycle indoors, turning your regular bike into a stationary exercise bike. It’s composed of a frame, a clamp to hold your bike in place, and a roller that presses against your rear wheel. When you pedal, the roller spins, simulating the resistance you would experience while cycling outdoors.

Using a bike trainer, you can work on your cycling skills and fitness level without leaving your home. It’s a great tool for indoor cycling training, especially during the colder months or when outdoor conditions are less than ideal.

Why Choose a Bike Trainer?

So, why should a cycling enthusiast consider investing in a bike trainer? Well, for beginners, a bike trainer offers a safe and controlled environment to start your cycling journey. It eliminates any concerns about traffic, road conditions, or weather, allowing you to focus purely on your performance.

For seasoned cyclists, a bike trainer is a great way to keep up with your training routine regardless of outdoor conditions. It allows you to work on specific areas of your cycling, such as improving your cadence or increasing your stamina, with a level of precision that can be hard to achieve outdoors.

Moreover, a bike trainer is a convenient and time-efficient solution for those with a busy lifestyle. You can set it up at home or in the office, allowing you to fit in a cycling session whenever it suits you best. How’s that for convenience?

Health and Fitness Gains with a Bike Trainer

Ever wondered how using a bike trainer could improve your health and fitness levels? Let’s explore that!

Improved Cardiovascular Health

One of the primary benefits of using a bike trainer is the improvement in cardiovascular health. When you engage in regular, intense workouts on your bike trainer, you’re essentially giving your heart a workout too. This cardiovascular exercise can help lower your risk of heart disease, reduce your blood pressure, and improve your overall heart health. Isn’t it amazing how a piece of cycling equipment can contribute to your well-being so significantly?

Enhanced Muscle Tone and Strength

Who doesn’t want a toned body? With a bike trainer, you’re not just pedaling away, you’re working on your muscles too. The resistance provided by the trainer challenges your muscles, leading to increased strength and improved muscle tone over time. Remember, the more you train, the stronger you become!

The Convenience of a Bike Trainer

Convenience is key in our busy lives. And a bike trainer offers just that. Here are some reasons why:

  • Train in any weather: Rain, snow, or high heat – nothing can stop your training schedule.
  • Flexibility of timing: Whether you’re an early bird or a night owl, your bike trainer is always ready.
  • Safe and comfortable environment: No need to worry about traffic or uneven terrain. Your living room is your new training field.
  • Easy to set up: You don’t need a vast space to set up your trainer. It fits perfectly in most homes.

Making Cycling Training Safer

Outdoor cycling can come with risks – traffic accidents, falls, and even getting lost. Fortunately, a bike trainer eliminates these risks. You can enjoy your cycling workout in the safety and comfort of your own home. Isn’t it great to know that you can focus entirely on your fitness goals without the worry of external risks?

Bike Trainers and Skill Development

Ever thought about the skills that you can develop while cycling? Well, with a bike trainer, you can work on specific cycling skills right from the comfort of your home. Isn’t that amazing? Not only can you maintain your fitness level, but you can also become a better cyclist. Let’s explore some of these skills.

  • Balance: One of the first skills you can enhance while using a bike trainer is balance. It may sound simple, but achieving the right balance can significantly improve your cycling efficiency.
  • Control: With a bike trainer, you can practice maintaining control over your bike in a safe environment. This skill is particularly useful for those tricky outdoor rides.
  • Pedal Stroke: A bike trainer allows you to focus on your pedal stroke, enabling you to pedal smoothly and efficiently.
  • Endurance: Long sessions on a bike trainer can help build your endurance, which is essential for long-distance cycling.
  • Strength: With controlled resistance, a bike trainer can help you build strength. This can be particularly beneficial for uphill cycling.

Types of Bike Trainers

Now that we know the skills that can be developed using a bike trainer, it’s time to delve into the different types that are available on the market. Are they all the same? Of course not! Each type of bike trainer has its unique features and benefits. Let’s take a look.

Type of Bike Trainer Features Benefits
Fluid Trainers Uses liquid resistance to mimic the feel of outdoor cycling. Provides a realistic ride feel, quiet operation, and progressive resistance.
Wind Trainers Uses wind resistance created by a fan. Offers a good resistance range, lightweight, and inexpensive.
Magnetic Trainers Uses a magnetic flywheel to create a resistance. Provides quiet and smooth operation, adjustable resistance.
Direct Drive Trainers Requires removal of your bike’s rear wheel and affixing the bike directly to the trainer. Eliminates tire wear, provides accurate power measurement, and a realistic ride feel.
Smart Trainers Can connect to devices via Bluetooth or ANT+ to use with cycling apps. Offers interactive and immersive training sessions, accurate power measurement.

Each type of bike trainer has its pros and cons, and the choice largely depends on your specific needs, preferences, and budget. So, which one will you choose for your indoor cycling sessions?

Tips for Maximizing the Benefits of a Bike Trainer

So, you’ve got your bike trainer and you’re ready to start your indoor cycling journey. But how can you make the most out of your new tool? Here are a few tips:

  • Keep a regular training schedule: Consistency is key when it comes to any form of exercise, and indoor cycling is no exception. Set aside specific times for your workouts and stick to them.
  • Monitor your nutrition: Proper nutrition can significantly enhance your performance and recovery. Make sure to fuel your body with a balanced diet rich in proteins, carbohydrates and healthy fats.
  • Track your progress: Keep a record of your workouts. This will not only motivate you to push harder but also help you identify areas that need improvement.
  • Rest and recover: While it’s important to push yourself, it’s equally crucial to allow your body time to recover. Striking a balance is key.

Getting Started with a Bike Trainer

So, how do you get started with a bike trainer? It’s simpler than you might think. Here’s a brief guide to help you out:

  1. Setting up your bike trainer: First, you need to set up your bike on the trainer. This usually involves clamping the rear wheel into the trainer and adjusting the resistance unit against the tire.
  2. Start slow: If you’re new to indoor cycling, it’s best to start slow. Begin with shorter, less intense workouts and gradually increase the intensity and duration as your fitness improves.
  3. Try different workouts: To avoid boredom and keep your workouts challenging, mix up your routine. Try different workouts like interval training, endurance rides, and hill simulations.

Investing in a Bike Trainer

If you’re considering investing in a bike trainer, there are several factors to take into account. The type of trainer, your budget, and the available space in your home are just a few factors that can influence your decision.

When it comes to the type of trainer, you need to consider your specific needs and preferences. Do you prefer a more realistic ride feel? Then a direct-drive trainer might be a good fit. On a tight budget? A wind or magnetic trainer could be a better choice.

Consider the space you have available in your home. Some trainers are quite bulky and may not fit in a small apartment. Others are foldable and can be easily stored away when not in use.

In the end, the choice comes down to your individual needs and preferences. But no matter which trainer you choose, remember: it’s an investment in your health and fitness. And that’s something you can’t put a price on, don’t you agree?

In conclusion, a bike trainer can be a great tool for both beginner and seasoned cyclists. It offers a safe, convenient way to train and can help improve your fitness and cycling skills. So, why not give it a try and embark on your own indoor cycling journey? You might just find that it’s the perfect fit for you.

Hill Climbing Techniques

Mountain biking is an exciting adventure filled with the thrill of overcoming challenging terrains. A significant part of this adventure involves hill climbing, which can seem daunting, especially for beginners. However, with the right techniques, you can turn this challenge into an exhilarating experience. Mastering hill climbing techniques can substantially enhance your cycling experience, improve your fitness levels, and equip you to tackle a variety of terrains with ease. Sounds interesting, doesn’t it?

Understanding the Basics of Hill Climbing

Let’s start with the basics. Hill climbing on a bike relies on a few fundamental principles. Understanding your gear usage is crucial: knowing when to switch gears can make a significant difference in your climbing effort. Maintaining a steady cadence, or rhythm in your pedaling, is another essential factor. It helps to conserve your energy and prevents you from exhausting yourself too quickly. Do you see how these simple principles can make a huge difference in your hill climbing experience?

Body Position and its Importance in Hill Climbing

Another important factor in hill climbing is your body position. The way you position your body can greatly impact your ability to climb hills. Maintaining balance is key, as it ensures that you have control over your bike at all times. Depending on the steepness of the hill, you may need to adjust your body position to maintain this balance. Your grip on the handlebars also plays a crucial role. A firm, yet relaxed grip can help you steer effectively without tiring your hands. Isn’t it fascinating how these minor adjustments can enhance your performance?

Importance of Breathing and Pacing

Now, let’s talk about something that we often overlook – breathing and pacing. Regulating your breath is vital while climbing hills. It ensures a steady supply of oxygen to your muscles, helping them perform better. Pacing is equally significant. By managing your pace, you can maintain a steady rhythm and conserve your energy for longer rides. So, the next time you’re cycling uphill, remember to breathe and pace yourself. It’ll make your ride much more enjoyable, don’t you think?

Gear Selection for Efficient Hill Climbing

Ever wondered why some cyclists seem to ascend hills effortlessly, while others struggle? A significant part of the answer lies in gear selection. Choosing the right gear at the right time can make all the difference when it comes to hill climbing. Let’s dive into this crucial topic.

When to Shift Gears

Knowing when to shift gears is a skill that can drastically improve your hill climbing ability. But when exactly should you shift gears?

Well, the key is anticipation. You want to shift to a lower gear (easier pedaling) before the hill gets too steep. If you wait until the hill is already steep, you might find it difficult to shift without losing momentum. On the other hand, once you’ve conquered the hill and the terrain starts to level out, it’s time to shift to a higher gear to pick up speed.

Remember, it’s all about maintaining a steady cadence and conserving energy. So, don’t hesitate to shift gears as the gradient changes.

Understanding Gear Ratios

Now, let’s talk about gear ratios. What are they? How do they affect your cycling effort?

Without getting too technical, gear ratios refer to the relationship between the number of teeth on the front chainring and the rear cog. A high gear ratio (big front gear, small rear gear) requires more effort to pedal but can get you moving quickly on flat ground or downhill. In contrast, a low gear ratio (small front gear, big rear gear) requires less effort, making it ideal for climbing steep hills.

Understanding this concept will help you choose the most efficient gear for any given incline, thus making your hill climbing experience smoother and more enjoyable.

Tips and Strategies for Effective Hill Climbing

Now that we’ve tackled gear selection let’s move on to some practical tips and strategies to enhance your hill climbing abilities.

Mental Strategies

Hill climbing isn’t just a physical challenge; it’s a mental one too. The sight of a steep hill can be daunting, and it’s easy to feel defeated before you even start the climb. But don’t fret; there are ways to overcome these psychological barriers.

One effective strategy is to break the hill down into smaller, manageable sections. Instead of focusing on the entire hill, concentrate on reaching the next tree or lamp post. Before you know it, you’ll be at the top!

Visualisation is another powerful tool. Picture yourself successfully reaching the top of the hill. This positive mental imagery can boost your confidence and motivation, helping you conquer even the most challenging climbs.

Remember, your mind can be your biggest ally or your greatest enemy in hill climbing. Harness its power, and you’ll be amazed at what you can achieve.

Common Mistakes to Avoid in Hill Climbing

Ever wondered why climbing hills on your bike seems harder than it should be? Well, you might be making some common mistakes. Don’t worry, we’ve all been there. Let’s take a look at these mistakes and learn how to avoid them.

Starting too fast is a classic error. It’s easy to hit the base of a hill with gusto, only to run out of steam halfway up. Remember, hills are a marathon, not a sprint. Pace yourself.

Another pitfall is standing up too early. Standing can help you generate more power, but it also burns more energy. Save this for the steepest parts or when you need a burst of speed. Otherwise, stay seated and conserve your energy.

Lastly, avoid the temptation to look down or up. Looking down can strain your neck and reduce your oxygen flow, while constantly looking up can be daunting. Instead, focus on the road just ahead of you. This keeps your posture in check and helps mentally break the climb into manageable chunks.

How to Train for Hill Climbing

Now that we’ve covered what not to do, let’s talk about how to train effectively for hill climbs. It’s not all about grueling, uphill slogs – variety is key. Incorporating different types of workouts can help improve your strength, stamina, and technique.

Interval training is a great way to build both power and endurance. This involves periods of intense effort followed by recovery, which can mimic the demands of hill climbing.

Cross-training can also be beneficial. Activities like running, swimming, or weightlifting can improve your overall fitness and strength, which can translate into better cycling performance.

Lastly, consider using progressive overload. That means gradually increasing the intensity of your workouts over time. This could be adding more hill repeats, increasing the gradient, or reducing your rest periods. It’s a proven strategy to improve your fitness and performance.

Below is an example of a hill climbing training schedule:

Day Workout Focus
Monday Interval Training Power and Stamina
Tuesday Rest Recovery
Wednesday Hill Repeats Strength and Technique
Thursday Rest Recovery
Friday Cross-Training (e.g., Running or Swimming) Overall Fitness
Saturday Long Ride with Hills Endurance
Sunday Rest Recovery

Advantages of Mastering Hill Climbing Techniques

So, what’s in it for you? Why should you invest your time and effort in mastering hill climbing techniques? Well, the benefits are manifold and extend far beyond just being able to conquer steep terrains.

Firstly, hill climbing can significantly improve your cardiovascular fitness. It’s an intense workout that gets your heart pumping, promoting better cardiovascular health. And who wouldn’t want a healthier heart?

Secondly, it enhances your leg strength. Climbing hills requires you to exert more force on the pedals, which in turn strengthens your leg muscles. This increased muscle strength can help you cycle longer distances, even on flat terrains.

Last but not least, mastering hill climbing techniques can boost your overall cycling performance. It enables you to tackle a variety of terrains, making you a more versatile cyclist. And let’s not forget the sense of achievement you feel when you reach the top of a steep hill. Isn’t that exhilarating?

Conclusion: Climbing Hills with Confidence

By now, you should have a good understanding of hill climbing techniques and their importance. But remember, like any other skill, it takes time and practice to master these techniques. So be patient with yourself.

Don’t get discouraged if you struggle initially. Instead, see it as an opportunity to learn and grow. With consistent practice, you’ll soon find yourself climbing hills with ease and confidence. And the view from the top? It’s absolutely worth the effort!

Are you ready to take your cycling skills to new heights?

  • Understand the basics: Gear usage, maintaining a steady cadence, and conserving energy are all fundamental to hill climbing.
  • Pay attention to your body position: Your balance and grip on the handlebars can significantly affect your ability to climb hills.
  • Regulate your breathing and pacing: These factors play a crucial role in managing your energy and stamina.
  • Choose the right gear: Knowing when to shift gears and understanding gear ratios can make your climb easier.
  • Avoid common mistakes: Being aware of the common pitfalls can help you improve your hill climbing skills.
  • Train consistently: Regular and varied training is key to mastering hill climbing techniques.

Average Speeds for Recreational Cyclists

Welcome, cycling enthusiasts and beginners alike! Have you ever wondered about the average speeds for recreational cycling? If you’re new to the world of cycling, understanding your speed can be a great way to track your progress, set goals, and plan your cycling adventures. In this blog post, we’re going to tackle everything you need to know about the average speeds for recreational cycling and why they matter.

Here’s a snapshot of a recreational cyclist in action to get you in the mood for our discussion!

Understanding Cycling Speed

First off, let’s talk about how cycling speed is measured. The speed of a cyclist is usually measured in miles per hour (mph) or kilometers per hour (km/h), depending on your location and preference. However, several factors can affect your speed. For instance, the terrain you’re cycling on can significantly impact your speed. Are you cycling uphill or on a flat surface? What about the weather? Windy conditions can slow you down while a tailwind can give you a nice speed boost.

Why Cycling Speed Matters

So, why should you care about your cycling speed? Well, knowing your speed can help you track your progress over time. It can also help you set realistic goals for your fitness and cycling proficiency. If you’re planning a cycling trip, understanding your average speed can help you estimate how long it will take you to cover a certain distance. Plus, keeping tabs on your speed can also help you improve your fitness level. After all, cycling is not just about the destination, but also about the journey and how you improve along the way, right?

Factors Affecting Cycling Speed

Ever wondered why your cycling speed varies from one ride to another? There are several factors at play here. Some of these factors are within your control, while others, like weather conditions, are beyond your control. Let’s dive deep into these factors and see how they impact your cycling speed.

The Impact of Fitness Level on Cycling Speed

How fit are you? Your fitness level plays a crucial role in determining your cycling speed. If you’re physically fit, you’ll be able to maintain a higher average speed compared to someone who isn’t as fit.

But it’s not just about physical fitness. Mental toughness is equally important. Cycling, especially long-distance cycling, demands a great deal of mental stamina. How well can you handle physical discomfort? Can you push yourself to keep going even when you’re tired? Your mental strength can significantly affect your cycling speed.

Role of Bike Type and Gear in Cycling Speed

Not all bikes are created equal. The type of bike you ride can greatly impact your speed. For instance, road bikes are typically faster than mountain bikes because they’re lighter and designed for speed. Similarly, the type of gear you use can also make a difference. For example, using clipless pedals can improve your pedaling efficiency, thereby increasing your speed.

The weight of your bike, the type of tires you have, and your gear settings can all contribute to your cycling speed. Are you using the right equipment for your cycling needs?

Factor Impact on Cycling Speed
Physical Fitness A higher level of fitness allows for a higher average speed.
Mental Strength Being mentally strong can help you push through physical discomfort and maintain a higher speed.
Bike Type Road bikes are typically faster than mountain bikes due to their lighter weight and design.
Gear Using efficient gear like clipless pedals can improve pedaling efficiency and increase speed.
Weather Conditions Adverse weather conditions like wind and rain can decrease speed.
Road Conditions Smooth, flat roads allow for faster speeds compared to rough, hilly terrains.

Understanding these factors can help you optimize your cycling speed. But remember, it’s not just about speed. Enjoying the ride and staying safe should always be your top priorities. So, are you ready to hit the road?

Determining Your Personal Average Speed

Ever wondered how fast you’re really going on your bike? Knowing your average speed can be a useful tool to monitor your progress and set new goals. But how do you measure it?

One of the most common methods is using a cycling computer or GPS. These devices are designed to track your speed, distance, and duration of your ride. They’re typically easy to use and give you real-time feedback while you’re cycling!

But what if you prefer to keep things simple and not invest in extra gear? You can still figure out your average speed manually. All you need is a basic watch and a known distance. Simply time how long it takes you to travel the distance, and then do a bit of math to calculate your speed. Remember, speed is distance divided by time.

Improving Your Average Cycling Speed

Now that you know your average speed, you might be wondering how to improve it. Don’t worry, there are plenty of strategies you can utilize to get faster on your bike.

First and foremost, consistent training is key. The more you cycle, the better you’ll get. Next, consider incorporating specific workouts into your routine, such as interval training or hill repeats. These can help boost your speed and endurance.

Don’t forget about the importance of rest and recovery, though. Overtraining can lead to burnout or injury, which will only set you back. Balance your hard days with easier, recovery rides.

Diet also plays a significant role in your cycling performance. Fueling your body with the right nutrients can give you the energy you need to push harder and go faster. So, make sure you’re eating a balanced diet with plenty of carbohydrates, protein, and healthy fats.

Key Strategies for Improving Cycling Speed

  • Consistent Training: The more you cycle, the better you’ll get. Make cycling a regular part of your routine.
  • Specific Workouts: Incorporate interval training or hill repeats into your routine to boost speed and endurance.
  • Rest and Recovery: Don’t forget to balance your hard training days with easier, recovery rides to prevent overtraining.
  • Diet: Fuel your body with the right nutrients for energy and recovery. Aim for a balanced diet with plenty of carbohydrates, protein, and healthy fats.

Setting Realistic Cycling Speed Goals

Ever wondered how to push your limits without pushing too far? Setting realistic and achievable cycling speed goals is the answer. This is a crucial aspect of your cycling journey, especially if you’re a recreational cyclist. It’s about finding the fine line between improvement and overdoing it.

Start by understanding your current average speed. Once you know where you stand, increase your speed goals gradually. For instance, if your current average speed is 10 mph, don’t aim for 20 mph right away. A more realistic goal might be to increase your average speed by 1-2 mph over a certain period. This method ensures you don’t overstrain yourself and risk injuries.

Remember, the key is not to burn out. Cycling is as much about endurance as it is about speed. So, avoid the temptation to ramp up your speed too quickly. Instead, focus on consistent, steady progress. And most importantly, listen to your body. It will tell you when it’s time to push a little harder and when it’s time to rest.

Final Thoughts on Cycling Speed

As we wrap up, it’s important to understand that cycling speed is a useful tool for tracking your progress and setting goals. But it’s not the be-all and end-all of cycling. Enjoying the ride, staying safe, and improving your overall fitness are aspects that hold equal, if not more, importance.

Cycling is a journey, not a race. Speed is just one aspect of that journey. So, focus on building your endurance, improving your fitness, and above all, enjoying the ride. That’s what being a recreational cyclist is all about.

Remember, every cyclist is different. What works for one person might not work for another. So, keep experimenting, keep learning, and you’ll find what works best for you. Who knows, you might even surprise yourself with how fast you can go!

So, are you ready to hop on your bike and hit the road?

  • Understanding your current average speed is the first step to setting realistic cycling speed goals.
  • Gradually increasing your speed goals can help avoid injury and burnout.
  • Cycling speed is a useful tool, but enjoying the ride and staying safe are more important.
  • Every cyclist is different, so keep experimenting to find what works best for you.

Bike Fitting Basics: A Guide for Beginners

Are you an aspiring cyclist or a seasoned pro looking to enhance your riding experience? If so, then you’re in the right place. We’re about to dive into the world of bike fitting, a crucial aspect that any cycling enthusiast should not overlook. Bike fitting, in essence, is the process of adjusting a bike to fit the rider’s unique physique and riding style. Sounds simple, right? But it’s more than just adjusting a seat or handlebars. It’s about creating a harmonious relationship between you and your bike for a safer, efficient, and more enjoyable ride. Ever wondered why some cyclists seem so comfortable and efficient on their bikes while others struggle? The secret often lies in bike fitting.

The Meaning and Importance of Bike Fitting

Let’s start by unpacking what bike fitting really means. It’s the process of adjusting various components of a bike, such as the saddle, handlebars, and pedals, to align with the rider’s body dimensions and flexibility. This is crucial as it significantly reduces discomfort and the risk of injuries while riding. But that’s not all. A correct bike fit can also enhance your performance by maximizing your pedaling power and efficiency. Think of it this way: a well-fitted bike is like a well-tailored suit. It not only looks good but also feels great!

Things You Need to Consider Before Bike Fitting

Before you jump into bike fitting, there are a few factors you need to consider. Remember, bike fitting is not a one-size-fits-all scenario. It’s a personalized process that takes into consideration your body’s flexibility, your riding style, and personal preferences. For instance, a competitive road racer might need a different bike fit compared to a casual weekend rider. Why? Because their riding styles and objectives are different. It’s all about finding what works best for you.

Key Elements of a Bike Fit

So, what exactly goes into a bike fit? It’s not just about adjusting the seat to your height. There are several components that, when properly aligned, can make your ride smoother, more comfortable, and more efficient. Let’s break down these elements:

Bike Size

First things first, the size of your bike is absolutely crucial. But how do you know what’s the right size for you? Well, this largely depends on your height and body type. Riding a bike that’s too big or too small for you can not only be uncomfortable, but it can also lead to injuries and decreased performance.

So, take a moment to consider your body type. Are you tall with long legs? Or are you on the shorter side? These factors will influence the size of the bike that’s best for you. And remember, every bike brand can have slightly different sizing, so it’s always a good idea to check the manufacturer’s sizing chart.

Saddle Height and Position

Next up is the saddle height and position. This is so much more than just making sure your feet touch the ground when you’re at a standstill. The right saddle height and position can significantly improve your pedaling efficiency, reduce the risk of injury, and increase overall comfort.

But how do you find the right saddle height and position? It’s all about your leg extension. When your foot is at the bottom of the pedal stroke, there should be a slight bend in your knee. As for the position, your saddle should be parallel to the ground or slightly tilted downwards. Remember, every millimeter counts when it comes to saddle adjustment, so take your time with this.

Handlebar Position and Height

Let’s move on to handlebars. The position and height of your handlebars can greatly influence your control over the bike and your overall cycling experience. Too high, and you might find yourself leaning back too much. Too low, and you could end up hunching over.

The ideal handlebar position and height largely depend on your riding style and comfort. For a more relaxed, upright position, the handlebars should be higher. For a more aggressive, aerodynamic position, they should be lower. It’s all about finding a balance that works for you.

DIY Bike Fitting vs Professional Bike Fitting

Now that we’ve covered the key elements of a bike fit, you might be wondering if you should do it yourself or hire a professional. There’s no right or wrong answer here, as both have their own set of advantages and disadvantages.

DIY bike fitting can be a great way to understand your bike better and make adjustments as you ride. It’s also more cost-effective. However, it can be time-consuming and there’s always the risk of incorrect fitting.

On the other hand, professional bike fitting is more precise and can provide personalized advice based on your body type and riding style. But, it can be quite expensive and not everyone has access to a professional bike fitter.

So, which one should you choose? It ultimately comes down to your personal preference, budget, and access to resources. But remember, a well-fitted bike is key to a comfortable and enjoyable ride. So, why not give it a shot?

A Step-by-Step Guide to DIY Bike Fitting

Ever wondered how you could fit your bike at home, without having to visit a professional? Well, it’s quite possible and can be quite a fun and rewarding process. Let’s walk you through how you can do this.

First things first, you’ll need some basic tools – a bike stand, a plumb line, and a measuring tape. Ready? Let’s get started!

Step Description
1 Set your bike on the stand and ensure it’s stable.
2 Measure your inseam. This is the distance from your crotch to the floor. This measurement is critical for setting your saddle height.
3 Set the saddle height. A general rule is that your saddle height should be roughly 0.883 of your inseam measurement. Don’t forget to check the tilt of your saddle. It should be level to support your full body weight and allow you to move around on the seat when necessary.
4 Check the saddle fore/aft position. When your pedal is at 3 o’clock, a plumb line from your knee should fall directly over the pedal spindle.
5 Set the handlebar height and reach. Your handlebar should be as wide as your shoulders, and the reach should allow a slight bend in your elbows.
6 Finally, take a test ride to see how these adjustments feel. Make necessary tweaks until you find your perfect fit!

Mistakes to Avoid When Fitting Your Bike

While fitting your bike can be a DIY task, there are some common mistakes you need to avoid. The first one is neglecting comfort. Remember, comfort is king when it comes to bike fitting. You should be able to ride your bike for a long time without feeling discomfort. Another common mistake is not considering your riding style. Are you a casual city cyclist or a hard-core mountain biker? Your bike fit should reflect this.

Also, don’t forget about your unique body proportions. Everybody is different, and what works for someone else might not work for you. And finally, remember that bike fitting is not a one-time job. As you ride more and your body changes, you might need to make further adjustments.

Proper Maintenance After Bike Fitting

Now that your bike fits you perfectly, how do you keep it that way? The key is regular maintenance. Just as you would regularly check your car or any other machine, your bike needs the same treatment.

Keep an eye on your bike’s components, especially the ones you’ve adjusted during the fitting. Make sure they remain in their correct positions and are properly tightened. You might also want to get a professional check-up once in a while to ensure everything is still in order.

Remember, a well-maintained bike not only lasts longer but also ensures a comfortable and safe ride every time. So, what are you waiting for? Grab your tools and start fitting!

Frequently Asked Questions about Bike Fitting

Got some burning questions about bike fitting? Don’t worry, you’re not alone. Here are some common queries that beginners often have, along with their answers.

  • Q: What is the ideal saddle height for me?
    A: The ideal saddle height varies from person to person. It depends on your leg length and riding style. A general rule of thumb is to adjust the saddle height so your knee is slightly bent when the pedal is at its lowest point.
  • Q: How often should I adjust my bike fit?
    A: Your bike fit should be adjusted whenever there are significant changes in your physical condition, riding style or if you get a new bike. Otherwise, a yearly check-up should suffice.
  • Q: Can I do bike fitting by myself?
    A: Yes, you can! However, it requires a good understanding of your body and the bike. If you’re unsure, it’s best to seek help from a professional.
  • Q: Does bike fitting help to prevent injuries?
    A: Absolutely! A proper bike fit can help prevent overuse injuries caused by incorrect posture and alignment.
  • Q: Is bike fitting necessary for casual riders?
    A: While competitive riders will see the most benefit, casual riders can also enjoy a more comfortable ride with a bike that fits well.

Final Thoughts on Bike Fitting

So, there you have it – the basics of bike fitting. Whether you’re a serious cyclist or just enjoy a leisurely ride now and then, a properly fitted bike can make a world of difference. It can make your rides more comfortable, more efficient, and more fun. Who wouldn’t want that?

Remember, you don’t have to figure it all out on your own. Whether you decide to DIY or get professional help, the most important thing is to ensure your bike is properly fitted to you. So, why not give it a try? Your body (and your bike) will thank you!

Essential Items for Longer Rides

Have you ever thought about taking your bicycle out for a longer ride? If so, you know it’s not as simple as hopping on and pedaling away. Especially for beginners, it’s crucial to be well-prepared for the journey. In this blog post, we’ll explore the essentials you need for a long ride, why they’re important, and how they can enhance your cycling experience. So, let’s get started!

Before we dig into the details, it’s worth noting that being well-prepared for a long bike ride doesn’t just involve packing your bag. It’s about understanding the difference between short and long rides, knowing what to bring, and learning how to effectively use your gear. So, are you ready to take a deep dive into the world of long-distance cycling?

Understanding the Difference Between Short and Long Rides

So, what exactly is the difference between short and long rides? It’s not just about the distance. It’s about the pacing, the energy you’ll expend, and the level of preparation you’ll need. When you’re out for a short ride, you can afford to push yourself a little harder and faster. However, for long rides, it’s all about endurance and maintaining a steady pace. You’ll need to conserve your energy to last the entire ride.

Also, when you’re preparing for a longer ride, you need to think about more than just the physical exertion. You need to consider the weather, the terrain, and the distance between rest stops. All these factors will determine what you need to bring with you.

Basic Essentials for Any Ride

Whether you’re going on a short ride around the neighborhood or a long-distance journey, there are some essentials that you should always have with you. Firstly, safety should always be your priority. A good quality helmet is a must-have for any cyclist. It’s also important to have a water bottle to stay hydrated, and a basic repair kit for any minor bike issues that might arise.

Speaking of repair kits, what should they include? At the very least, you should have a multi-tool with the basic tools for bike repair, a spare tube in case you get a flat tire, and a pump. And remember, it’s not just about having these items, but also knowing how to use them!

Preparing For The Long Haul

When you’re gearing up for a long bike ride, there are a few more items you’ll need to add to your checklist. You don’t just need to think about safety and basic repair equipment – you also need to consider your comfort and well-being over a prolonged period of time. So, what exactly are these items?

Nutrition and Hydration

First off, let’s talk about fuel. Riding for hours on end burns a significant amount of calories, and you’re going to need to replenish them. Proper nutrition and hydration are key to maintaining energy levels and preventing fatigue during your ride.

Energy bars are a great portable option that pack a nutritional punch. With a balance of carbohydrates, protein, and fat, they can provide a steady release of energy over time. And don’t forget fruit – it’s not just refreshing, it’s also packed with quick-digesting carbohydrates that can give you a much-needed energy boost.

Of course, hydration is just as important. Always carry a water bottle – or two – with you. An insulated bottle can keep your drink cool for longer, which can be a real treat on hot days.

Clothing and Comfort

Next on the list is cycling attire. When you’re spending hours in the saddle, comfort is key. And the right clothing can make a huge difference.

Padded shorts are a must-have for any long-distance cyclist. They offer much-needed cushioning, reducing discomfort and preventing chafing. Cycling gloves are also worth considering. They not only protect your hands in the event of a fall, but they also provide cushioning that can help prevent numbness and tingling caused by prolonged pressure on the handlebars.

Last but not least, make sure to dress appropriately for the weather. If it’s sunny, consider a jersey with UV protection. If it’s chilly, layer up with a lightweight jacket that can be easily stowed away when not needed.

Emergency Preparedness

Even the best-laid plans can go awry. That’s why it’s so important to be prepared for unexpected situations. Having the right items on hand can turn a potential disaster into a minor hiccup.

Here’s a list of emergency items you should always carry with you:

  • First-aid kit: For treating minor injuries on the go.
  • Multi-tool: For making adjustments to your bike.
  • Spare tubes and a pump: In case of a flat tire.
  • Phone: For calling for help if necessary.

Remember, the goal is not to anticipate every possible scenario, but to be equipped to handle common issues that might arise. The more prepared you are, the more confident you’ll feel – and the more you’ll enjoy your ride.

The Importance of Packing Light

Have you ever wondered why minimalists are so passionate about their lifestyle? It’s because carrying less has a way of freeing you. This is especially true when it comes to long bicycle rides. While it’s crucial to be well-prepared, it’s equally important not to be weighed down by unnecessary items. After all, every ounce counts when you’re pushing your limits.

So, how do you strike a balance? The secret is in choosing items that serve multiple purposes. For instance, a multi-tool can function as a screwdriver, a wrench, and more, eliminating the need to carry separate tools for each function. Also, consider lightweight versions of items. You’d be surprised how much weight you can save with a lightweight water bottle or a compact first-aid kit.

How to Pack Your Gear

Now that you understand the importance of packing light, let’s talk about how to pack your gear effectively. You might think it’s as simple as stuffing everything into your backpack, but there’s a method to the madness.

Firstly, think about balance. Heavy items should be packed at the bottom and towards the center of your backpack to maintain your center of gravity. This makes handling and controlling your bicycle easier. Next, consider accessibility. Items that you might need to reach quickly, like a water bottle or energy bars, should be within easy reach. Lastly, pack your gear in a way that it doesn’t shift around while you’re riding. Loose items can throw off your balance and even become dangerous in certain situations.

Remember, every cyclist is unique and what works for one person might not work for another. So, don’t be afraid to experiment with different packing strategies until you find what works best for you.

Training for Longer Rides

Let’s talk about a topic that’s often overlooked when preparing for long rides: training. It’s not just about what you bring with you, but also about preparing your body for the journey. The better trained you are, the less you’ll need to rely on external aids to get you through the ride.

Start with shorter rides and gradually increase the distance and intensity. This allows your body to adapt to the increasing physical demands. Don’t rush this process! It’s important to give your body time to recover and adapt to the new levels of stress. Remember, Rome wasn’t built in a day, right?

Integrating strength training into your routine can also be beneficial, especially for those hilly routes. A stronger body means a smoother ride and less fatigue, which in turn reduces the amount of food and water you’ll need to carry.

And let’s not forget about rest days. They are crucial for allowing your body to recover, rebuild, and become stronger. Plus, who doesn’t love a good rest day?

Final Thoughts and Recommendations

As we wrap up, let’s revisit some key points. Preparing for a long bike ride involves careful planning, both in terms of what you pack and how you train your body. It’s about finding the right balance between being prepared and not overloading yourself.

Remember to gradually increase your ride length, incorporate strength training, and don’t skimp on those rest days. Training is just as important as the gear you bring along.

Finally, don’t forget about safety. Always wear a helmet, use lights if riding in low-light conditions, and have a plan in case of emergencies.

Sounds like a lot? Don’t worry, you’ve got this!

Item Use
Helmet Safety
Water Hydration
Repair kit Fixing minor bike issues
Energy bars/fruits Nutrition
Padded shorts, gloves, and weather-appropriate attire Comfort and protection
First-aid kit Handling minor injuries

Tips for Commuting by Bike

Are you looking for a way to make your daily commute more exciting, environmentally friendly, and beneficial to your health? Then bike commuting might just be the thing for you! With the increasing congestion in our cities and the growing awareness of our environmental impact, more and more people are turning to cycling as their preferred means of transportation. Not only does it help reduce your carbon footprint, but it also presents a fantastic way to stay fit. This post aims to provide novice cyclists with practical tips and advice to make their biking commute enjoyable and efficient.

Why Choose Bike Commuting?

So, why should you consider swapping your car keys or metro card for a bike helmet? There are numerous benefits to bike commuting. First and foremost, it significantly reduces your carbon footprint. Unlike cars, bikes emit no greenhouse gases, making them a superb option for environmentally conscious individuals. Besides, have you ever thought about the health benefits? Regular cycling can greatly improve your cardiovascular health, build strength, and help maintain a healthy body weight. And let’s not forget the cost-effectiveness! Save on gas, parking, and vehicle maintenance costs. Lastly, who doesn’t want to avoid traffic congestion? On a bike, you can weave your way through traffic or take scenic routes through parks or along bike paths.

Choosing the Right Bike for Commuting

Decided to give bike commuting a try? Great! The first step is choosing the right bike. There are several types of bikes suitable for commuting, including road bikes, hybrid bikes, and city bikes. But how do you choose the right one? Consider factors such as the distance of your commute, the terrain, and your personal comfort.

If you’ll be covering long distances or need speed, a road bike might be a good fit. They are lightweight and designed for speed, but they might not be as comfortable for longer rides. Hybrid bikes, on the other hand, offer the best of both worlds. They are versatile, comfortable, and suitable for various terrains. City bikes are designed with urban commuters in mind. They are comfortable, durable, and often come with features like a basket for your belongings.

Remember, the best bike for you is one that fits well, feels comfortable, and meets your commuting needs. Don’t hesitate to try out different bikes before making a decision.

Bike Commuting Essentials

So you’ve decided to start commuting by bike – that’s fantastic! But what do you need to ensure a safe and comfortable ride? Let’s go through the essentials.

Safety Gear

First and foremost, your safety is paramount. You may be a cautious rider, but it’s always important to be prepared for any situation on the road. So what safety gear should you consider?

Helmets are a no-brainer – pardon the pun. They protect your head in the unfortunate event of a crash. Make sure it fits you well and is always securely fastened.

You need to be seen to be safe! That’s why lights and reflective clothing are essential, especially if you’ll be riding in low-light conditions. Front and rear lights help others on the road see you, and reflective clothing amplifies this visibility.

Weather-Appropriate Clothing

Just like any other form of transport, you’ll need to dress for the weather. But don’t worry – you don’t need a whole new wardrobe to start bike commuting.

In rainy conditions, consider investing in waterproof gear like a jacket and pants. For colder weather, layer up to stay warm, but remember to choose materials that wick away sweat so you don’t get too chilly.

Other Essential Items

Now that we’ve covered safety and clothing, let’s consider some other items that will make your commute easier and more enjoyable.

  • Lock: You’ll want to secure your bike once you reach your destination. A sturdy lock is an absolute must.
  • Repair Kit: Flat tires happen to the best of us. Carry a basic repair kit with you to handle minor repairs on the go.
  • Water Bottle: Hydration is key, especially on longer rides. Make sure you have a water bottle and a way to carry it on your bike.
  • Pannier or Backpack: You’ll need something to carry your belongings in. A pannier attaches to your bike, while a backpack is worn on your body. Choose what’s most comfortable for you.

Understanding Road Rules and Cycling Etiquette

Knowing the rules of the road is crucial for your safety and the safety of others. But it’s not just about the rules – it’s also about being a courteous and respectful cyclist.

Always signal your intentions to others on the road. This includes signaling turns and stops.

Respect traffic lights and signs just as you would when driving a car. They’re there for everyone’s safety, including yours.

And finally, remember to be courteous to other road users. This includes pedestrians, drivers, and other cyclists. We’re all sharing the road, after all!

Planning Your Cycling Route

Have you ever wondered what the best route for your daily commute might be? It’s not always as simple as picking the shortest path. When planning your cycling route, there are several factors to consider. You need to think about the presence of bike lanes, the amount of traffic, the type of terrain, and the total distance. Ideally, you would want a route that is safe, efficient, and enjoyable.

With the rise of cycling apps and online maps, planning your route has never been easier. These tools can help you identify bike-friendly roads, avoid heavy traffic, and even find the flattest route if you prefer a less strenuous ride. Don’t forget to test ride your chosen route during a non-peak time before you commit to it for your daily commute.

Staying Healthy and Hydrated

Just as important as planning your route is ensuring that you stay healthy and hydrated during your commute. Cycling is a physically demanding activity, and it’s crucial to fuel your body with the right nutrients for energy. Consider having a balanced meal before you set off, and always carry a water bottle to stay hydrated.

While it’s easy to focus on the physical exertion, don’t forget about the importance of rest and recovery, especially for longer commutes. Listen to your body and take a break when needed. After all, the goal is to arrive at your destination feeling refreshed, not exhausted.

Dealing with Common Challenges

Now, let’s address the elephant in the room: the challenges. Flat tires, inclement weather, fatigue – these are just a few of the common obstacles that cyclists can encounter. But don’t let these discourage you! There are solutions and preventive measures you can take.

A flat tire can be a nuisance, but carrying a repair kit with you can make it a minor hiccup rather than a major disruption. As for the weather, checking the forecast before you leave and packing appropriate gear can help you stay prepared. Fatigue, on the other hand, can be mitigated by proper nutrition, hydration, and rest, as mentioned earlier.

Remember, every cyclist faces challenges. What matters is how you deal with them. With the right preparation and mindset, you can turn these obstacles into just another part of your cycling adventure.

Maintenance and Care for Your Bike

Keeping your bike in optimal condition is not just about enhancing performance, but also about ensuring your safety. Regular maintenance helps you avoid unexpected breakdowns that could leave you stranded or even lead to accidents. So, what should you be on the lookout for?

Things like tire pressure, chain lubrication, and general check-ups are crucial. A tire with the correct pressure will make your ride smoother and faster. A well-lubricated chain, on the other hand, reduces friction and wear, thus prolonging the life of your bike’s drivetrain. Regular check-ups allow you to spot and fix potential issues before they become major problems.

Now, you might be wondering, “How often should I perform these maintenance tasks?” Good question. Let’s take a look at a simple guide:

Maintenance Task Frequency Why It’s Important
Checking tire pressure Weekly Ensures smooth and efficient rides
Lubricating the chain Monthly or after riding in the rain Reduces friction and wear
General check-ups Every 6 months Allows early detection and correction of potential issues

Benefits and Challenges of Bike Commuting

By now, we’ve covered quite a bit about the benefits of bike commuting. It’s cost-effective, eco-friendly, great for your health, and an excellent way to beat traffic. But let’s not overlook the fact that there can be challenges along the way.

Inclement weather, flat tires, and fatigue are just a few of the potential hurdles. But don’t let these deter you. With the right gear, a solid maintenance routine, and proper self-care, these challenges can be effectively managed.

Take the First Pedal Stroke

Ready to embrace bike commuting? Great! Remember, you don’t have to dive all in at once. Start with shorter routes, or try commuting by bike just a few days a week. As you gain confidence and stamina, you can gradually increase the distance and frequency.

To help you get started, here’s a handy checklist:

  • Get a suitable bike: Choose a bike that fits your commute in terms of distance and terrain.
  • Invest in essential gear: Helmet, lights, lock, and weather-appropriate clothing are a must.
  • Understand the rules of the road: Learn about cycling etiquette and traffic laws in your area.
  • Plan your route: Use maps or cycling apps to find the safest and most efficient route.

Looking for more information? Check out these resources:

  • Cycling organizations: Join a local cycling club or national organization for support and camaraderie.
  • Bike shops: Your local bike shop can provide expert advice and services.
  • Cycling apps: Apps like Strava or MapMyRide can help with route planning and tracking your progress.