Bike Fitting Basics: A Guide for Beginners
Are you an aspiring cyclist or a seasoned pro looking to enhance your riding experience? If so, then you’re in the right place. We’re about to dive into the world of bike fitting, a crucial aspect that any cycling enthusiast should not overlook. Bike fitting, in essence, is the process of adjusting a bike to fit the rider’s unique physique and riding style. Sounds simple, right? But it’s more than just adjusting a seat or handlebars. It’s about creating a harmonious relationship between you and your bike for a safer, efficient, and more enjoyable ride. Ever wondered why some cyclists seem so comfortable and efficient on their bikes while others struggle? The secret often lies in bike fitting.
Contents
The Meaning and Importance of Bike Fitting
Let’s start by unpacking what bike fitting really means. It’s the process of adjusting various components of a bike, such as the saddle, handlebars, and pedals, to align with the rider’s body dimensions and flexibility. This is crucial as it significantly reduces discomfort and the risk of injuries while riding. But that’s not all. A correct bike fit can also enhance your performance by maximizing your pedaling power and efficiency. Think of it this way: a well-fitted bike is like a well-tailored suit. It not only looks good but also feels great!
Things You Need to Consider Before Bike Fitting
Before you jump into bike fitting, there are a few factors you need to consider. Remember, bike fitting is not a one-size-fits-all scenario. It’s a personalized process that takes into consideration your body’s flexibility, your riding style, and personal preferences. For instance, a competitive road racer might need a different bike fit compared to a casual weekend rider. Why? Because their riding styles and objectives are different. It’s all about finding what works best for you.
Key Elements of a Bike Fit
So, what exactly goes into a bike fit? It’s not just about adjusting the seat to your height. There are several components that, when properly aligned, can make your ride smoother, more comfortable, and more efficient. Let’s break down these elements:
Bike Size
First things first, the size of your bike is absolutely crucial. But how do you know what’s the right size for you? Well, this largely depends on your height and body type. Riding a bike that’s too big or too small for you can not only be uncomfortable, but it can also lead to injuries and decreased performance.
So, take a moment to consider your body type. Are you tall with long legs? Or are you on the shorter side? These factors will influence the size of the bike that’s best for you. And remember, every bike brand can have slightly different sizing, so it’s always a good idea to check the manufacturer’s sizing chart.
Saddle Height and Position
Next up is the saddle height and position. This is so much more than just making sure your feet touch the ground when you’re at a standstill. The right saddle height and position can significantly improve your pedaling efficiency, reduce the risk of injury, and increase overall comfort.
But how do you find the right saddle height and position? It’s all about your leg extension. When your foot is at the bottom of the pedal stroke, there should be a slight bend in your knee. As for the position, your saddle should be parallel to the ground or slightly tilted downwards. Remember, every millimeter counts when it comes to saddle adjustment, so take your time with this.
Handlebar Position and Height
Let’s move on to handlebars. The position and height of your handlebars can greatly influence your control over the bike and your overall cycling experience. Too high, and you might find yourself leaning back too much. Too low, and you could end up hunching over.
The ideal handlebar position and height largely depend on your riding style and comfort. For a more relaxed, upright position, the handlebars should be higher. For a more aggressive, aerodynamic position, they should be lower. It’s all about finding a balance that works for you.
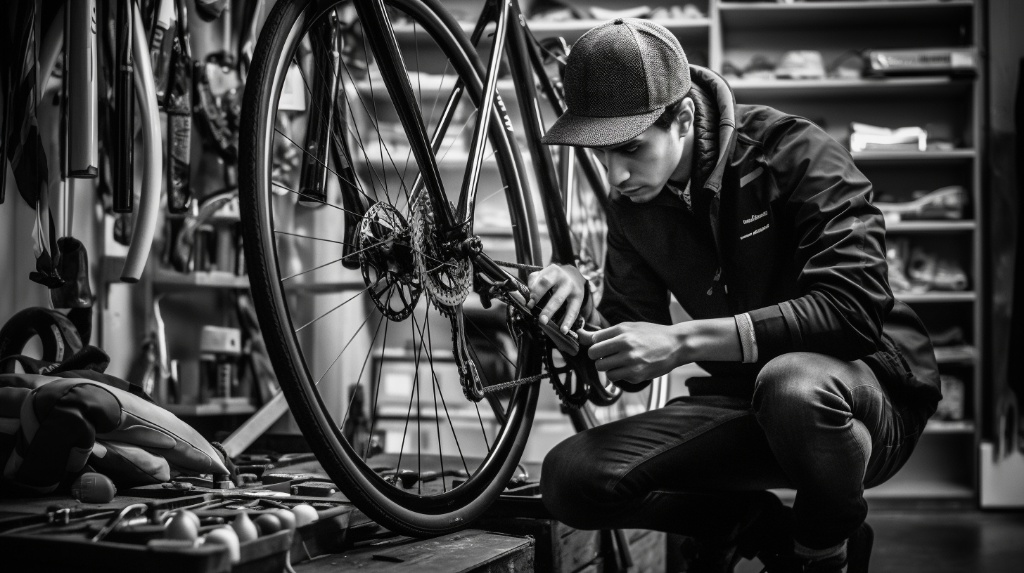
DIY Bike Fitting vs Professional Bike Fitting
Now that we’ve covered the key elements of a bike fit, you might be wondering if you should do it yourself or hire a professional. There’s no right or wrong answer here, as both have their own set of advantages and disadvantages.
DIY bike fitting can be a great way to understand your bike better and make adjustments as you ride. It’s also more cost-effective. However, it can be time-consuming and there’s always the risk of incorrect fitting.
On the other hand, professional bike fitting is more precise and can provide personalized advice based on your body type and riding style. But, it can be quite expensive and not everyone has access to a professional bike fitter.
So, which one should you choose? It ultimately comes down to your personal preference, budget, and access to resources. But remember, a well-fitted bike is key to a comfortable and enjoyable ride. So, why not give it a shot?
A Step-by-Step Guide to DIY Bike Fitting
Ever wondered how you could fit your bike at home, without having to visit a professional? Well, it’s quite possible and can be quite a fun and rewarding process. Let’s walk you through how you can do this.
First things first, you’ll need some basic tools – a bike stand, a plumb line, and a measuring tape. Ready? Let’s get started!
| Step | Description |
|---|---|
| 1 | Set your bike on the stand and ensure it’s stable. |
| 2 | Measure your inseam. This is the distance from your crotch to the floor. This measurement is critical for setting your saddle height. |
| 3 | Set the saddle height. A general rule is that your saddle height should be roughly 0.883 of your inseam measurement. Don’t forget to check the tilt of your saddle. It should be level to support your full body weight and allow you to move around on the seat when necessary. |
| 4 | Check the saddle fore/aft position. When your pedal is at 3 o’clock, a plumb line from your knee should fall directly over the pedal spindle. |
| 5 | Set the handlebar height and reach. Your handlebar should be as wide as your shoulders, and the reach should allow a slight bend in your elbows. |
| 6 | Finally, take a test ride to see how these adjustments feel. Make necessary tweaks until you find your perfect fit! |
Mistakes to Avoid When Fitting Your Bike
While fitting your bike can be a DIY task, there are some common mistakes you need to avoid. The first one is neglecting comfort. Remember, comfort is king when it comes to bike fitting. You should be able to ride your bike for a long time without feeling discomfort. Another common mistake is not considering your riding style. Are you a casual city cyclist or a hard-core mountain biker? Your bike fit should reflect this.
Also, don’t forget about your unique body proportions. Everybody is different, and what works for someone else might not work for you. And finally, remember that bike fitting is not a one-time job. As you ride more and your body changes, you might need to make further adjustments.
Proper Maintenance After Bike Fitting
Now that your bike fits you perfectly, how do you keep it that way? The key is regular maintenance. Just as you would regularly check your car or any other machine, your bike needs the same treatment.
Keep an eye on your bike’s components, especially the ones you’ve adjusted during the fitting. Make sure they remain in their correct positions and are properly tightened. You might also want to get a professional check-up once in a while to ensure everything is still in order.
Remember, a well-maintained bike not only lasts longer but also ensures a comfortable and safe ride every time. So, what are you waiting for? Grab your tools and start fitting!
Frequently Asked Questions about Bike Fitting
Got some burning questions about bike fitting? Don’t worry, you’re not alone. Here are some common queries that beginners often have, along with their answers.
- Q: What is the ideal saddle height for me?
A: The ideal saddle height varies from person to person. It depends on your leg length and riding style. A general rule of thumb is to adjust the saddle height so your knee is slightly bent when the pedal is at its lowest point. - Q: How often should I adjust my bike fit?
A: Your bike fit should be adjusted whenever there are significant changes in your physical condition, riding style or if you get a new bike. Otherwise, a yearly check-up should suffice. - Q: Can I do bike fitting by myself?
A: Yes, you can! However, it requires a good understanding of your body and the bike. If you’re unsure, it’s best to seek help from a professional. - Q: Does bike fitting help to prevent injuries?
A: Absolutely! A proper bike fit can help prevent overuse injuries caused by incorrect posture and alignment. - Q: Is bike fitting necessary for casual riders?
A: While competitive riders will see the most benefit, casual riders can also enjoy a more comfortable ride with a bike that fits well.
Final Thoughts on Bike Fitting
So, there you have it – the basics of bike fitting. Whether you’re a serious cyclist or just enjoy a leisurely ride now and then, a properly fitted bike can make a world of difference. It can make your rides more comfortable, more efficient, and more fun. Who wouldn’t want that?
Remember, you don’t have to figure it all out on your own. Whether you decide to DIY or get professional help, the most important thing is to ensure your bike is properly fitted to you. So, why not give it a try? Your body (and your bike) will thank you!