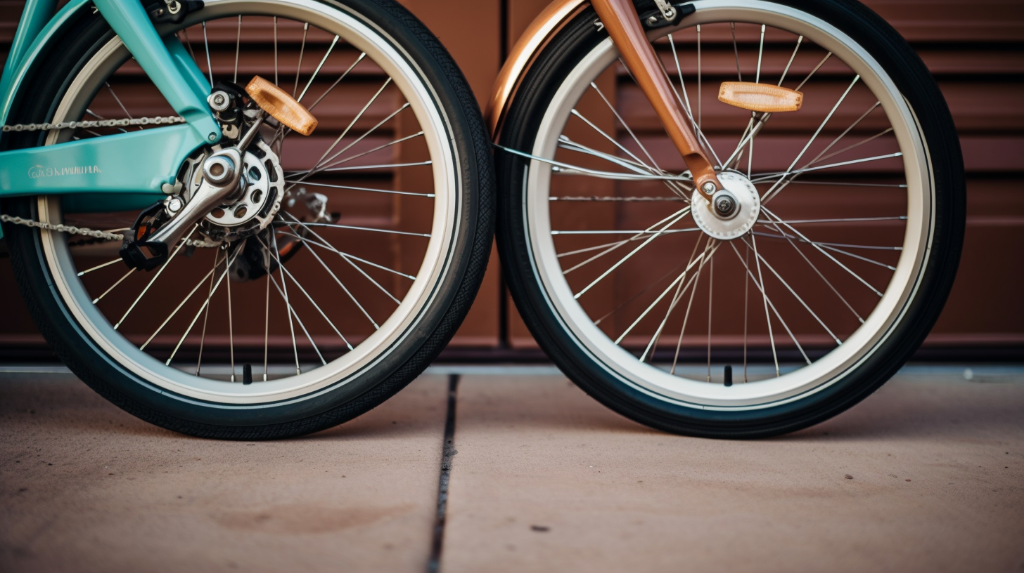
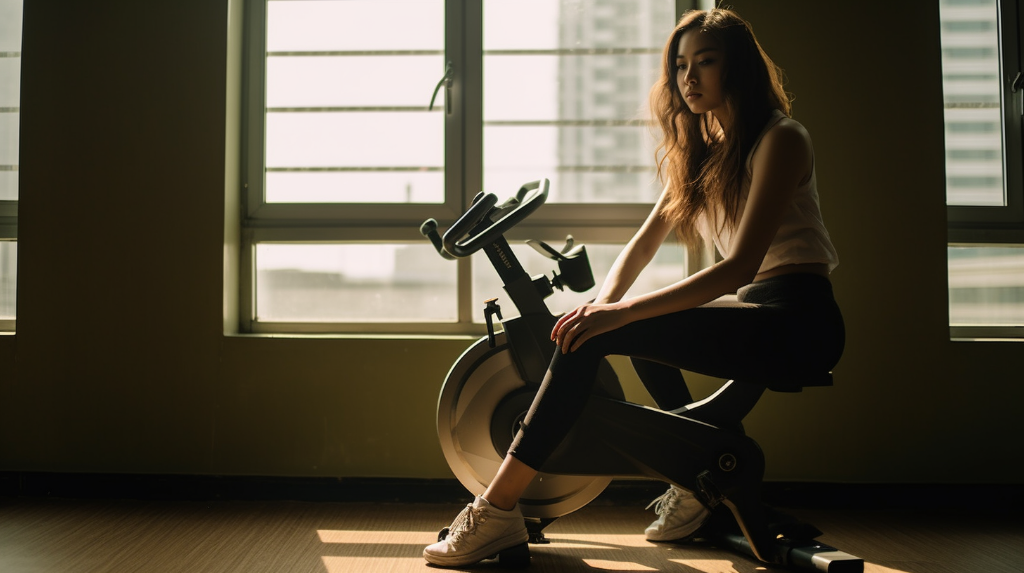
Setting Cycling Goals

Whether you’re a beginner cyclist or an enthusiast, setting cycling goals can be a game-changer for your experience on two wheels. Setting goals isn’t just for professional athletes; it’s for anyone who wants to see improvement, track progress, and get more enjoyment out of their hobby. It’s about making your cycling journey more personal and purposeful.

Imagine being able to measure your progress, improve your skills, and enjoy your rides even more – all because you took the time to set some goals. Sounds pretty good, right? Let’s get into it.

Why Setting Goals is Important in Cycling

Now, you might be thinking, “Why should I bother setting goals for cycling? I’m not trying to compete in the Tour de France!” Well, setting goals in cycling, just like in any other area of life, brings a slew of benefits.

Firstly, goal setting is a fantastic way to track your progress. It gives you a clear idea of where you’re at and how far you’ve come. Secondly, it helps to keep you motivated. When you have a goal in mind, you’re more likely to push through those tough moments and keep pedaling. Lastly, setting goals can lead to significant improvements in your cycling skills and overall experience. You’re not just aimlessly riding around – you’re working towards something, and that’s powerful.

Different Types of Cycling Goals

So, what kind of cycling goals can you set? The beauty of it is that you can tailor your goals to suit your preferences, fitness level, and personal ambitions. Here are a few examples:

  • Distance goals: This could be anything from cycling a certain number of miles in a week or month, or completing a long-distance ride or tour.
  • Speed goals: Maybe you want to increase your average speed over a particular distance, or beat your personal best time on a favorite route.
  • Frequency goals: This could involve committing to a certain number of rides per week, no matter the distance or speed.
  • Event participation goals: Perhaps you have your sights set on completing a charity ride, gran fondo, or even a race.

Each type of goal carries its benefits, from improving endurance and speed to building consistency and taking part in community events. The key is to choose goals that inspire and motivate you, and most importantly, make cycling more enjoyable for you.

How to Set Effective Cycling Goals

Setting goals is a crucial part of any endeavor, cycling included. But how can one set goals that are not only challenging but also achievable and relevant? The answer lies in the SMART goal-setting method. SMART stands for Specific, Measurable, Achievable, Relevant, and Time-bound. These five elements can serve as a roadmap to successful goal setting in cycling.

Specific Goals in Cycling

Specificity is key when setting goals. Instead of saying “I want to cycle more,” try something like “I want to cycle 30 miles every week.” This gives you a clear, precise target to aim for. The more specific your goal, the easier it is to plan for and achieve. So, what are your specific cycling goals? Let’s make them clear and detailed, shall we?

Measurable Goals in Cycling

Goals should also be measurable. This means that you should be able to track and quantify your progress towards achieving them. For example, if your goal is to cycle 30 miles every week, you can easily measure your progress by keeping track of the miles you cycle each day. This allows you to see how close you are to achieving your goal, which can be a great motivator. So, think about it, wouldn’t it be satisfying to watch your progress unfold?

Achievable Goals in Cycling

Achievable goals are realistic and within your abilities. They should be challenging enough to motivate and push you, but not so difficult that they discourage you. If you’re a beginner, setting a goal to cycle a 100-mile race within a month might not be achievable. Instead, you could start with a smaller, more achievable goal, like cycling 10 miles without stopping. Remember, the aim is to set goals that stretch your abilities but are still within your reach. So, are you ready to challenge yourself?

Overcoming Obstacles in Achieving Cycling Goals

Every journey has its hurdles, and the road to achieving your cycling goals is no exception. You might encounter physical challenges such as fatigue, or mental ones like lack of motivation. The key to overcoming these obstacles is to anticipate them and have a plan in place to deal with them. This could involve mixing up your training routine to keep it interesting, or finding a cycling buddy to keep you motivated. Remember, every challenge is an opportunity for growth. So, what challenges will you overcome on your cycling journey?

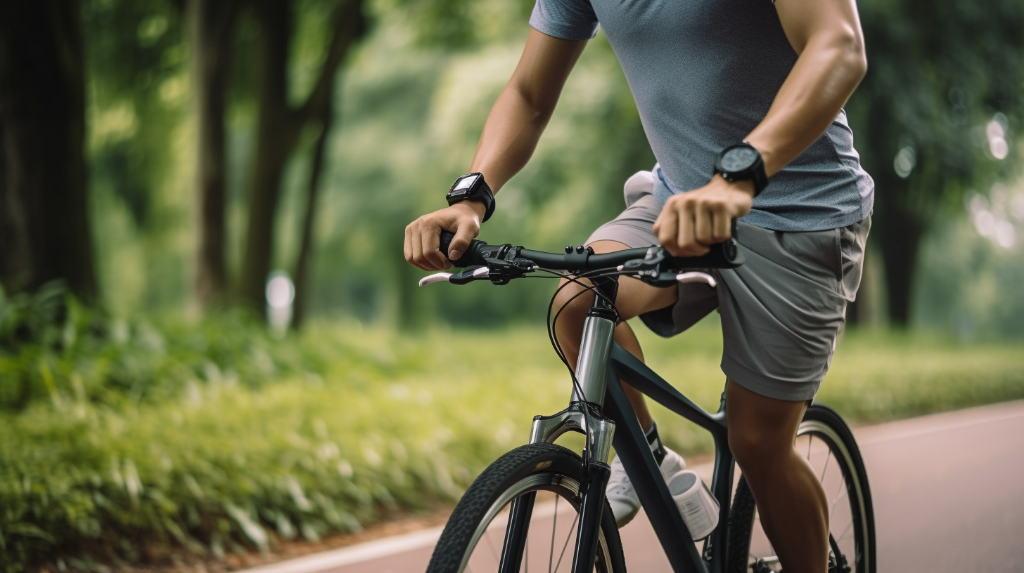
Tracking Your Cycling Progress

Ever wondered why tracking your progress is crucial in achieving your cycling goals? Well, monitoring your progress is like having a map that guides you towards your goal. It helps you stay on track, see how far you’ve come, and identify areas for improvement. It also provides a sense of accomplishment and motivation as you see yourself moving closer to your goal.

There are various tools and methods cyclists can use to track their progress, such as cycling apps, physical logs, or fitness trackers. These tools can help you record your cycling stats, analyze your performance, and even provide personalized training plans based on your progress.

But with so many options available, how do you choose the right tool for you? Here’s a table to help you compare different cycling apps and fitness trackers.

Tool Key Features Benefits Price
Strava GPS tracking, performance analysis, social networking Accurate tracking, detailed analysis, motivation from social features Free, premium version available
Garmin Connect GPS tracking, heart rate monitoring, sleep tracking Comprehensive tracking, health monitoring, syncs with Garmin devices Free, requires Garmin device
Fitbit Step counting, sleep tracking, heart rate monitoring All-round fitness tracking, easy to use, syncs with Fitbit devices Free, requires Fitbit device

Celebrating Your Cycling Achievements

Have you ever thought about how rewarding it feels when you celebrate your achievements? It’s like giving yourself a pat on the back for a job well done. Celebrating your cycling achievements, no matter how small, is a crucial part of fostering motivation and enthusiasm towards cycling. It recognizes your hard work, boosts your confidence, and motivates you to strive for more.

There are countless ways to celebrate your successes. You might treat yourself to a new cycling gear, share your achievement with friends and family, or even take a well-deserved rest day. Remember, every achievement is worth celebrating, so don’t be shy to give yourself some credit!

Adapting Your Cycling Goals

Have you ever stopped to consider the dynamic nature of your cycling goals? Life happens, and our goals need to be flexible enough to accommodate these changes. Whether you’ve just achieved a milestone, encountered an unforeseen setback, or experienced a shift in your personal circumstances, it’s essential to reassess and adjust your goals accordingly.

Perhaps you’ve just completed your first 50-mile ride, or maybe you’ve had to take some time off due to an injury. In either case, it’s an excellent opportunity to reflect on your goals. Are they still relevant and challenging? Do they still align with your current circumstances and aspirations? If not, don’t be afraid to make the necessary adjustments. Remember, the ultimate goal is to keep you engaged and motivated in your cycling journey.

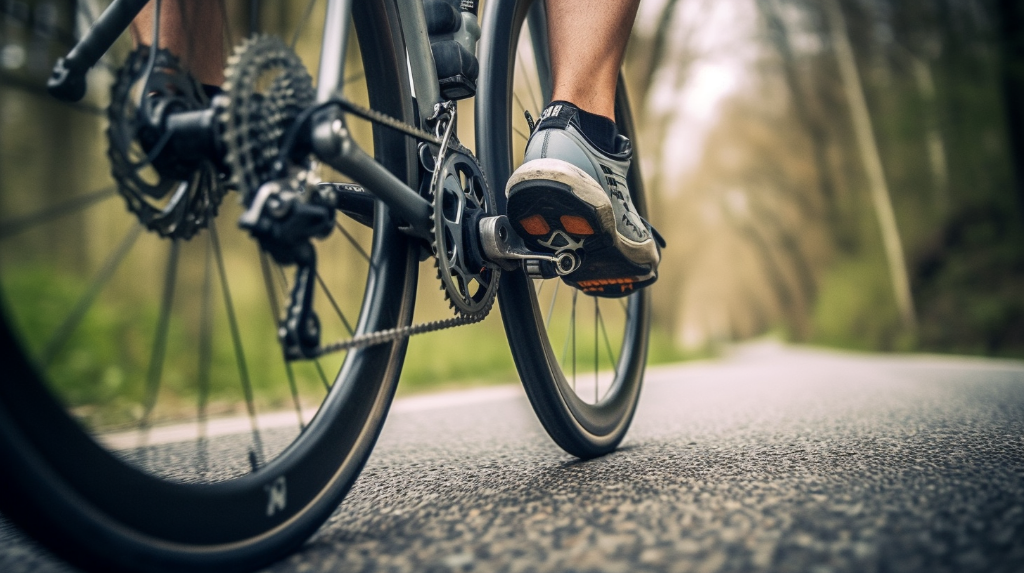
Maintaining Cycling Motivation

It’s one thing to set a goal; it’s another to maintain the motivation required to achieve it. Cycling, like any other pursuit, can sometimes feel like a grind, especially when we hit inevitable roadblocks. So, how can we keep our spirits high and the wheels turning?

Here are a few tips:

  • Find a cycling group: There’s strength in numbers. Joining a cycling group not only provides a sense of community but also offers a platform for shared experiences, encouragement, and healthy competition.
  • Participate in races: Races are not just for competitive cyclists. They can be a fun and exciting way to test your skills, track your progress, and meet other cycling enthusiasts.
  • Incorporate variety into your routines: Break the monotony by exploring new routes, incorporating different cycling styles, or even trying out other complementary activities like yoga or strength training.

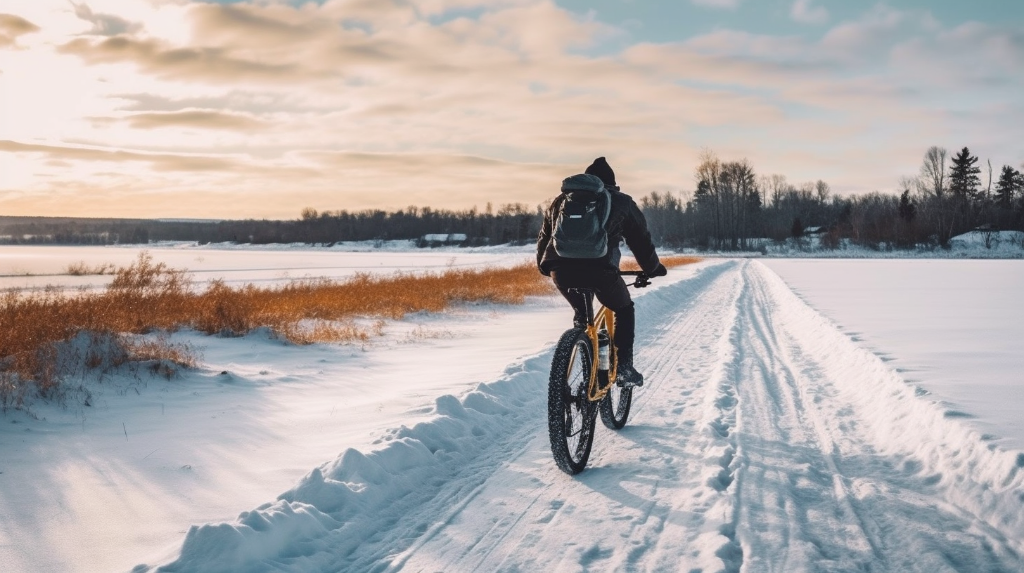
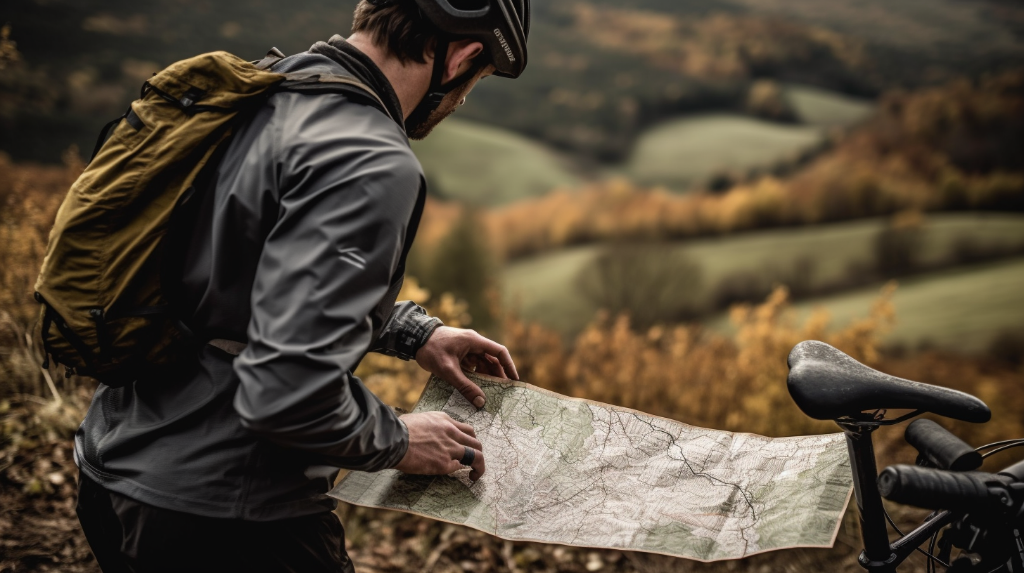
Looking to the Future: Long-term Cycling Goals

While short-term goals provide immediate targets and keep our motivation high, long-term goals give us a broader perspective and a bigger picture to work towards. They represent our ultimate aspirations as cyclists, whether it’s completing a cross-country trip, participating in a 100-mile race, or making cycling a lifelong habit.

Here are some long-term cycling goals you may want to consider:

  • Complete a century ride (100 miles)
  • Participate in a multi-day cycling event
  • Commute to work by bike at least once a week
  • Plan and execute a bike touring vacation
  • Make cycling a regular part of your fitness routine

Remember, these are just ideas. Your long-term goals should reflect your own personal passions and aspirations in cycling. So, what’s your cycling dream?

Clipless Pedals vs Flat Pedals: Which is Better?

When it comes to cycling, whether for fitness or as a hobby, the type of pedal you choose can play a pivotal role. They are the interface between your feet and the bike, translating your energy into motion. In this post, we will explore the differences between clipless and flat pedals, two popular options, and discuss why your choice matters. So, if you’re a novice cyclist, this is an important read for you!

Ready to learn more about the world of cycling pedals? Let’s pedal on!

Understanding the Basics: What are Clipless and Flat Pedals?

Before we dive into the debate, let’s set the stage with some definitions. Clipless pedals are a type of bicycle pedal that secures your foot to the pedal using a cleat and spring mechanism. Despite the name, ‘clipless’ pedals actually ‘clip in’ your shoes, holding them firmly in place.

On the other hand, flat pedals, also known as platform pedals, are the simplest type of pedal, with a flat surface for your foot to rest on. They do not secure the foot and are often used with regular shoes. They are popular for casual cycling and are often seen on mountain bikes and BMX bikes.

Why Pedal Type Matters in Cycling

Now, you might be thinking, “It’s just pedals, how much difference can it really make?” Well, the type of pedal you choose can significantly affect your cycling experience.

Pedals influence the contact point between your foot and the bike, affecting your control, speed and comfort. Different pedal types can lead to different cycling techniques, which can impact your performance and safety. So, choosing the right pedal isn’t just a matter of preference, it’s a key aspect of your cycling setup.

The Benefits of Clipless Pedals

When it comes to the world of cycling, the type of pedals you choose can have a significant impact on your overall performance and experience. But have you ever wondered why so many professionals opt for clipless pedals?

Better Energy Transfer with Clipless Pedals

One of the primary advantages of clipless pedals is the superior energy transfer they offer. The design of clipless pedals allows your feet to connect directly to the pedals. This connection ensures that every ounce of energy exerted through your legs is transferred to the bike, enhancing your speed and efficiency. Can you imagine the difference it could make on a long-distance ride?

Improved Cycling Posture and Technique

Another fantastic benefit of clipless pedals is their ability to promote better cycling posture and technique. When you’re securely clipped into your pedals, you have more control over your bike, which helps maintain a proper and consistent posture. This not only aids in reducing the risk of injury but also in enhancing your cycling performance. Isn’t it incredible how a small change can lead to a big difference?

The Drawbacks of Clipless Pedals

While clipless pedals offer great benefits, they also come with a few drawbacks that are worth considering.

One of the main disadvantages of clipless pedals is the learning curve involved. It takes time to get used to clipping in and out of the pedals, especially during crucial moments like stopping at a traffic signal or navigating through tricky terrains. The last thing you want is to be stuck to your bike when you need to get off quickly, right?

Furthermore, the potential for injury can be higher with clipless pedals. If not unclipped properly, they can lead to falls, which might result in injuries. Therefore, it’s essential to practice using clipless pedals in a safe environment before hitting the busy roads or challenging trails.

The Advantages of Flat Pedals

Have you ever considered the benefits that flat pedals offer? Let’s dig into why many cyclists, especially beginners, prefer using flat pedals.

Ease of Use for Beginners

One of the main reasons why flat pedals are so popular, especially among novice cyclists, is their simplicity. Flat pedals are straightforward and easy to use. There’s no need to worry about the complex mechanisms associated with clipless pedals. You just place your foot on the pedal and start pedaling. It’s as simple as that! This ease of use can make the learning process smoother and more enjoyable for beginners.

Increased Safety for Casual Riders

Another key advantage of flat pedals is their potential to enhance safety, particularly for casual riders and those who frequently stop and start. With flat pedals, you can easily remove your foot from the pedal without any delay. This quick foot release can be particularly useful when you need to stop abruptly, reducing the risk of falls and accidents. So, are you a casual rider who prioritizes safety? If so, flat pedals might be your best bet!

The Drawbacks of Flat Pedals

Despite the benefits, flat pedals are not without their drawbacks. It’s important to understand these potential disadvantages before making your pedal choice.

One of the main drawbacks of flat pedals is that they can lead to less efficient energy transfer. Unlike clipless pedals, which allow for power transfer on both the upstroke and downstroke, flat pedals only provide power on the downstroke. This lack of efficiency can affect your speed and endurance, especially on longer rides.

Another potential downside of flat pedals is that your foot can slip off the pedal, particularly in wet or muddy conditions. This can disrupt your rhythm and even lead to injuries. So, if you’re planning on cycling in challenging conditions or aiming for high speeds, you might want to think twice about choosing flat pedals.

How to Choose Between Clipless and Flat Pedals

So, you’ve learned about both clipless and flat pedals, but how do you know which one is right for you? It’s not a one-size-fits-all answer, my friend. It depends on several factors including your experience level, cycling goals, and the typical conditions you ride in. Are you a beginner or a seasoned cyclist? Your answer could steer you in the direction of flat pedals or clipless ones.

Do you cycle for leisure or are you training for a race? Your goals matter. Leisure cyclists may prefer the simplicity of flat pedals, while those seeking efficiency might opt for clipless pedals. Lastly, consider your typical riding conditions. Are you navigating city streets with frequent stops or are you mostly on open roads or trails? Your environment plays a pivotal role in your pedal selection.

Transitioning from Flat Pedals to Clipless Pedals

Moving from flat pedals to clipless can feel like a big step, but it doesn’t have to be intimidating. Start by getting comfortable with your new clipless pedals in a safe, controlled environment before hitting the open road. Practice clipping in and out until it feels second nature. Remember, it’s all about building confidence and muscle memory.

Keep in mind that it’s completely normal to experience a few falls while you’re getting used to clipless pedals. Don’t let this discourage you. With time, you’ll become more comfortable and the benefits of clipless pedals will start to shine through.

Clipless vs Flat Pedals: A Comparative Overview

Clipless Pedals Flat Pedals
Energy Transfer Highly efficient Less efficient
Learning Curve Steep Easy to learn
Safety Can be risky for beginners Safer for casual riders
Cycling Posture Improves posture Posture depends more on rider

Final Thoughts on Pedal Selection

Choosing between clipless and flat pedals isn’t a decision to take lightly. It’s a choice that can significantly impact your cycling experience. But remember, it’s not about which pedal type is better—it’s about which pedal type is better for you.

  • Consider your experience level and cycling goals
  • Take into account your typical riding conditions
  • Don’t rush the transition from flat to clipless pedals
  • Most importantly, choose the pedal type that makes you feel comfortable and confident on your bike

Tracking for Cycling Fitness

Have you ever considered taking up cycling as a hobby or a fitness routine? Well, it’s not just an enjoyable pastime, it’s also a fantastic way to keep fit and healthy. When you’re a beginner, tracking your cycling fitness can be a game-changer, helping you reach your fitness goals faster and more effectively. Imagine understanding your progress, setting realistic goals, and keeping your motivation high. Sounds great, right? Plus, with the right tracking strategies, your fun hobby can turn into a powerful tool for serious fitness improvement.

Why Track Your Cycling Activity?

So, why exactly is tracking your cycling activity important? Well, it’s all about understanding your performance and progress. When you track your workouts, you gain valuable insights into how you’re doing and where you can improve. This helps to set realistic fitness goals, and nothing boosts motivation like seeing your progress charted out in front of you.

The Basics of Cycling Metrics

Let’s talk about the basics of cycling metrics. These include measures like distance, speed, time, elevation gain, and heart rate. These numbers may seem simple, but they offer a wealth of information about your workout intensity and your overall fitness level. For instance, your heart rate can give you a glimpse into how hard your body is working, while your speed and distance can tell you about your endurance and strength. Pretty cool, right?

Beginners Guide to Cycling Equipment for Tracking

Now, let’s dive into the equipment you’ll need to track your cycling fitness. For beginners, some essential devices include heart rate monitors, speed and cadence sensors, and GPS navigation devices. Heart rate monitors, as the name suggests, track your heart rate, helping you understand the intensity of your workout. Speed and cadence sensors measure how fast and how far you’re going, while GPS devices help you navigate your routes and track your elevation gain. With these tools at your disposal, you’ll be well on your way to tracking your cycling fitness like a pro.

Exploring Different Tracking Methods

Let’s take a ride through the various ways you can track your cycling fitness. It’s fascinating to see how technology has evolved, providing us with high-tech tools like fitness apps and wearable devices. But don’t worry, we’re also going to remember the good old days and talk about traditional methods like cycling logs and simple observation.

Fitness Apps for Cyclists

Ever thought about your smartphone as a fitness tool? Well, today’s fitness apps have transformed our phones into powerful workout trackers. Apps like Strava, Endomondo, and MapMyRide can track your rides, analyze your performance, and even let you compete with other cyclists around the world. They use your phone’s GPS to record your distance, speed, and route. Some apps even offer personalized training plans and audio coaching. Sounds amazing, right?

These fitness apps make it easy to track your progress over time and see how you’re improving. Plus, they’re convenient – you’re probably bringing your phone on your rides anyway. However, keep in mind that running these apps can drain your battery, especially on longer rides.

Wearable Fitness Trackers

Thinking of taking your tracking to the next level? A wearable fitness tracker might be just what you need. These devices, worn on the wrist like a watch, can monitor various metrics like heart rate, calories burned, and sleep quality, in addition to cycling stats like speed and distance.

Popular models for cyclists include the Garmin Forerunner series and the Fitbit Charge. These devices offer continuous heart rate monitoring, GPS tracking, and even smartphone notifications. However, they can be more expensive than using a simple fitness app, and you’ll need to remember to charge them regularly.

How to Interpret Cycling Data

Now that we’ve talked about collecting cycling data, let’s discuss how to interpret it. After all, those numbers and charts won’t do you much good if you don’t know what they’re telling you.

Each cycling metric has its own significance. Distance and speed give you an overall picture of your performance on each ride. Time can help you see how long you’re able to maintain a certain pace. Elevation gain shows you how well you’re handling hills. And heart rate is a great indicator of how hard you’re working.

Remember, these metrics are most useful when you look at trends over time, rather than focusing too much on a single ride. Seeing your speed increase over several weeks, for example, can be a big morale boost. But don’t get discouraged if you have a slow day – we all do. The important thing is to keep pedaling!

Common Mistakes in Tracking Cycling Fitness

As much as tracking your cycling fitness can be beneficial, it’s also easy to fall into certain traps that may hinder your progress. Despite the best intentions, we may find ourselves focusing too much on the numbers and ignoring the equally important signals from our body. It’s crucial to strike the right balance between using data and tuning into your body’s needs.

Another common pitfall is neglecting the importance of rest days. Yes, you read it right! Rest days are as important as your active days. Over-training can lead to fatigue, burnout, and even injuries. Remember, fitness growth happens during recovery, not just during the workout itself.

  • Over-dependence on metrics: While metrics provide valuable feedback, over-reliance on them can lead to frustration and can take the joy out of cycling. Remember, not every ride has to be a race. Enjoy the ride!
  • Ignoring body signals: Metrics can’t tell you everything. Learn to listen to your body. If you’re feeling exhausted, it might be time to take it easy, regardless of what the numbers say.
  • Not taking enough rest: Rest days are crucial for recovery and growth. Don’t skip them in the pursuit of constant progress.

Setting Achievable Goals with Cycling Fitness Tracking

Setting goals is an essential part of any fitness journey, and cycling is no exception. But how do you set goals that are challenging yet achievable? Start with small, realistic targets based on your current fitness level and gradually increase them as you improve. Remember, the key is consistency, not intensity.

Setting short-term goals can be highly motivating as they provide immediate feedback and a sense of accomplishment. Long-term goals, on the other hand, provide direction and a bigger picture of where you want to be. It’s the balance of these two that keeps us motivated and focused.

Taking Cycling Fitness to the Next Level

So, you’ve got the basics down, and you’re ready to take your cycling fitness to the next level? Great! This is where things get really exciting. Advanced tracking methods can provide more detailed insights into your performance and help you fine-tune your training plans.

Power meters, for example, measure the actual effort you’re putting into your ride, regardless of external factors like wind or terrain. This can be a game-changer for serious cyclists looking to improve their performance.

Advanced training plans can provide a structured approach to your cycling fitness, ensuring that you’re progressively challenging yourself. And finally, working with a cycling coach can provide personalized guidance based on your specific strengths, weaknesses, and goals. It’s like having a personal fitness trainer, but for cycling!

Maximizing the Benefits of Cycling with Effective Tracking

Effective tracking in cycling is not just about numbers; it’s about understanding your progress, setting realistic goals, and pushing yourself to achieve them. Have you ever wondered how some cyclists seem to improve so quickly? The secret lies in effective tracking.

When you track your rides, you’re not just recording data. You’re learning about your strengths and weaknesses. You’re discovering what works best for you and what you need to improve. But most importantly, you’re creating a roadmap for your fitness journey. Isn’t that something worth investing time in?

Tracking Method Benefits
Fitness Apps Easy to use, provides a wealth of data, customizable, can connect with other fitness enthusiasts
Wearable Fitness Trackers Convenient, provides real-time data, can monitor heart rate and sleep patterns
Cycling Logs Simple, no technology required, can add personal notes and observations
GPS Navigation Devices Accurate tracking of routes, distance and speed, useful for off-road cycling
Heart Rate Monitors Provides data on workout intensity, useful for structured training

Embracing Cycling as a Lifelong Fitness Journey

Remember, cycling isn’t just a hobby—it’s a lifestyle. It’s a commitment to lifelong fitness and health. And tracking your progress is an integral part of this journey. With each ride, each hill climbed, each goal achieved, you’re not just becoming a better cyclist—you’re becoming a healthier, stronger version of yourself.

So, embrace the journey, and let effective tracking be your guide towards continuous improvement. After all, isn’t it exciting to see how far you’ve come and how much further you can go?

Brake Types: A Complete Guide

When it comes to cycling, one component that plays a crucial role is the bicycle brake. It’s not just about stopping your bike, but doing so safely and efficiently. Brakes are the unsung heroes of cycling, responsible for controlling speed, maintaining safety, and preventing accidents. In this blog post, we’re going to take a closer look at different types of bicycle brakes and understand their mechanics. So, are you ready to get a grip on your bike’s stopping power? Let’s dive in!

Why Brakes are Essential for Cycling

Have you ever thought about what happens when you squeeze the brake lever of your bike? It’s not just about bringing your bicycle to a halt; it’s about controlling your ride. Good brakes are essential for safe and efficient cycling. They allow you to manage your speed, navigate corners, and stop quickly when necessary. They can make the difference between a smooth ride and a sudden crash. Ever heard of the term ‘stopping distance’? It’s the distance your bike travels from the moment you apply the brakes to when it comes to a complete stop. Good brakes can drastically reduce this distance, ensuring your safety.

Understanding the Mechanism of Bicycle Brakes

Let’s break down the basics of how bicycle brakes work. When you squeeze the brake lever, it pulls a brake cable that is connected to the brake pad. This causes the brake pads to press against the wheel, creating friction, which slows down and eventually stops your bike. Simple, right? But, did you know there are different types of brakes that use this mechanism in unique ways? Let’s get into those details in the next sections.

Rim Brakes: The Classic

When it comes to bicycle brakes, Rim brakes are the quintessential classic. They have been around for a considerable amount of time and are still one of the most common types of bicycle brakes. But what makes them so popular? And are there any drawbacks to using them?

How Rim Brakes Work

Ever wonder how Rim brakes work? It’s actually quite simple. The brake pads, which are part of the brake, are designed to clamp onto the rims of the wheels when you apply pressure to the brake lever. This action creates friction, which in turn slows down the bike and eventually brings it to a stop. Sounds pretty straightforward, right?

But here’s the thing. While the mechanism is easy to understand, it requires the rims of your wheels to be in good condition. If your rims are damaged or if they’re wet or dirty, the effectiveness of your brakes can be significantly compromised.

Common Varieties of Rim Brakes

Rim brakes aren’t all the same. In fact, there are several different varieties, each with its own set of characteristics. The most common ones you’ll encounter are caliper brakes, cantilever brakes, and V-brakes.

Caliper brakes consist of a single unit that attaches to the bike via a central bolt, and they are common on road bikes. Cantilever brakes, on the other hand, have two separate brake arms and are often found on older mountain and cyclocross bikes. V-brakes, also known as linear-pull brakes or direct-pull brakes, are a type of cantilever brake that provides more power and is common on mountain bikes.

  • Pros of Rim Brakes:
  • They are typically lighter than disc brakes.
  • They are easier to repair and maintain.
  • You can visually check the wear on the brake pads.
  • Cons of Rim Brakes:
  • They may not perform well in wet or muddy conditions.
  • The braking surface wears out over time.
  • They require more hand strength to brake effectively.

Disc Brakes: The Modern Choice

Now let’s talk about a more modern option: Disc brakes. They’ve become increasingly popular in recent years, especially among mountain bikers and road cyclists. But why is that? What makes them a good choice?

How Disc Brakes Work

Disc brakes function differently from rim brakes. They use a metal disc, or “rotor,” attached to the wheel and a caliper that houses the brake pads. When you squeeze the brake lever, the brake pads in the caliper clamp onto the rotor to slow down the bike.

This mechanism allows for more consistent braking, especially in wet or dirty conditions, as the braking surface is away from the ground and the elements. However, they can be more challenging to maintain and adjust than rim brakes.

  • Pros of Disc Brakes:
  • They provide consistent braking in all conditions.
  • They don’t wear out the rims.
  • They offer better stopping power, especially in wet conditions.
  • Cons of Disc Brakes:
  • They can be more difficult to maintain and adjust.
  • They are typically heavier than rim brakes.
  • They can be more expensive.

Drum Brakes: The Old Reliable

Have you ever heard of Drum brakes? While they might not be as common as Rim or Disc brakes, they have stood the test of time and proven to be a reliable choice for many cyclists.

Drum brakes work by applying pressure to a drum inside the hub of the wheel. When the brake lever is squeezed, it pulls a cable that operates the brake shoes. These shoes then press against the inside of the drum, slowing down the bike. It’s a simple but effective mechanism.

One of the primary advantages of Drum brakes is their longevity. They are enclosed within the wheel hub, which protects them from dust, dirt, and water. This means they require less maintenance and tend to last longer than other brake types. Plus, they perform well in all weather conditions, making them a great choice for those who cycle in variable climates.

However, Drum brakes do have some downsides. They are heavier than other types of brakes, which can add to the overall weight of the bike. They also might not offer the same level of stopping power as Disc or Rim brakes, especially at high speeds.

Coaster Brakes: For the Casual Riders

Next, let’s talk about Coaster brakes. Also known as ‘back-pedal brakes’, these are often found on casual bikes, city bikes, and children’s bikes.

The mechanism of Coaster brakes is quite unique. Unlike other types where you squeeze a lever to operate the brakes, with Coaster brakes, you simply pedal backwards. This action engages the brake shoes, slowing down the bike.

One of the main advantages of Coaster brakes is their simplicity. They are easy to use and require little to no maintenance. This makes them an excellent choice for casual riders or children who are just learning to cycle. Plus, because the braking system is entirely contained within the bike’s hub, it’s protected from weather and wear.

However, Coaster brakes might not be suitable for everyone. Since they only function on the rear wheel, they don’t provide as much stopping power as other brake types. They also don’t allow for ‘feathering’ of the brake, which is a technique often used by more advanced cyclists.

A Comparison of Brakes

Brake Type Pros Cons
Rim Brakes Lightweight, affordable, easy to maintain Reduced performance in wet conditions, wears out the wheel rim
Disc Brakes Excellent stopping power, performs well in all weather conditions More expensive, heavier, more complex to service
Drum Brakes Long-lasting, low maintenance, good for all weather conditions Heavier, not as strong stopping power at high speeds
Coaster Brakes Simple to use, low maintenance, good for casual riders Lower stopping power, doesn’t allow for feathering of the brake

Factors to Consider When Choosing Brakes

When it comes to choosing the right brakes for your bike, there’s a lot more to consider than you might think. These factors can make a significant difference in your overall cycling experience. Are you ready to find out what they are?

Firstly, consider the type of cycling you’ll be doing. Are you a mountain biker, a road cyclist, or do you simply enjoy casual rides around the park? Different types of cycling require different braking systems. For instance, disc brakes are often favored by mountain bikers due to their superior stopping power, even in wet conditions.

Speaking of weather conditions, that’s another crucial factor to consider. If you frequently cycle in wet or muddy conditions, disc brakes can be a solid choice due to their resistance to these elements. On the other hand, if your rides are mostly in dry conditions, rim brakes could serve you just fine.

Maintenance needs and personal preference also play a part in your decision. Some brakes require more upkeep than others, so consider how much time and effort you’re willing to put into brake maintenance. And of course, your personal preference matters. You have to feel comfortable and confident with your brakes, so choose a system that feels right for you.

How to Maintain Your Bicycle Brakes

Once you’ve chosen your brakes, it’s vital to keep them in top shape. Why, you ask? Well, well-maintained brakes not only last longer but also ensure your safety while cycling. So, how do you go about maintaining your bicycle brakes?

Regular checks are a must. Make it a habit to visually inspect your brakes before each ride. Look for worn-out brake pads, loose cables, or any other signs of damage. If you notice anything unusual, it’s best to address it immediately to prevent any potential issues down the line.

Timely replacement of brake pads is also crucial. Over time, brake pads wear down and lose their effectiveness. Don’t wait until it’s too late; replace your brake pads as soon as you notice significant wear. This will ensure that your brakes continue to provide effective stopping power when you need it the most.

Final Thoughts on Bicycle Brakes

And there you have it, a complete guide to bicycle brakes! We’ve covered different types of brakes, how they work, their pros and cons, and even how to maintain them. But remember, the most important factor is choosing a braking system that suits your individual needs and ensuring its proper maintenance. After all, nothing beats a safe and enjoyable ride, right?

So, whether you’re a seasoned cyclist or a beginner looking to get into the hobby, we hope this guide has given you a better understanding of what to look for in bicycle brakes. Now, it’s time to hit the road (or trail) and enjoy the ride!

Understanding Cadence in Cycling

Have you ever heard of the term ‘cadence’ in cycling and wondered what it means? Well, you’re not alone. Cadence in cycling is a fundamental concept that every cyclist, whether novice or professional, should understand. It refers to the speed at which a cyclist pedals. But why is it so important? Cadence is crucial as it directly impacts your cycling performance and efficiency. In this post, we aim to shed light on all aspects of cadence in cycling, including how to find your optimal cadence and how to train for it. Ready to pedal smarter? Let’s get started!

The Basics of Cadence in Cycling

Before we go any further, let’s define cadence in cycling. Cadence is simply the rate at which a cyclist pedals, usually measured in ‘revolutions per minute’ (RPM). It’s not to be confused with speed or power, which are separate but related concepts. Why is cadence so important? Well, it’s all about efficiency. A higher cadence means you’re pedaling faster, but with less force, which can help reduce muscle fatigue. On the flip side, a lower cadence means you’re pedaling slower, but with more force, which can be more efficient in certain situations. The key is to find your optimal cadence – the one that maximizes your performance and efficiency.

Different Types of Cadences

Now that we’ve defined cadence, let’s look at the different types of cadences used in cycling. First, we have the low cadence, typically under 60 RPM. This is often used when climbing steep hills or when you want to conserve energy. Then we have the medium cadence, usually between 60 and 80 RPM. This is a comfortable range for most cyclists and is ideal for long-distance rides. Finally, we have the high cadence, above 80 RPM. This is often used during sprints or when you want to increase your speed. Different cadences can be used for different types of rides or terrains, and understanding when to use each one is a crucial part of becoming a more efficient cyclist.

Finding Your Optimal Cadence

Ever wonder how to find that sweet spot in your cadence that makes your ride smooth and efficient? Well, it’s not a one-size-fits-all answer. Your optimal cadence can vary depending on a multitude of factors such as your physical condition, the type of ride you’re embarking on, and even the bicycle you’re riding. The key is to listen to your body and understand your unique cycling rhythm.

Remember, there’s no ‘perfect’ cadence that applies to everyone. Some cyclists might find their sweet spot at a lower cadence while others might prefer a higher one. It’s all about finding what works best for you and your personal cycling style.

Tools to Measure Cadence

Now, you might be wondering, “How do I measure my cadence?” Well, there are several tools available that can help you monitor your cadence effectively. One such tool is a bike computer, which can provide real-time data about your cadence.

There are also smart devices, such as watches and sensors, that can be paired with apps to track your cadence and other cycling metrics. These tools can provide valuable insights into your cycling performance and help you find your optimal cadence.

The Role of Gearing in Cadence

Did you know that the gear ratio on your bicycle can significantly affect your cadence? It’s true! Understanding how to use your gears effectively can help you maintain an optimal cadence.

For instance, using a lower gear can allow you to pedal at a higher cadence with less resistance, which can be beneficial on steep climbs. On the other hand, a higher gear can make it harder to pedal but can help you maintain a lower cadence and higher speed on flat terrains. The key is to experiment with different gears to find what works best for you in different riding situations.

The Role of Cadence in Endurance Riding

Cadence isn’t just about speed; it’s also about endurance. Maintaining an optimal cadence can greatly enhance your energy efficiency, which is crucial for long-distance or endurance rides.

Think about it: If you’re pedaling too fast, you’re likely to tire out quickly. But if you’re pedaling too slow, you might not be able to maintain a steady speed. Finding the right balance can help you conserve energy and keep going for longer distances.

So, next time you’re planning a long ride, remember to pay attention to your cadence. It could be the key to your most efficient and enjoyable ride yet.

Training for Optimal Cadence

So, you’ve learned about cadence, understood its importance, and found your optimal rhythm. But how do you train for it? That’s what we’re going to explore in this section.

Training for optimal cadence isn’t about going all out from day one. It’s a gradual process that involves slowly increasing your cadence while ensuring that your body is comfortable with the new pedaling rhythm. This might seem challenging, but with a proper plan and perseverance, you can achieve it.

Remember, your cycling routine plays a significant role in your cadence training. It’s not just about isolated cadence exercises, but also about incorporating cadence work into your regular cycling sessions. Ready to get started? Let’s dive in!

Week Target Cadence Training Activities
1 60-70 rpm Regular cycling with focus on maintaining target cadence
2 70-80 rpm Include cadence drills in your routine, increase target cadence
3 80-90 rpm Incorporate hill climbs, continue cadence drills
4 90+ rpm Focus on maintaining high cadence during long rides

Common Cadence Mistakes and How to Avoid Them

As with any skill, there’s a learning curve when it comes to cadence. It’s easy to make mistakes, especially when you’re just starting out. But don’t worry, we’ve got you covered. Here are some common cadence mistakes and tips on how to avoid them:

  • Ignoring cadence: Cadence is an essential aspect of cycling. Ignoring it can lead to inefficient riding and potential injuries. Always be mindful of your cadence, try to maintain a steady rhythm, and adjust as necessary.
  • Overdoing it: While a higher cadence generally means more efficiency, there’s a limit. Pushing too hard can strain your muscles and lead to fatigue. Listen to your body and find a cadence that’s comfortable for you.
  • Forgetting about gears: Gears are your best friend when it comes to controlling cadence. Use them effectively to maintain your cadence, especially on different terrains.

Remember, the key to mastering cadence is practice and patience. Don’t rush it. With time and consistent training, you’ll see improvements.

The Connection Between Cadence and Cycling Speed

Have you ever wondered how cadence impacts your cycling speed? Well, let’s get into that.

It’s no secret that a higher cadence can often lead to a higher speed. It’s all about how fast you’re turning those pedals. But here’s the catch. While it might seem like the faster you pedal, the faster you’ll go, that’s not always the case. Why, you ask?

Simply put, pedaling faster can increase your speed, but only up to a certain point. After that, you might just be wasting energy. And that’s not something we want, right? So, while a higher cadence can potentially increase your speed, it’s essential to find your personal optimal cadence to ensure you’re cycling efficiently.

Cadence and Cycling Safety

Now, let’s talk about safety. Because, at the end of the day, no matter how fast you’re cycling, safety is paramount. But how does cadence come into play?

Maintaining a steady cadence can significantly enhance your road safety. It allows you to keep a consistent speed, making your movements more predictable for other road users. Plus, a proper cadence can also prevent injuries. How so?

By maintaining a steady and optimal cadence, you’re less likely to exert excessive pressure on your knees and joints. This reduces the risk of strain injuries, promoting a safer and healthier cycling experience.

Final Thoughts on Cadence for Novice Cyclists

If you’re a novice cyclist, understanding cadence is a game-changer. It’s not just about pedaling faster or slower. It’s about finding your optimal cadence to improve your performance, speed, and safety.

Remember, each cyclist’s optimal cadence may vary. It depends on your physical condition, the type of ride, your bike’s gear ratio, and other factors. So, take your time, experiment, and find the cadence that works best for you.

  • Understanding cadence is crucial for improving your cycling performance.
  • Higher cadence can lead to higher speed, but only up to a point.
  • Maintaining a steady cadence enhances road safety and prevents injuries.
  • Finding your optimal cadence is a personal journey. Take your time and experiment.

Benefits of Stretching and Strength Training

As a cyclist, it’s crucial to have a well-rounded fitness routine that goes beyond just pedaling. Incorporating both stretching and strength training into your routine can result in significant improvements in your cycling performance. Not only can these exercises enhance your endurance, but they can also help reduce the risk of injuries. Sounds like a win-win, doesn’t it?

Even better, they can play a key role in improving the power of each pedal stroke, making your rides smoother and more efficient. Let’s not forget the added bonus of accelerating your recovery post-ride. Ready to take your cycling to the next level?

Here’s a novice cyclist, demonstrating the importance of a good stretch before a ride.

Understanding the Roles of Stretching and Strength Training

So, what exactly do stretching and strength training bring to the table? Well, stretching is all about enhancing flexibility and range of motion in your muscles. This increased flexibility can help you ride more effectively, reducing muscle tension and enabling smoother, more fluid movements.

In contrast, strength training is all about, well, strength! It can boost your power and endurance, making those uphill climbs a little less daunting. Think of it as giving your muscles an extra dose of oomph. Intrigued?

The Benefits of Stretching for Cyclists

Stretching isn’t just reserved for yoga enthusiasts. It plays a crucial role in cycling too. For one, it can help prevent muscle stiffness and strain, keeping those post-ride aches and pains at bay. But that’s not all.

Regular stretching can also improve your body posture and coordination, making you more comfortable and efficient on your bike. Plus, it can accelerate your recovery post-ride, helping you get back in the saddle sooner. Who wouldn’t want that?

Stretch Exercises for Novice Cyclists

Just getting started with cycling? That’s great! But before you hit the road, it’s important to prepare your body for the ride ahead. Stretching is a vital part of any fitness routine, especially for cyclists. It improves your flexibility, which in turn, enhances your cycling performance.

So, what stretches should you, as a beginner, be doing? Let’s take a look at some simple and effective stretching exercises that you can incorporate into your routine.

  • Hamstring Stretch: Sit on the ground with one leg extended out and the other folded in. Reach for your toes on the extended leg. Hold for 15-30 seconds and then switch legs.
  • Quadriceps Stretch: Stand straight and bend your knee, bringing your heel towards your buttock. Use your hand to hold the ankle. Hold for 15-30 seconds and then switch legs.
  • Calf Stretch: Stand at arm’s length from a wall. Place one foot behind the other. Bend your front knee and keep your back knee straight, heel on the ground. Lean into the wall until you feel a stretch in your back leg. Hold for 15-30 seconds and then switch legs.

Best Time to Stretch

There’s a bit of debate in the fitness community about when the best time to stretch is. Should you stretch before you hop on the bike, or after your ride? Well, the answer is both.

Pre-ride stretching helps to warm up your muscles and prepare them for the ride. On the other hand, post-ride stretching helps to cool down your body and reduce muscle stiffness.

Remember, the key is to keep your pre-ride stretching routine light and save the more intensive stretches for after the ride.

Common Stretching Mistakes to Avoid

As a beginner, it’s easy to fall into some common stretching pitfalls. But don’t worry, we’re here to guide you through it.

One common mistake is bouncing while stretching. This can lead to a muscle pull or strain. Instead, hold your stretches steady.

Another common error is not holding the stretch long enough. For maximum benefit, each stretch should be held for at least 15 seconds.

Finally, avoid stretching a cold muscle. Always warm up before stretching to increase blood flow to the muscles and make them more flexible.

The Benefits of Strength Training for Cyclists

Ever wondered how you can enhance your cycling power and speed? Well, strength training is your answer! Strength training is not just about bulking up. In fact, it plays a crucial role in improving your overall body strength, promoting better balance and stability, and enhancing your cycling speed and power.

As you build muscle through strength training, you’re essentially building a stronger engine, which can help you cycle faster and for longer periods. Additionally, stronger muscles can better support your joints, which can reduce your risk of injury. It’s a win-win situation, isn’t it?

Strength Training Exercises for Novice Cyclists

Now that you know the benefits, let’s talk about the how. Here are some effective strength training exercises that beginners can do. These exercises specifically target the key muscles used in cycling, namely the quadriceps, hamstrings, calves, and core.

  • Squats: A full-body exercise that primarily targets your quadriceps, hamstrings, and glutes.
  • Lunges: Great for working on your balance and stability while also strengthening your lower body.
  • Planks: This is a core exercise that strengthens the entire abdominal region and improves your balance.

Remember, the key here is to perform each exercise correctly. Incorrect form can lead to injuries and won’t give you the results you’re looking for. So, take your time, start with lighter weights, and gradually increase the intensity as you get stronger.

How to Incorporate Stretching and Strength Training into Your Cycling Routine

So, how can you mix stretching and strength training into your cycling routine without feeling overwhelmed? Here are some practical tips:

  • Plan your week ahead: Schedule regular strength training sessions, and make sure to include a light stretching session both before and after cycling.
  • Balance is key: Don’t forget to balance your training with proper rest and nutrition. Your muscles need time to recover and grow after a workout.
  • Stay consistent: Consistency is key in seeing results. So, even if you can only spare a few minutes a day, make sure to stick to your routine.

Remember, it’s about making small, sustainable changes that you can maintain in the long run. So, don’t be too hard on yourself, and enjoy the process!

The Importance of Consistency and Progression

Ever heard the phrase, “Consistency is key”? In the realm of fitness, especially stretching and strength training for cyclists, this saying couldn’t be more true! Regularity in your fitness routine is what fuels improvement and brings about desired results. But, it’s not just about doing the same exercises day in and day out. It’s about ensuring a gradual progression in your training regimen.

What does that mean, you ask? Well, it means that as you grow stronger and more flexible, you should continually challenge your body by increasing the intensity, duration, or complexity of your exercises. This could be adding more weight to your strength training routine, holding your stretches for a longer period, or trying out more advanced exercises. But remember, this progression should be gradual to avoid the risk of injuries. It’s a delicate balance, isn’t it?

Overcoming Common Challenges in Stretching and Strength Training

While we all have the best intentions when it comes to maintaining a regular workout routine, we often find ourselves facing certain roadblocks. These could be lack of time, dwindling motivation, or simply not knowing the correct form for certain exercises. But don’t worry, we’ve all been there, and there are practical solutions for each of these challenges!

Struggling with time management? You could try waking up a bit earlier to get in a quick workout before you start your day, or use lunch breaks for a quick stretching session. Motivation running low? Consider setting specific, measurable goals or finding a workout buddy to keep you accountable. Unsure about the correct exercise forms? Don’t hesitate to seek help from a professional trainer or reliable online resources. Remember, it’s about making fitness a lifestyle, not a chore!

Day Cycling Stretching Strength Training
Monday 30 minutes moderate intensity 10 minutes post-ride 20 minutes upper body
Tuesday Rest 15 minutes gentle full-body Rest
Wednesday 45 minutes high intensity 10 minutes pre-ride, 10 minutes post-ride 20 minutes lower body
Thursday Rest 15 minutes gentle full-body Rest
Friday 30 minutes moderate intensity 10 minutes post-ride 20 minutes core
Saturday 60 minutes low intensity 10 minutes pre-ride, 10 minutes post-ride Rest
Sunday Rest 15 minutes gentle full-body Rest

In Conclusion – A Balanced Approach to Cycling Fitness

In conclusion, a well-rounded cycling fitness routine should include both stretching and strength training. But remember, the key to reaping the benefits of these exercises lies in consistency and gradual progression. It’s important to start small, respect your body’s limits, and gradually increase the intensity as your strength and flexibility improve.

Yes, there might be challenges along the way, but with a determined mindset and the right strategies, they can be overcome. So, are you ready to take a balanced approach to your cycling fitness? It’s never too late to start!

How to Do Basic Bike Repairs

Are you a novice cyclist who’s looking to enhance your cycling experience? Well, learning basic bike repairs is a great place to start. Not only does it add to your skill set as a cyclist, but it also saves you a few bucks and a trip to the bike repair shop. Plus, it’s a fantastic way to get to know your bike better. This post will guide you through the essentials of bike repair, from understanding your bike’s parts to maintaining your bike chain. So, are you ready to become your own bike mechanic?

Understanding Your Bike and Its Parts

Before you dive into repairing your bike, it’s essential to understand your bike and its parts. Each part of your bike has a unique function, and knowing what each part does will make your repair work much easier.

The main parts of your bike include the frame, the wheels, the drivetrain (which includes parts like the pedals, chain, and gears), the handlebars, and the saddle. It’s like getting to know the anatomy of your bike. This knowledge will not only help you in repair work but also in maintaining your bike and enhancing its longevity.

Essential Bike Repair Tools to Have

Just like a doctor needs their medical kit, a bike mechanic needs their repair tools. Having the right tools can make a world of difference when you’re trying to fix a problem on your bike.

Some of the must-have tools include multi-tools, which are compact and handy for various tasks, tire levers for replacing tires, patch kits for mending punctured tubes, and wrenches for tightening and loosening bolts. Investing in these tools is a wise decision that will serve you well in the long run.

Common Bicycling Issues and How to Fix Them

Before we get started on any repairs, it’s crucial to identify the problem first. Isn’t it easier to fix something when you know what’s wrong? So, let’s dive into some common cycling issues and their solutions.

Dealing With Flat Tires

One of the most common problems cyclists face is flat tires. But don’t worry, changing a bike tire is a skill you can master with a little practice. First, you’ll need to remove the wheel from your bike. This can usually be done by loosening the wheel’s axle nuts or quick-release mechanism.

Next, use a tire lever to pry off one side of the tire from the rim. Pull out the old tube, then check the inside of the tire and the rim for any sharp objects that could have caused the flat. If found, remove them carefully.

Now, it’s time to put in the new tube. Partially inflate it, then place it inside the tire and carefully fit the tire back onto the rim. Once it’s in place, you can fully inflate the tube to the correct pressure. And there you have it, you’ve successfully changed a bike tire!

But what if the tube isn’t totally ruined and just has a small puncture? That’s where a patch kit comes in handy. Simply locate the hole, roughen the area around it with the sandpaper provided in your kit, apply the adhesive, and then stick on the patch. Wait for it to dry and you’re good to go!

Adjusting the Brakes

Ever felt like your brakes aren’t as responsive as they used to be? It’s probably time to adjust them or replace the brake pads. To adjust the brakes, you’ll need to loosen the bolt that holds the brake cable, pull the cable tighter until you’re satisfied with the brake’s response, and then tighten the bolt again. Simple, isn’t it?

On the other hand, replacing brake pads is slightly more complex but still doable. First, remove the old brake pads. They’re usually held in place by a small bolt. Once you’ve removed them, attach the new brake pads, making sure they line up with the rim of the wheel. And voila, you’ve got yourself a bike with fresh and responsive brakes!

Maintaining Your Bike Chain

Maintaining your bike chain is essential for a smooth and efficient ride. Remember, a well-maintained chain results in better performance and longer lifespan for your bike. But how do you do it?

Cleaning and lubricating your bike chain is a good place to start. You can clean your chain by using a chain cleaning device or a simple old toothbrush and some degreaser. Once the chain is clean, make sure to dry it thoroughly before applying lubricant. The lubricant helps to reduce friction and wear, leading to a smoother ride and longer chain life.

But what about replacing the chain? While it might sound daunting, it’s actually quite straightforward. If your chain is excessively worn out or damaged, it’s time for a new one. Simply remove the old chain using a chain tool, size the new chain to the correct length, and use the chain tool again to connect the ends of the new chain. And just like that, you’ve replaced your bike chain!

Checking and Adjusting Your Bike’s Gears

Ever wondered why your bike ride feels a bit too challenging, or why you’re not getting the smooth gear shifts you desire? It could be down to your bike’s gears. Adjusting your bike’s gears is not as complex as it might seem at first. In fact, with a little practice, you can do it yourself at home.

Checking and adjusting your bike’s gears is essential for a smooth and efficient ride. When your gears are in good working order, you’ll find that your bike responds better to your pedaling, making your rides easier and more enjoyable. Plus, it can help prevent wear and tear on your bike’s components.

So, how do you go about this? Start by inspecting your gears for any visible issues like a bent derailleur hanger or worn out gears. Then, you can adjust the front and rear derailleurs using the limit screws and tension adjustment. Remember, it’s always a good idea to refer to your bike’s manual or online tutorials for specific instructions.

And don’t worry if you don’t get it right the first time. It takes a little bit of practice, but once you get the hang of it, you’ll be able to fine-tune your bike’s gears like a pro.

Troubleshooting Your Bike’s Saddle and Handlebars

Let’s talk about two important parts of your bike that significantly affect your comfort while riding – the saddle and the handlebars. The right positioning and adjustment of these components can make a world of difference in your riding experience.

Firstly, adjusting your bike’s saddle to the correct height and angle can significantly improve your comfort and efficiency while pedaling. If your saddle’s too high or too low, it could lead to discomfort, reduced pedaling efficiency, and even injuries. So, make sure to adjust it according to your height and riding style.

Next, let’s move on to the handlebars. Handlebars that are too high, too low, or too far from the saddle can lead to neck, shoulder, and back pain. They can also affect your control over the bike. So, it’s crucial to adjust them to a position that allows you to ride comfortably and confidently.

Moreover, both the saddle and handlebars should be tightened properly to prevent them from moving unexpectedly while riding. Remember, safety first!

Regular Bike Inspections to Prevent Major Issues

Now let’s look at some regular bike inspections that can help you identify potential issues before they become major problems. Here’s a handy checklist:

  • Check the tire pressure: Under-inflated tires can make your ride harder and increase the risk of flats.
  • Inspect the brake system: Ensure your brakes are working properly and the brake pads are not worn out.
  • Check the chain: A clean and well-lubricated chain can improve your bike’s performance.
  • Inspect the gears: Check for smooth shifting and adjust if necessary.
  • Check the saddle and handlebars: Make sure they are adjusted for your comfort and securely fitted.
  • Inspect the frame: Look for any cracks or damages that could affect your bike’s safety and performance.

Remember, regular inspection and maintenance can extend your bike’s lifespan and give you a safer, smoother ride. So, why not take a few minutes to give your bike a quick check-up?

Bike Cleaning and Care

Have you ever thought about the importance of cleaning your bike? It’s not just about aesthetics. Regular cleaning maintains your bicycle’s good functioning. Dirt and grime can cause significant wear and tear on your bike, impairing its performance over time. So, how do you clean a bike?

First, you’ll need some basic cleaning products. A gentle, biodegradable cleaner is a good place to start. Avoid any harsh chemicals that could damage your bike’s finish. A set of brushes of different sizes can reach those tricky corners and crevices. And don’t forget a good, absorbent towel for drying.

Start by wetting your bike, then apply the cleaner and scrub gently. Pay special attention to the chain and gears. Rinse thoroughly and dry with your towel. Regular cleaning not only keeps your bike looking great, but it also gives you the chance to spot any potential issues before they become major problems.

When to Seek Professional Help

While basic bike repairs can be done at home, there are situations when it’s best to take your bike to a professional. But how do you know when that is?

If you’re dealing with complex issues like gear system malfunctions, severe wheel misalignment, or you’re simply not sure what’s wrong, it’s time to consult a professional. They have the knowledge, tools, and experience to handle more complicated repairs and can often spot problems that you might have missed. After all, the goal is to keep your bike in top condition, right?

Common Bike Issues Their Causes Potential Solutions
Flat Tires Punctures, worn out tires Patch the tube, replace the tire
Brake Problems Worn out brake pads, misaligned calipers Replace brake pads, realign calipers
Chain Issues Lack of lubrication, damaged links Lubricate chain, replace chain

Continuing Your Bike Repair Education

By now, you’ve got a good understanding of basic bike repair. But why stop there? There’s always more to learn. Advanced repair skills can be incredibly useful, and staying updated with bike repair trends and innovations can take your cycling experience to the next level. Doesn’t that sound exciting?

There are numerous resources available online, from video tutorials to forums where cyclists share their tips and tricks. So why not dive in? The more you learn, the better equipped you’ll be to handle any bike-related challenges that come your way.

To wrap things up, learning basic bike repair is not only a cost-effective and convenient skill, but it also enhances your cycling experience. So start practicing these basic bike repair skills at home, and remember to keep a toolkit handy when cycling. Who knows, you might just become the go-to bike repair expert in your community!

Should I Cycle Alone or Join Group Rides?

There’s something undeniably appealing about cycling. The wind in your hair, the rush of adrenaline, and the sense of accomplishment after a long ride can make it an addictive hobby. Not to mention, it’s a fantastic way to stay fit and explore the outdoors. However, one question that often arises for beginners is whether to embark on solo rides or join group rides. Each offers a unique experience with its own set of benefits. So, how do you decide which is right for you? This blog aims to shed some light on this topic and help you make an informed decision.

Understanding the Basics of Cycling

Before we delve into the solo vs group cycling debate, let’s go over the basics. Cycling, like any sport, requires the right gear. This includes a suitable bike, helmet, and comfortable clothing. Safety is paramount, so make sure you’re familiar with road rules and always be aware of your surroundings. As for riding techniques, it’s all about balance, control, and endurance. And remember, practice makes perfect!

The Appeal of Solo Cycling

Now, let’s talk about solo cycling. Have you ever felt the need for some alone time? A moment to unwind, reflect, and just be with your thoughts? That’s what solo cycling can offer. It gives you the freedom to ride at your own pace, stop whenever you want, and choose your route. It’s just you, your bike, and the open road. Sounds pretty liberating, doesn’t it?

Pros and Cons of Cycling Alone

Have you ever wondered about the upsides and downsides of cycling alone? Well, let’s dive into it. Just like any other activity, cycling alone comes with its own set of pros and cons.

Advantages of Cycling Alone

One of the significant advantages of solo cycling is the independence it offers. You can set your own pace, choose your own routes, and take breaks whenever you feel like it. There’s no need to keep up with anyone or adjust your speed to a group’s average. Sounds liberating, doesn’t it?

Besides the freedom, cycling alone allows for a great deal of flexibility. You can decide to take off on a ride on a whim without having to coordinate schedules with others. This can be a real advantage if you have an unpredictable routine.

Lastly, solo rides can provide valuable time for introspection. The quiet solitude of a bike ride can offer a perfect backdrop for some deep thinking or even a bit of daydreaming. It’s the perfect way to clear your head and enjoy your own company.

Disadvantages of Cycling Alone

However, cycling alone is not without its challenges. A common issue solo riders face is the lack of external motivation. Without a group to push you, it might be easier to slack off or even skip rides.

Another concern when cycling alone is safety. In case of an accident or mechanical trouble, you’re on your own. This lack of support can be daunting, especially for beginners or on more remote routes.

Lastly, solo rides can sometimes get lonely. The lack of social interaction on long rides might make them feel monotonous or even boring for some people.

Navigating Solo Rides Successfully

Despite these challenges, solo rides can be quite rewarding. The key is to navigate them successfully. But how?

Firstly, it’s crucial to plan your routes in advance. Knowing where you’re going can give you confidence and prevent you from getting lost.

When it comes to safety precautions, always ensure that you have the right safety gear and your bike is in good shape before you head out. Carry a basic repair kit and learn how to fix common issues like a flat tire.

And finally, if you’re worried about motivation, set personal goals or use a fitness app to track your progress. Seeing your improvement over time can be a great motivator. Remember, the most important thing is to enjoy the ride!

Solo Cycling Group Cycling
Freedom High – Choose your own routes and pace Reduced – Need to consider group’s preferences
Safety Moderate – Increased risk when cycling alone High – Safety in numbers
Social Aspect Low – Mostly solitary activity High – Opportunity to meet and interact with others
Motivation Moderate – Self-motivation required High – Group can provide motivation and support
Flexibility High – Can cycle whenever you want Moderate – Need to coordinate with group’s schedule

The Buzz of Group Rides

Have you ever felt the thrill of being part of a team? The excitement that comes with shared experiences? That’s exactly what group rides offer! There’s a unique sense of camaraderie that comes with cycling in a group. It’s not just about the ride, it’s about the shared laughs, the friendly competition, and the collective experiences that make each ride memorable.

Upsides and Downsides of Group Rides

Just like solo rides, group rides have their own set of pros and cons. Let’s take a closer look.

Benefits of Group Rides

When you’re part of a group ride, there’s a strong sense of community. It’s not just about pedaling, it’s about the friendships and connections you make along the way. It’s about the shared motivation when the ride gets tough, and the collective cheer when a hill is conquered. And let’s not forget the safety factor – there’s always safety in numbers.

Drawbacks of Group Rides

However, group rides aren’t without their challenges. One of the main issues is the need to match the pace of the group. If you’re a beginner, this can be daunting. There’s also the matter of scheduling. Coordinating with a group means you have to adapt to other people’s schedules, which might not always align with yours. There’s also the potential for conflict within the group, as different personalities and cycling styles come into play.

  1. Understand group rules
  2. Practice group riding etiquette
  3. Take up the appropriate role in the group

Deciding What’s Best for You

So, you’re caught in the middle, wondering whether to ride solo or join a group? The decision ultimately depends on your personality, preferences, and cycling goals. Are you someone who values peace, solitude, and the freedom to control your own pace? Or do you thrive in a community setting, enjoying the shared motivation and camaraderie that comes with group rides? Your answer to these questions will guide you in choosing the right path.

Switching Between Solo and Group Rides

You might be thinking, “Do I really have to stick to one?” Not at all! It’s completely fine—and even beneficial—to switch between solo and group rides. There are days when you might crave the tranquility of a solo ride, and other days when the buzz of a group ride is just what you need. The beauty of cycling is its flexibility, allowing you to adapt it to your mood and circumstances.

  1. Cycling is a versatile activity that can be enjoyed alone or in a group.
  2. Both solo and group rides have their unique advantages and challenges.
  3. Your choice between the two should depend on your personal preferences and cycling goals.
  4. It’s perfectly fine to switch between solo and group rides depending on your mood and circumstances.

Group ride in action

Conclusion

In the world of cycling, there’s no one-size-fits-all. Whether you prefer the independence of a solo ride or the shared enthusiasm of a group ride, both experiences have their unique charm and benefits. The key is to explore and experiment until you find what works best for you. Remember, the goal isn’t to conform to a particular style, but to enjoy the ride and make the most of your cycling journey. So, are you ready to hit the pedals?

Best Bike Storage Solutions for Small Spaces

When it comes to bike storage, the struggle is real, especially for those of us living in small apartments or houses. While bikes provide a fun and eco-friendly mode of transport, they can be quite a challenge to store. Bulky, unwieldy, and often muddy, they seem to take up more space than they should. But fear not! The right storage solution can turn this challenge into a breeze.

Imagine a neat, organized space where your bike is conveniently stored, no longer in the way, yet easily accessible. This is the beauty of proper bike storage. It not only saves space but also keeps your bike safe and secure. Sounds like a dream, right? Let’s make that dream a reality.

Understanding Your Storage Needs

Before we dive into the various bike storage solutions, let’s first identify your specific needs. Every person and dwelling is unique, and what works for one may not work for another. So, what factors should you consider?

First and foremost, consider the size of your living space. If you’re in a tiny apartment, a floor stand might not be the best option. Then, think about the number of bikes you need to store. Are you a single bike household, or do you have a fleet of bicycles for the whole family? Lastly, consider your budget. While some storage solutions can be a bit pricey, there are many affordable options out there as well. Remember, understanding your needs is the first step towards finding the perfect solution.

The Impact of Improper Bike Storage

Why is proper bike storage so important, you ask? Well, improperly storing your bike can lead to a number of issues. For starters, your bike could get scratched or dented, especially if it’s constantly being moved around or knocked over. This not only affects the aesthetic of your bike, but can also lead to more serious problems.

Structural damage is a real risk with improper storage. Bikes are designed to withstand the pressures of riding, not to be leaning awkwardly against a wall or other objects. Over time, this can lead to warping or bending of the frame. Furthermore, if you’re not storing your bike in a secure location, there’s also the risk of theft. All of these factors underscore the importance of a proper storage solution.

Types of Bike Storage Solutions

Wondering what types of bike storage solutions are available for you? Worry not, dear reader! The market today is replete with a variety of storage options that cater to the needs of both novice cyclists and bicycle hobbyists alike. The key is to find the one that best suits your space, needs, and budget.

Let’s discuss some of these storage solutions in detail. Shall we?

Wall Mounts

Ever seen a bicycle hanging on a wall like a piece of art? That’s a wall-mounted bike storage system for you! Wall mounts are a popular choice, particularly for small spaces. They are easy to install and can hold your bike securely, saving you precious floor space.

But what makes them such a great choice? Well, apart from being space-saving, they also provide easy access to your bike. Plus, they add a stylish element to your decor. However, they do require a sturdy wall for installation. So, if you’re in a rented apartment or have weak walls, you might want to consider other options.

Bike Stands

Not a fan of drilling holes in your wall? Or perhaps you don’t have a wall space to spare? Don’t worry, bike stands are here to the rescue!

Bike stands, as the name suggests, are freestanding structures that hold your bike upright. They are perfect for those who prefer a non-permanent storage solution. They are portable, easy to assemble, and don’t require any wall or ceiling mounts.

However, bike stands do take up some floor space. So, if you’re really tight on space, this might not be the best option for you. But if you have a bit of room to spare, bike stands can offer an easy and flexible bike storage solution.

DIY Bike Storage Ideas

Are you a DIY enthusiast or just on a tight budget? Well, why not create your own bike storage solution? With a little creativity and some basic tools, you can build a storage solution that’s tailored to your specific needs and space.

For example, you can create a simple wall mount using a large hook and a wooden board. Or, you could build a bike rack out of PVC pipes. The possibilities are endless!

Remember, the goal is to create a storage solution that is both functional and aesthetically pleasing. So, don’t be afraid to get creative and experiment with different materials and designs. And most importantly, have fun with it!

Choosing the Right Bike Storage Solution

Now that we’ve explored the different types of bike storage solutions, it’s time to decide which one is right for you. Remember, it’s not just about choosing the most popular or the cheapest option. It’s about finding a solution that fits your needs and your space.

Think about the factors we discussed earlier. What’s the size of your space? How many bikes do you need to store? And of course, what’s your budget? These are all crucial questions that will guide your decision-making process.

  • How many bikes do I need to store?
  • Do I have wall space available for a wall mount or should I consider a stand?
  • What is my budget for a storage solution?
  • Do I prefer a DIY solution or a ready-made one?
  • Is there a specific material or design that I prefer?

By asking yourself these questions, you’re already one step closer to finding the perfect bike storage solution for your small space. But remember, there’s no rush. Take your time to consider your options and make an informed decision. After all, it’s not just about storing your bike, but also about keeping it safe and in good condition.

Maintenance and Care for Bike Storage Solutions

Once you’ve chosen your bike storage solution, it’s crucial to take care of it to ensure it lasts a long time. Proper maintenance and care can significantly extend the lifespan of your storage solution and keep your bike safe and secure.

For wall mounts, make sure to check the stability regularly. If you notice any wobbling or shifting, it may be time to tighten the screws or consider a replacement. Don’t forget to clean the mount occasionally to prevent dust buildup, which can lead to wear and tear.

For bike stands, it’s essential to check for any signs of rust or corrosion, especially if you’re using the stand outdoors. Regular cleaning and oiling can help prevent these issues. If your stand has any moving parts, ensure they’re well lubricated to prevent sticking and squeaking.

Remember, a well-maintained bike storage solution not only looks good but also performs better. It’s a small investment of time that can pay off significantly in the long run. So why not give your bike storage solution the care it deserves?

Where to Buy Bike Storage Solutions

Now that you know what to look for in a bike storage solution, you might be wondering, where can I buy one? Well, you’re in luck! With the rise in cycling popularity, there are numerous places where you can purchase bike storage solutions.

Online platforms such as Amazon, eBay, and specialized cycling websites offer a vast variety of options. From wall mounts to bike stands, you’ll find an array of solutions to suit your needs. Plus, the product reviews from other customers can be incredibly helpful when making your decision.

Alternatively, physical stores like home improvement stores or bike shops also carry bike storage solutions. The advantage here is that you can see and touch the product before you buy it. You can also get expert advice from the staff. Remember to take your time and choose a solution that fits your space, budget, and needs.

Conclusion and Next Steps

Well, there you have it! We’ve covered the importance of proper bike storage, the different types of storage solutions, and where to buy them. Now it’s time for you to take the next step. Think about your storage needs, do your research, and find a solution that works for you.

Remember, the right storage solution can protect your bike, save space, and even add a stylish element to your room. So, why wait? Start exploring various bike storage solutions today!

Bike Storage Solution Cost Space Efficiency Ease of Installation
Wall Mounts $$ High Medium
Bike Stands $ Low High
DIY Ideas $ Variable Variable

Cold Weather Cycling: Tips and Tricks

Let’s talk about cycling in cold weather. Now, you might be thinking, “Cycling in the cold? No, thank you!” But hold on, hear us out. There’s something uniquely exhilarating about cycling in the winter. Yes, it’s cold, and yes, it’s challenging, but it’s also incredibly rewarding. Imagine pedaling through a serene, snow-covered landscape, with the chill air in your lungs and the crunch of fresh snow under your tires. Exciting, isn’t it?

The Appeal of Cold Weather Cycling

So, what’s so special about cold weather cycling? First off, there’s the beauty of the winter landscape. There’s nothing quite like watching the sunrise over a frost-covered field, or cycling through a snow-dusted forest. And then there’s the peace and quiet. The roads are less crowded, the trails are less busy, and the world seems to hold its breath in the cold. You get to experience nature in a way that’s simply not possible in other seasons.

And let’s not forget the sense of accomplishment. There’s something incredibly satisfying about braving the elements and coming out on top. You’ll feel like a true adventurer, and your hot chocolate at the end of the ride will taste that much better.

What to Expect When Cycling in Cold Weather

Now, let’s get into the nitty-gritty. What exactly can you expect when cycling in cold weather? Well, for one, the roads and trails can be icy, which means you’ll need to be extra careful. Your tire pressure will also be lower due to the cold, so you’ll need to adjust accordingly. And of course, there’s the wind. Cycling against a cold wind can be a challenge, but it’s also a great workout.

But don’t let these challenges deter you. With the right preparation and mindset, you can not only survive but thrive in these conditions. So, ready to give it a shot?

Essential Gear for Cold Weather Cycling

Now that we’ve covered the appeal and expectations of cold weather cycling, are you ready to brace the chill? Well, not quite yet. Before you hit the icy roads, it’s crucial to gear up. Remember, the right equipment can make a significant difference in your overall experience. So what exactly do you need?

Clothing Layers

When cycling in cold weather, layering is key. But why is it so important? Simply put, layering allows you to adjust your body temperature easily, keeping you comfortable throughout your ride. It’s all about finding the right balance – you don’t want to end up overheating or freezing!

Start with a base layer that is moisture-wicking to keep you dry. Merino wool or synthetic fabrics are excellent choices. Next, add an insulating layer to keep you warm. Fleece is a popular choice for this. Lastly, a water-resistant and windproof outer layer will protect you from the elements. Remember, the goal is to stay warm, not sweaty!

Insulated Gloves and Socks

Ever tried cycling with cold hands or feet? Not the most pleasant experience, right? That’s why insulated gloves and socks are an absolute must.

In colder temperatures, our bodies prioritise keeping the core warm, often leaving extremities vulnerable to the cold. Insulated gloves and socks protect these areas, ensuring you remain comfortable throughout your ride. Look for gloves that are windproof, waterproof, and offer a good grip. As for socks, go for wool or thermal insulated options.

Bicycle Preparation for the Cold

Just as you need to gear up, your bicycle also needs some preparation for the cold weather. Let’s look at some key areas that need attention.

Your tyre choice can significantly affect your bike’s performance. For icy conditions, consider using wider tyres with lower pressure for better grip. Regular bike maintenance is also crucial during winter. Pay particular attention to your chain, as it can suffer from increased wear and tear due to road salt and grit.

Bike lights are another must-have for winter cycling. As daylight hours are shorter, chances are you’ll be riding in darker conditions. Good front and rear lights will ensure you’re visible to other road users.

Gear Description
Layered Clothing Base layer (moisture-wicking), Insulating layer (fleece), Outer layer (water-resistant, windproof)
Insulated Gloves and Socks Windproof, waterproof gloves with good grip. Wool or thermal insulated socks.
Bike Tyres Wider tyres, lower pressure for icy conditions
Bike Maintenance Regular maintenance, with special attention to the chain
Bike Lights Good front and rear lights for visibility

Safety Tips for Winter Cycling

When it comes to cycling in colder weather, safety should be your top priority. Riding on icy roads can be a bit challenging. But don’t worry, with the right precautions, you can safely enjoy your ride. Sounds good, right?

First and foremost, visibility is key. The days are shorter during winter, and foggy or snowy conditions can limit visibility. Always use bright, blinking lights on the front and back of your bike. Reflective gear can also help other road users see you better.

Next, be aware that roads may be slippery due to ice or snow. Always ride slower than usual, especially around curves. Keep your body relaxed and avoid sudden braking to maintain control of your bike. Remember, there’s no rush. It’s all about enjoying the ride, isn’t it?

Lastly, even though it’s cold, staying hydrated is still important. Cold air has a drying effect, which can lead to dehydration. Always bring a bottle of water and take regular sips during your ride.

Staying Motivated During Winter Cycling

Now that we’ve covered safety, let’s talk about motivation. Cycling in cold weather can be tough, but with the right mindset, it can also be incredibly rewarding. So, how do you keep your motivation high?

Setting goals is a great way to stay motivated. Whether it’s increasing your distance, improving your speed, or simply riding a certain number of days per week, having a goal gives you something to work towards.

Another tip is to use apps to track your progress. Seeing your stats and improvements can be a big motivator. Plus, many apps have social features, allowing you to connect with other cyclists and even participate in virtual challenges.

Finally, consider joining a winter cycling group. Not only will you have others to share the experience with, but a group can also provide a sense of accountability, making you more likely to stick with it. Remember, there’s strength in numbers!

  • Set goals: Aim for a specific distance, speed, or number of rides per week.
  • Use tracking apps: Monitor your progress and participate in virtual challenges.
  • Join a winter cycling group: Share the experience with others and gain a sense of accountability.

Beneficial Aspects of Cold Weather Cycling

Ever wonder why some cyclists are so enthusiastic about biking in the cold? Well, there’s more to it than just the thrill and the beautiful winter scenery. Cold weather cycling has some significant fitness and health benefits too.

First off, cycling in the cold can boost your metabolism. Your body has to work harder to keep warm, which means you’ll be burning more calories. It’s a fantastic way to maintain your weight during the winter months when we all tend to be a bit more sedentary.

Did you know that cycling in the cold can also help to build mental resilience? Pushing through the challenging conditions requires mental toughness, and over time, this can translate to other areas of your life as well.

Lastly, let’s not forget the immunity boost. Regular exercise in the cold can enhance your immune system, making you less susceptible to common winter illnesses. Now, isn’t that a reason to bundle up and get pedaling?

Making the Most Out of Your Winter Bike Rides

Now that you’re aware of the benefits and have all the necessary knowledge to tackle cold weather cycling, it’s time to focus on enjoying the ride. Yes, it’s important to be prepared and stay safe, but let’s not forget the joy of cycling!

Take time to stop and take in the views. Winter landscapes can be incredibly beautiful and serene, making for some fantastic photo opportunities. You might even find that the winter light brings a whole new perspective to your usual cycling routes.

Another way to make your winter rides enjoyable is to reward yourself afterwards. A hot drink or a warm bath can be a great incentive to get out on the bike, even on the chilliest days. Plus, it’s a great way to warm up and relax your muscles after the ride.

Remember, winter cycling isn’t just about enduring the cold, it’s about embracing it. So get out there and make the most of it. You might just find that it becomes your favorite season for cycling!

  • Boost your metabolism by cycling in cold weather
  • Build mental resilience and enhance your immune system
  • Enjoy the serene and beautiful winter landscapes
  • Take time to reward yourself after each ride
  • Embrace the cold and make winter your favorite cycling season