How to Choose Your First Bike?

Choosing your first bike is an exciting moment. It’s like picking your first car or your first guitar. It’s a choice that can shape your cycling journey from the get-go. With so many different types of bikes available, it’s important to choose one that suits your needs and preferences. Whether you want to cycle in the city, off-road, or for fitness, there’s a bike that’s just right for you.

Let’s dive right into it and help you pick your first bike.

Why Your First Bike Matters

Your first bike plays a pivotal role in shaping your cycling experience. The right bike not only motivates beginners but also boosts their confidence. A bike that’s comfortable and easy to handle can make learning quicker and more enjoyable. So, why settle for anything less than perfect?

What to Consider Before Choosing Your First Bike

Before you embark on your quest to find your first bike, there are several factors to consider. First and foremost is your physique. Not all bikes are designed for all body types. You need to find a bike that you can comfortably mount, dismount, and ride.

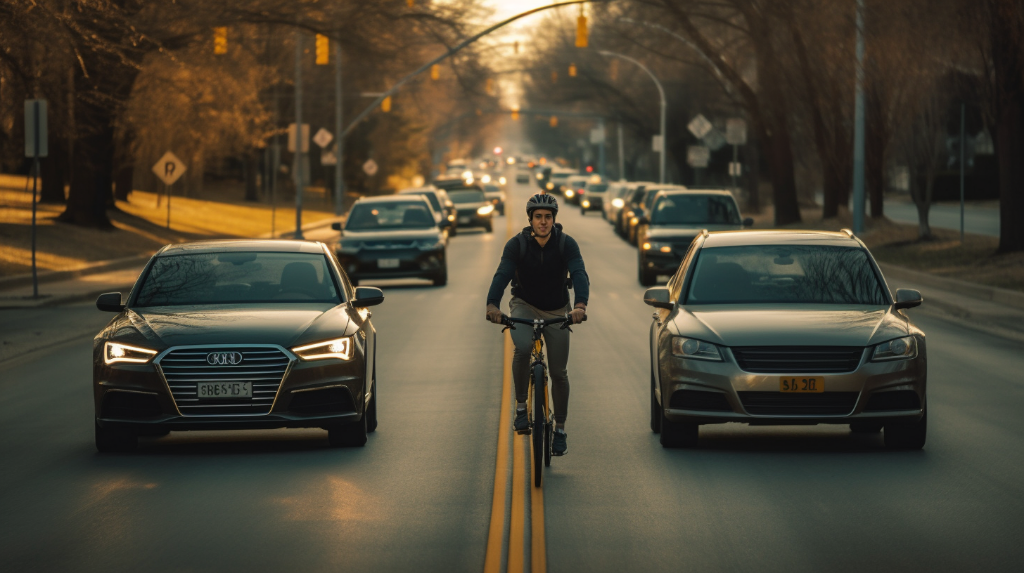
The intended use of the bike is another crucial factor. Do you plan to use it for commuting, fitness, or leisure? Different uses call for different types of bikes. Last but not least, your budget plays a significant role in your choice. Bikes come in a wide range of prices, and it’s important to choose one that fits your financial plan.

Think about these factors, take your time, and then start your bike hunt. Remember, it’s about finding the right bike, not the most expensive or the most trendy one.

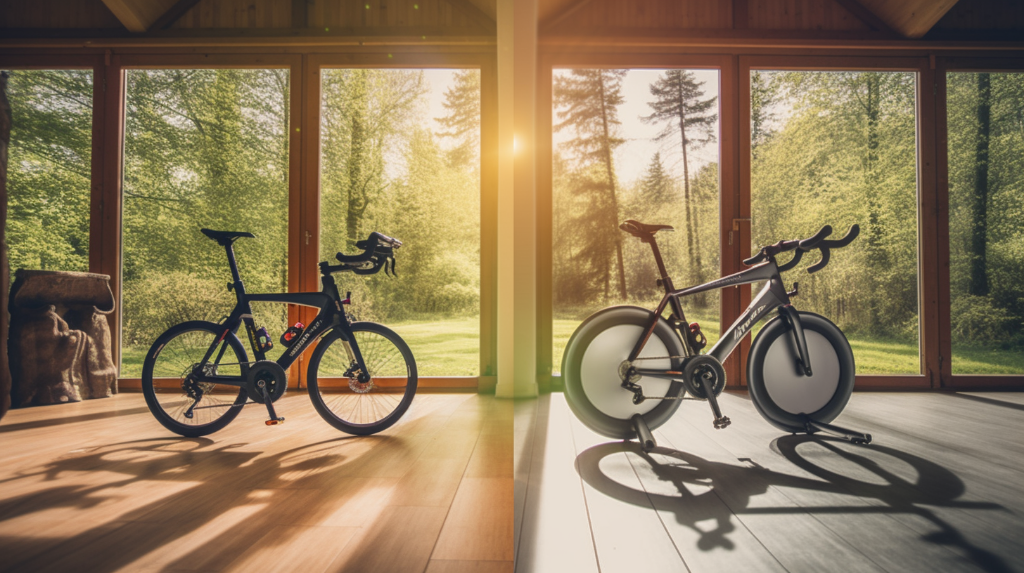
Understanding Different Types of Bikes

So, you’ve decided to start your cycling journey, but where to begin with the multitude of bikes out there? Fear not, we’re here to break down the basics for you. There’s a wide variety of bikes available in the market, each designed to serve a specific purpose. Let’s dive into the details.
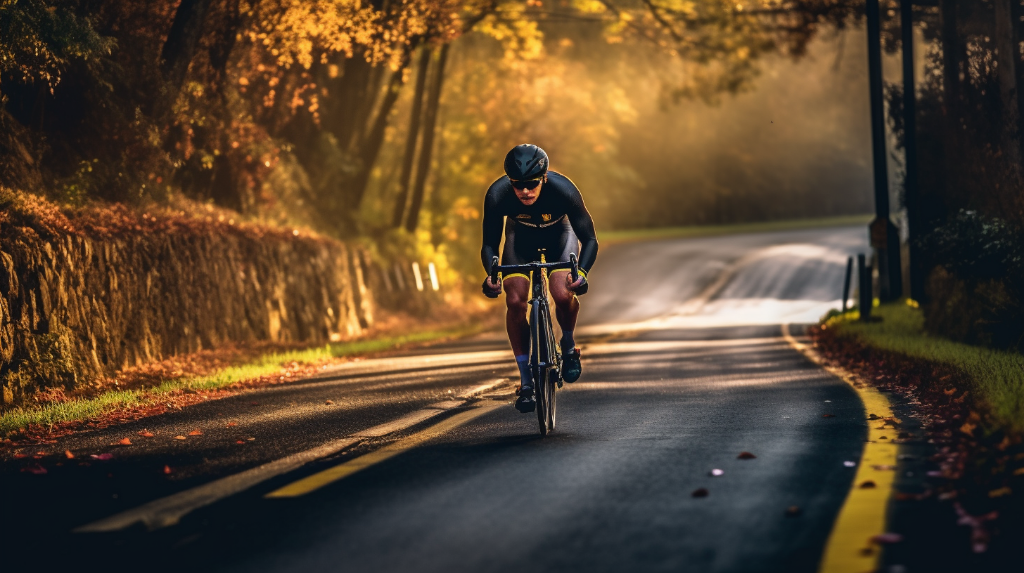
Road Bikes

Ever seen a cyclist whizzing past you on the highway? Chances are, they were riding a road bike. These are lightweight and designed for speed, with thin tires and a slim frame. They’re perfect for those who want to ride on paved paths and city streets, and value speed above all else.

Don’t forget though, the seating position can be a bit aggressive for beginners. But once you get used to it, there’s no beating the thrill of speed these bikes can offer!

Mountain Bikes

Are you an adventure seeker who loves off-road trails? Then, mountain bikes might be the one for you. They are designed with a rugged frame and wide, knobby tires to handle off-road terrain. Their suspension system also helps in absorbing shocks from bumpy trails, making your ride smoother.

Remember, they’re not as fast as road bikes on pavement, but they’re unbeatable when it comes to tackling dirt trails and rocky paths.

Hybrid Bikes

Can’t decide between a road bike and a mountain bike? Why not get the best of both worlds with a hybrid bike! As the name suggests, these bikes combine the features of both road and mountain bikes, making them incredibly versatile.

They have a more comfortable upright seating position like a mountain bike, but also possess the lighter frame and thinner tires of a road bike. If you’re someone who loves variety in their cycling routes, this could be the perfect choice!

How to Determine the Right Bike Size

Choosing a bike that fits you well is crucial. The right size can make your ride comfortable and enjoyable, while the wrong size can lead to discomfort or even injuries. But how do we determine the right bike size?

Most bikes are sized by their frame size (the length of the seat tube), and your height is the primary factor in determining the frame size you need. If you’re between sizes, it’s generally best to go with the smaller size. You can always raise the seat or move it forward to adjust the fit.

Remember, comfort is key when choosing a bike size. The best way to see if a bike fits you is to actually get on it and try it out!

Setting Your Budget

When it comes to purchasing your first bike, setting a reasonable budget is crucial. The price of bikes can vary greatly, depending on factors such as the type, quality, and brand. But did you know that there’s a bike for every budget? That’s right! Whether you have a modest budget or you’re willing to splurge, there’s a bike out there for you.

However, it’s important to remember that the cost of a bike doesn’t end at the purchase price. You should also consider ongoing costs like maintenance, upgrades, and accessories. Cycling, like any other hobby, requires a certain level of investment, but the health benefits and the joy of riding make it all worthwhile, don’t you agree?

Type of Bike Price Range Features
Road Bikes $500 – $2000 Lightweight, built for speed, ideal for paved surfaces
Mountain Bikes $400 – $3000 Durable, designed for off-road cycling, great suspension
Hybrid Bikes $300 – $1500 Combines features of road and mountain bikes, versatile

Where to Buy Your First Bike

Okay, you’ve done your research, you’ve set your budget, and now you’re ready to buy your first bike. But where do you go? Well, there are several options available to you, each with its own pros and cons.

Local bike shops are a great place to start. They often offer personalized service, expert advice, and the opportunity to try before you buy. However, their prices may be slightly higher than what you’d find online.

Speaking of online, there are many reputable online retailers that offer a wide range of bikes at competitive prices. But be aware, buying a bike online means you won’t have the chance to try it out first. And then there’s the second-hand market, which can be a great way to get a high-quality bike at a lower price, though it requires a bit more knowledge and caution.

  • Trek Bikes: Known for their high-quality bikes for all types of riders. They offer free shipping and have a comprehensive website with plenty of information.
  • Chain Reaction Cycles: This online retailer offers a wide range of bikes at different price points. They also have regular sales and discounts.
  • Evans Cycles: A UK-based online store that ships internationally. They offer a wide range of bikes and cycling gear.
  • Performance Bicycle: Offers a variety of bikes for different cycling disciplines. They have a great customer service and a flexible return policy.

Test Ride and Final Decision

Have you ever wondered why test rides are so important when buying a bike? It’s because a bike that looks perfect on paper might not feel so perfect once you’re actually riding it. So, when you’ve narrowed down your choices, it’s time for a test ride. It’s your opportunity to see how the bike handles, how it fits your body, and whether it’s comfortable to ride.

During your test ride, pay attention to how the bike feels under you. Is the seat comfortable? Do the handlebars feel natural in your hands? Can you reach the pedals easily without straining? These are all crucial points to consider. Remember, you’ll be spending a lot of time on this bike, so it needs to feel right.

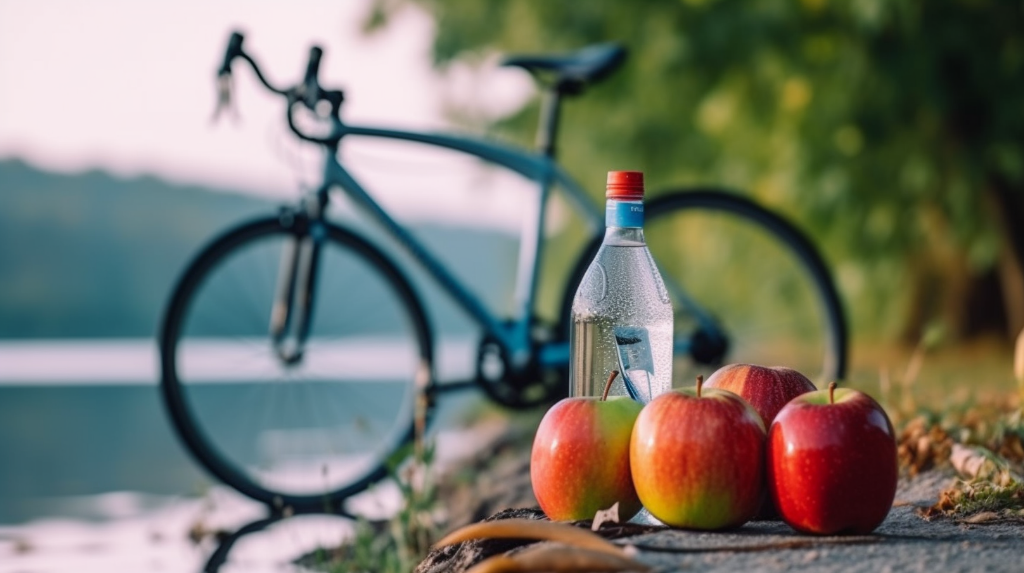
Necessary Gear and Accessories

Now that you’ve found your perfect bike, it’s time to gear up. Safety should always be your top priority when cycling, so a good quality helmet is a must. But that’s not all. Lights, locks, and other accessories play an important role in making your cycling experience safe and enjoyable.

Here’s a list of necessary gear and accessories for new cyclists:

  • Helmet
  • Bike lights
  • Bike lock
  • Water bottle and holder
  • Bike pump
  • Spare tubes and a small tool kit
  • Cycling shorts and gloves for comfort
  • A bell or horn for safety in traffic

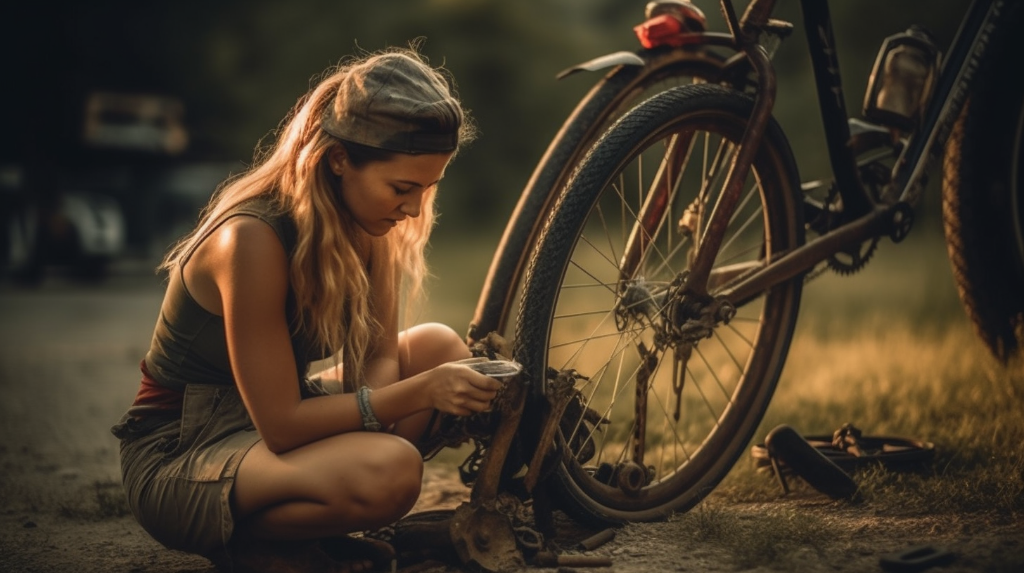
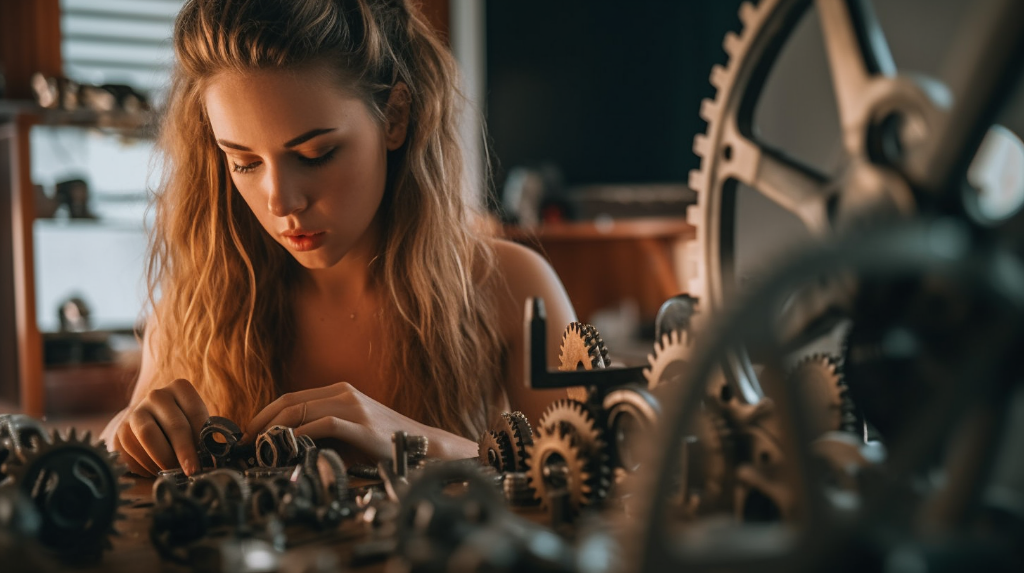
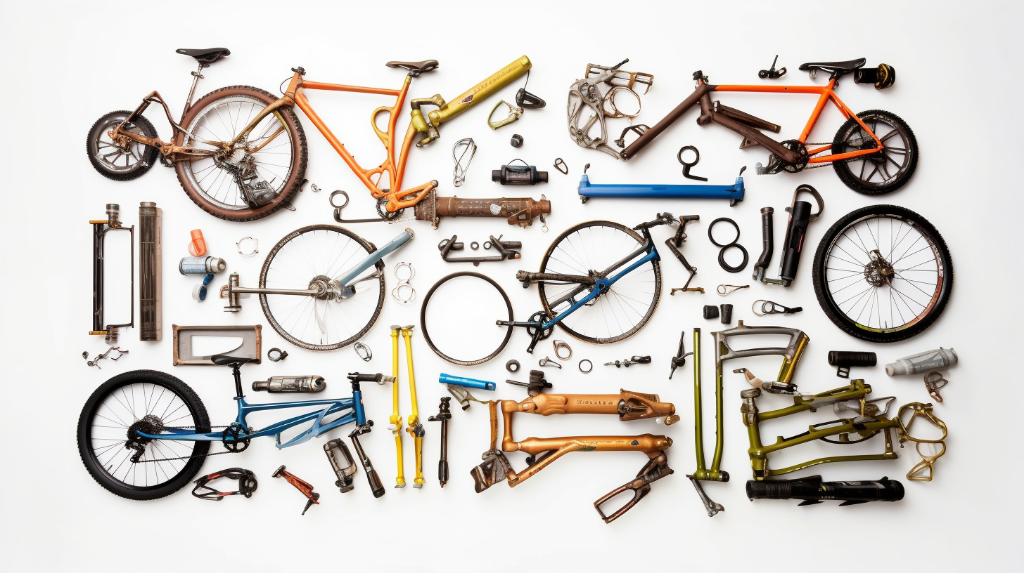
Understanding Basic Bike Maintenance

Getting a new bike is exciting, but your responsibility doesn’t end with the purchase. Regular maintenance is key to keeping your bike in good working condition. Think of it this way: your bike is like a pet, it needs regular care to stay happy!

Some basic bike maintenance tasks include cleaning your bike regularly, keeping the chain lubricated, checking the tire pressure, and making sure all the bolts are tight. Don’t worry, these tasks are simple to do and don’t require a lot of special tools. Plus, taking care of your bike can actually be a rewarding experience in itself.

Remember, the journey of becoming an avid cyclist begins with choosing the right bike. Take your time, do your research, and make sure the bike you choose is something that you genuinely love and are comfortable riding. Isn’t it exciting to think of all the places your new bike will take you? Happy cycling!

Cycling with a Flat Tire: What You Should Know

Imagine this: You’re enjoying a peaceful ride on a sunny afternoon, when suddenly, your bike starts to feel sluggish. You notice that you’re putting in more effort than usual to keep your pace. You stop and check, only to find out that you have a flat tire. It’s an all-too-common scenario for many cyclists, and while it may seem like a minor inconvenience, cycling with a flat tire can actually have serious consequences. It’s more than just a bump in the road—it can significantly impact your ride and your safety.

The Impact of a Flat Tire on Your Cycling Experience

Ever tried riding with a flat tire? If you have, then you know it’s no walk in the park—or rather, no ride on the road. A flat tire can drastically affect your speed and control, making your overall cycling experience far from enjoyable. You might find yourself struggling to maintain balance and control, which could potentially lead to accidents. And let’s not forget the possible damage to your beloved bike, especially if the flat tire goes unnoticed for a long time.

Common Causes of Flat Tires

But how do flat tires happen in the first place? Well, there are several culprits. One of the most common causes is punctures from sharp objects like glass shards, nails, or thorns. Regular wear and tear can also lead to flat tires, especially if your tires are old and worn out. And let’s not forget about improper tire pressure—too much or too little air in your tires can lead to flats as well. So, it’s important to always keep an eye on your tires and ensure they’re in good condition.

Recognizing the Signs of a Flat Tire

Have you ever noticed your bike feeling a bit off? Maybe it’s not as stable as it usually is, or perhaps it’s become unexpectedly difficult to control. Well, these could be signs that you’re dealing with a flat tire. It’s not always easy to spot, especially if the tire isn’t completely deflated. But being able to recognize the early signs of a flat can save you from a lot of trouble down the line.

One of the most obvious visual cues is when the tire looks deflated. A healthy tire should appear round and full, so if yours is looking a bit squashed or saggy, it’s likely that it’s lost some air. Another sign to look out for is the bike’s performance. Flat tires can make your bike feel unstable, especially when cornering or riding at high speeds. If you’re finding it more difficult to control your bike than usual, it’s worth checking your tires.

How to Perform a Quick Tire Check

So, how can you ensure your tires are in good condition before each ride? You can do this by performing a quick tire check. It’s easy and it doesn’t take much time at all. Here’s how:

First, visually inspect your tires. Look for any signs of deflation, such as a squashed or saggy appearance. Also, keep an eye out for any visible damage, such as cuts, punctures, or worn-out tread.

Next, physically check your tires. Press them with your thumb. They should feel firm, not soft or squishy. If they feel soft, it’s likely that they’re underinflated.

Lastly, take your bike for a quick spin. Pay attention to how it feels. Does it feel stable and easy to control? If not, your tires may be to blame.

The Dangers of Continuing to Ride with a Flat Tire

So, you’ve discovered that your tire is flat. What now? Well, the worst thing you can do is to ignore it and keep riding. Continuing to ride with a flat tire can lead to a host of problems, some of which can be quite dangerous.

Firstly, a flat tire can cause you to lose control of your bike. Without the necessary air pressure, your tire won’t be able to maintain its shape, affecting its grip on the road. This can make your bike unstable and harder to control, increasing the risk of accidents.

In addition, riding on a flat tire can cause damage to the wheel. The rim can get bent or even cracked, leading to costly repairs. Even worse, if you continue to ride on a damaged wheel, it might fail altogether, putting you at risk of a serious accident.

So, next time you notice that your tire is flat, resist the temptation to just keep going. It’s not worth the risk. Instead, take steps to fix the problem as soon as possible.

What to Do When You Get a Flat Tire Mid-Ride

Ever been out on a ride, enjoying the wind in your hair and the sun on your face, only to hear that dreaded hiss? Yes, that’s right. You’ve got a flat tire. But don’t worry, it’s not the end of the world, or your ride for that matter. Here’s a step-by-step guide on what you should do if you find yourself in such a situation.

Firstly, stay calm. Panicking won’t help. Secondly, get off the road. It’s safer to deal with your flat tire off the road, away from traffic. Thirdly, assess the situation. Is it a full flat or a slow leak? Depending on the severity of the flat, your course of action might differ.

At this point, it’s good to have a certain set of tools and equipment on hand. But what exactly should you have in your emergency kit?

  • Spare tube – This is a must. It’s your quickest way to get back on the road.
  • Tire levers
  • – These will help you remove the tire from the rim.

  • Mini pump – To inflate the new tube. Some cyclists prefer CO2 cartridges for their speed and ease of use, but these are single-use.

How to Fix a Flat Tire

Got your tools ready? Great! Let’s get to fixing that flat. The first step is to remove the wheel from your bike. Next, use your tire levers to pry the tire off the rim. Once you’ve done that, remove the tube from the tire. Now’s the time to inspect your tire and tube to find the cause of the flat. Look for punctures, cuts, or embedded objects. Once you’ve found the culprit, it’s time to put in your new tube. Make sure it’s slightly inflated before you put it in the tire. This will help it take shape and prevent any pinching. Put the tire back on the rim, ensuring the tube isn’t pinched between the tire and the rim. Finally, inflate the tire to the correct pressure.

Tips for Preventing Flat Tires

Prevention is better than cure, they say. And they’re right. Here are some tips to help you avoid flat tires in the first place.

Check your tire pressure regularly. Under-inflated tires are more prone to flats. Make it a habit to check your tire pressure before each ride. Avoid riding over sharp objects. This might seem obvious, but sometimes we can’t resist that shortcut through the gravel or that jump off the curb. Just remember, every time you do that, you’re increasing your chances of getting a flat. Lastly, consider using puncture-resistant tires. They might be more expensive, but they could save you a lot of hassle in the long run.

Remember, a flat tire is not the end of the world. With the right knowledge, tools, and a bit of patience, you can be back on the road in no time. Ride safe!

The Importance of Proper Bike Maintenance

Have you ever considered the role regular bike maintenance plays in preventing flat tires and other issues? It’s quite significant! Not only does a well-maintained bike keep you safer on the roads and trails, but it also enhances your overall riding experience. Imagine gliding smoothly over the asphalt, confident in the knowledge that your bike is in top-notch condition. Sounds good, doesn’t it?

Regular maintenance is not just about keeping your bike clean and shiny – it’s about ensuring that all its components, including the tires, are in good working order. This way, you can preempt any issues that might arise, such as a flat tire, and take appropriate action. After all, prevention is better than cure, right?

Task Frequency
Check tire pressure Before every ride
Inspect tires for wear and tear Weekly
Clean and lubricate chain Every 100 miles or after riding in the rain
Inspect brake pads Every 2-4 weeks
Check and adjust gears Every 2-4 weeks

Wrapping Up: Stay Safe and Enjoy Your Ride

So there you have it, folks! You now know the importance of checking your tires before every ride, understanding the signs of a flat tire, and the risks associated with continuing to ride with one. You also know what to do if you get a flat tire mid-ride, how to repair it, and how to prevent flat tires in the first place. That’s quite a lot of information, isn’t it? But it’s all essential for your safety and enjoyment on the bike.

Remember, cycling isn’t just about speed and agility – it’s also about safety and preparedness. So, always take the time to check your tires before you set off, and make sure you carry the necessary equipment for dealing with a flat tire. After all, it’s better to be safe than sorry, right?

Let’s not forget the importance of regular bike maintenance too. Keeping your bike in good shape is crucial for preventing issues like flat tires, and for ensuring a smooth and enjoyable ride. So, follow the maintenance schedule we’ve outlined above, and your bike will thank you for it!

Alright then, it’s time to wrap things up. Stay safe, ride responsibly, and most importantly, enjoy every moment on your bike. Happy cycling!

Understanding Bike Gears and When to Shift

For those who love cycling, whether as a hobby or a means of commute, understanding the bike’s gear system is of utmost importance. You may wonder, why? The answer is simple. Knowing when and how to shift your bike’s gears can drastically enhance your cycling experience. It can make your ride smoother, more efficient, and less tiring. Especially for novice cyclists, familiarizing yourself with the gear system can be a game-changer. So, let’s dive in and discover the fascinating world of bike gears.

The Basics of Bike Gears

Before we delve into the mechanics of bike gears, let’s familiarize ourselves with some basic terminologies. Firstly, we have the front and rear derailleurs. These are the devices that move your chain from one gear to another. Then we have the chainrings, the large gears attached to the pedals, and the cassettes, the set of gears on the rear wheel. Lastly, we have the sprockets, individual gears on the cassette. Understanding these terms is the first step towards mastering bike gears.

How Bike Gears Work

So how exactly do bike gears work? Let’s break it down. The combination of gears you choose – one from the chainring and one from the cassette – determines the effort you need to pedal and the speed of the bike. When you shift to a larger chainring or a smaller sprocket, you’ll need to put in more effort, but you’ll also go faster. On the other hand, shifting to a smaller chainring or a larger sprocket makes it easier to pedal, but you’ll travel slower. Sounds complicated? Don’t worry, with a bit of practice, you’ll become a pro in no time.

Now that we’ve covered the basics, you’re probably wondering how to use this knowledge in practical riding situations. Stay tuned, as we’ll be discussing that in the upcoming sections!

Types of Bike Gears

Did you know that not all bikes are made the same? Indeed, they aren’t! One of the primary differences lies in the type of gears they use. Bicycles generally come with three types of gears: single-speed, fixed gear, and multi-speed.

Single-speed bikes, as the name suggests, operate on a single gear ratio. They are most commonly seen on BMX or kids’ bikes. Then we have fixed gear bikes, often called ‘fixies.’ They are unique in that they do not allow coasting or freewheeling. Lastly, the multi-speed bikes come with a variety of gears to choose from, perfect for tackling diverse terrains and speeds. These are typically found on mountain bikes, road bikes, and hybrids.

Pros and Cons of Different Types of Gears

Each gear type comes with its unique set of advantages and disadvantages. Single-speed gears, for example, are simple and easy to use, making them ideal for beginners. However, their lack of versatility can be a limitation when cycling on varied terrains.

Fixed gears offer a direct connection between the rider and the bike, providing a unique riding experience. But, they can be challenging to handle for inexperienced cyclists. On the other hand, multi-speed gears offer a wider range of gear ratios, making them highly adaptable. However, they require a better understanding and regular maintenance due to their complexity.

Understanding Gear Ratios

Ever wondered what a gear ratio is? Well, in simple terms, a gear ratio refers to the relationship between the number of teeth on two gears that are meshed. In cycling, it determines the bike’s performance in different terrains.

For instance, a low gear ratio makes pedaling easier, perfect for uphill rides or when you’re battling against the wind. A high gear ratio, in contrast, is more challenging to pedal but can help you reach higher speeds, ideal for flat or downhill terrains.

Gear Ratios and Terrain

As we’ve mentioned before, changing the gear ratio can significantly influence your cycling experience. When you’re riding on a flat surface, a higher gear ratio can help you maintain a faster speed. When going uphill, shifting to a lower gear ratio can make the ride easier. And when you’re cruising downhill, a high gear ratio can help you harness the pull of gravity for an exhilarating ride. Isn’t it fascinating how gears can transform your ride?

Calculating Your Bike’s Gear Ratio

Calculating your bike’s gear ratio isn’t as complicated as it might seem. First, you need to know the number of teeth on the front chainring and the rear cog. The gear ratio is simply the division of the former by the latter. So, if your front chainring has 40 teeth and your rear cog has 20, your gear ratio is 2:1.

The Role of Cadence in Cycling

Let’s talk about cadence now. Cadence refers to the number of times a cyclist pedals per minute. It plays a pivotal role in determining your speed and the effort you need to put in while cycling.

The interesting part is that your gear shifting significantly influences your cadence. When you shift to a lower gear, your cadence increases, making it easier to pedal but at a slower speed. Conversely, shifting to a higher gear reduces cadence, making pedaling harder but at a faster speed. That’s why understanding gears and mastering the art of shifting is so crucial in cycling!

When to Shift Gears

Ever wondered when it’s the best time to shift gears while cycling? Well, it largely depends on factors like the terrain you’re cycling on and the speed you’re trying to maintain. Let’s dive right into it, shall we?

Shifting Gears for Uphill and Downhill Cycling

When cycling uphill, you’ll want to shift down to a lower gear to make pedaling easier. On the other hand, when going downhill, you should shift up to a higher gear. This helps to increase your speed without having to pedal like a maniac. Remember, the aim here is to maintain a comfortable and efficient cadence, regardless of the terrain.

But what if the terrain is constantly changing, you ask? Well, that’s where the beauty of bike gears comes in. Being able to switch between gears smoothly allows you to adapt to changes in the terrain, ensuring an enjoyable and efficient cycling experience.

Shifting Gears for Speed

Now, let’s talk about speed. Shifting gears can significantly affect your cycling speed. For instance, if you’re trying to increase your speed while cycling on a flat terrain, shifting up to a higher gear can make your wheels turn more for each pedal turn, allowing you to go faster. However, this also requires more effort. So, it’s a bit of a trade-off!

What about maintaining speed? Well, that’s where the concept of cadence comes into play. By shifting gears to maintain a comfortable and efficient cadence, you can maintain your speed without exerting unnecessary energy. It’s all about finding that sweet spot!

Common Mistakes in Gear Shifting

Shifting gears can be a bit tricky, especially if you’re a beginner. But don’t worry, we’ve all been there. Here are some common mistakes that beginner cyclists often make when shifting gears, along with some tips on how to avoid them:

  • Shifting too late: This can cause the chain to drop or the bike to come to a sudden stop. To avoid this, try to anticipate the terrain and shift gears in advance.
  • Shifting under load: Shifting gears while pedaling hard can cause wear and tear to your bike’s gear system. Try to ease off the pedals when shifting gears.
  • Not using the full range of gears: Many cyclists tend to stick to a small range of gears. However, doing so can make cycling more strenuous and less efficient. Don’t be afraid to explore the full range of gears on your bike.
  • Incorrect gear combinations: Using extreme gear combinations (like the smallest front gear with the smallest rear gear) can cause the chain to stretch, leading to wear and tear. Try to use a combination of gears that allows the chain to be as straight as possible.

Practical Tips for Shifting Bike Gears

Ever wondered how you could make your biking experience smoother and more enjoyable? Well, mastering the art of gear shifting might just be the answer! Here are some practical tips to help you shift gears like a pro:

  • Anticipate the Terrain: One of the keys to smooth gear shifting is anticipation. If you see a hill coming up, shift your gears before you start climbing to prevent your chain from straining.
  • Don’t Cross-Chain: This means you should avoid using the smallest chainring and smallest cog or the largest chainring and largest cog at the same time. It can cause unnecessary wear and tear on your gears.
  • Practice Makes Perfect: The more you practice shifting gears, the more intuitive it will become. Try practicing on different terrains and at different speeds to get comfortable with your bike’s gear system.
  • Listen to Your Bike: Your bike will often give you audible feedback when you need to shift gears. If you hear a clicking noise or if the bike feels like it’s struggling, it might be time to shift.

Basic Gear Maintenance

Maintaining your bike gears is just as important as knowing how to use them. Proper maintenance not only ensures smoother rides but also prolongs the life of your bike. Here are some maintenance tips to keep your gears in top shape:

Maintenance Tip Frequency
Clean your chain regularly Every 200-300 miles
Lubricate the chain Every 100-200 miles, or after cleaning
Check for wear and tear Every 500 miles
Replace the chain Every 2,000 miles, or if significantly worn

Becoming a More Efficient Cyclist

Understanding your bike gears and how to use them efficiently can truly transform your cycling experience. It can help you adapt to different terrains, maintain a steady cadence, and conserve energy. So why not take the time to practice your gear shifting skills?

Remember, every great cyclist was once a beginner. Don’t be discouraged if you don’t get it right away. With patience, practice, and a little bit of maintenance, you’re well on your way to becoming a more efficient and confident cyclist. So, are you ready to shift gears and take your biking experience to the next level?

Sharing the Road: Biking Etiquette Explained

Ever been on a bike ride and wondered if you’re following the unwritten rules of the road? You’re not alone. Understanding biking etiquette is crucial when you’re sharing the road with other users such as pedestrians and motorists. In this blog post, we’ll cover essential etiquette rules, help you understand traffic laws, and provide tips for safe and respectful biking. It’s not just about avoiding accidents—it’s about promoting harmony on the road.

Whether you’re a seasoned cyclist or a biking beginner, this guide will help you navigate the roadways with confidence and respect for your fellow travelers. So, buckle up your helmet and let’s get rolling!

Understanding the Basics of Road Sharing

What exactly is road sharing? It’s a simple concept that holds immense significance in ensuring safety and harmony on the roads. Road sharing is all about understanding that the road is a shared space, used by a variety of people including drivers, cyclists, and pedestrians. Each user has a responsibility to behave in a way that ensures the efficient and safe use of this shared space.

But how are different road users supposed to interact? That’s where the importance of understanding traffic rules and etiquette comes into play.

The Importance of Biking Etiquette

So, why is biking etiquette so important? It goes beyond the individual—it’s about ensuring the safety of all road users. Proper biking etiquette promotes better understanding, reduces conflicts, and ensures a more enjoyable biking experience for everyone.

It’s about giving and receiving respect. By following the rules of the road and showing consideration for others, we can all help to create a positive biking culture. Don’t you think it’s high time we start putting these principles into practice?

Essential Etiquette Rules for Bikers

Have you ever wondered about the unwritten rules that govern the world of cycling? Just like any other form of transportation, biking has its own set of etiquette rules that contribute to safer and more respectful road sharing. These rules are not just for the bikers but also for the pedestrians, motorists, and other road users they share the road with. So, what are these rules?

Yielding to Pedestrians

First and foremost, bikers should always yield to pedestrians. Why, you ask? It’s simple. Pedestrians are the most vulnerable road users, and they have the right of way. When you’re on a bike, and you see a pedestrian, slow down, acknowledge their presence, and let them pass. It’s about respecting their space and safety. Also, it’s crucial not to speed up or startle them, especially when overtaking. Remember, we’re all in this together, aren’t we?

Signaling Turns and Stops

Another essential etiquette rule is signaling your intentions. How else are other road users supposed to know what you’re planning? Whether you’re turning left, right, or stopping, it’s crucial to use hand signals to communicate your intentions. And it’s not just about safety. It’s also about courtesy and respect for others on the road. So, don’t forget to signal, it’s a simple act that can prevent accidents and misunderstandings.

Navigating Bike Lanes and Trails

Bike lanes and trails are a blessing for bikers. They provide a safe and efficient way to travel. But they also come with their own set of etiquette rules. First, always stay on the right, allowing others to pass on your left. It’s a standard rule that applies to most roads and trails. But what about when you want to overtake another biker?

Well, the rule is simple. Always announce your intention to overtake by saying “on your left” or using a bell. It’s about giving them a heads up and ensuring they’re not startled. And remember, never block the trails, whether you’re riding or taking a break. Keep to the side so that others can pass. Sounds fair, right?

Above all, navigating bike lanes and trails is about being aware of your surroundings and respectful of other users. So, let’s make the road a better place for everyone, shall we?

Understanding Traffic Laws for Bikers

As cyclists, we’re not just out there pedaling for fun or fitness, we’re part of the traffic. This means that, just like motorists, we are subject to certain rules and regulations. Ever thought about that? Many people don’t realize that bikers are legally considered vehicles on the road. We have the same rights – and responsibilities – as those behind the wheel of a car.

For instance, we must stop at stop signs and red lights, just like cars. We also have to signal our turns, using hand signals, so other road users know what we plan to do. Riding against traffic? Not a good idea – it’s illegal in most places and can be dangerous.

It’s critical to familiarize yourself with the specific traffic laws in your area because they can vary from one place to another. However, the underlying principle remains the same: we should conduct ourselves on the road as responsible, law-abiding users.

The Role of Courtesy in Biking Etiquette

Okay, so we’ve covered the legal part. But what about the unwritten rules of the road? We’re talking about courtesy. Yes, that old-fashioned concept that can make all the difference when it comes to harmonious road sharing. Think about it. How would you feel if every cyclist you encountered was rude or inconsiderate?

Small acts of courtesy can defuse potential conflicts, promote goodwill, and make the road a more pleasant place for everyone. A simple wave to a motorist who gives you space, a polite “on your left” when overtaking another cyclist, an apologetic smile if you make a mistake – these are all gestures that can go a long way in fostering positive interactions on the road.

But wait, there’s more. Courtesy also extends to how we treat the road itself. This means not littering, not damaging property, and respecting nature if we’re biking on trails. In other words, being good stewards of the environment. Sounds like a big responsibility, doesn’t it? Well, it is. But it’s also a rewarding one.

Common Courteous Acts for Bikers

  • Signal: Always signal your intentions to other road users. This is not just about following the law, it’s about showing respect.
  • Thank you wave: A friendly wave of thanks to a motorist who’s been considerate can do wonders for cyclist-driver relations.
  • Apologize if you make a mistake: We’re all human. If you mess up, a simple apology can diffuse any tension.
  • Respect nature: If you’re on trails, stay on the path to protect the environment and wildlife.
  • Don’t litter: Keep a small bag with you to store trash until you can dispose of it properly.

Tips for Safe and Respectful Biking

Now that we have a solid understanding of biking etiquette and traffic laws, let’s dig into some practical tips for safe and respectful biking. Remember, it’s not just about following the rules, it’s also about promoting a positive biking culture where everyone feels safe and respected.

Firstly, always ensure your bike is in good working condition before hitting the road. Regular maintenance checks are key in preventing accidents caused by mechanical failures. Secondly, wear appropriate safety gear like helmets, reflective clothing, and lights. This not only protects you but also makes you more visible to other road users, particularly in low-light situations.

Next, always be predictable in your movements. Sudden changes in direction can be dangerous, so make sure to signal your intentions well in advance. Also, respect traffic signs and signals just as any other vehicle would. Bicycles may be smaller and more agile, but they are still part of the traffic ecosystem and should adhere to the same rules.

Lastly, always keep a safe distance from other vehicles, pedestrians, and cyclists. This gives everyone enough space to manoeuvre and react to unexpected situations. And of course, remember to be courteous and patient on the road. A little kindness can go a long way in fostering a positive road-sharing environment.

Etiquette Rules Traffic Laws Practical Tips
Yielding to pedestrians Obey traffic signals Regular bike maintenance
Signaling turns and stops Adhere to speed limits Wear safety gear
Proper use of bike lanes and trails Riding on the right side of the road Be predictable in movements
Displaying courtesy Respect traffic signs Keep a safe distance

Final Thoughts on Biking Etiquette

As we wrap up, let’s take a moment to revisit the importance of good biking etiquette. It’s not just about rules and regulations, it’s about fostering a safer and more enjoyable environment for all road users. Whether you’re a seasoned cyclist or a beginner, it’s crucial to be knowledgeable of the etiquette and laws that govern sharing the road.

Remember, it’s in everyone’s best interest to promote a positive biking culture. So, why not lead by example? Show consideration for others, respect the laws, and continuously strive to improve your biking manners. After all, wouldn’t it be great if all your future rides were smooth, safe, and enjoyable?

How to Do Interval Training for Cyclists

Ever wondered how you could take your cycling hobby to the next level? Or perhaps you’re searching for a way to improve your cycling performance? If so, interval training might just be what you need. Cycling is not just a pastime; it’s a fantastic way to keep fit, challenge yourself, and explore new terrains. With interval training, you can unlock new potentials in your cycling performance.

But what exactly is interval training, you ask? And how can it benefit you as a cyclist? Let’s find out!

Understanding Interval Training

Interval training is a type of training that involves alternating periods of high-intensity exercise with low-intensity recovery periods. It’s not just for professional athletes; it’s beneficial for anyone looking to improve their fitness level, including cyclists like you.

There are various types of interval training, but the most common types include High Intensity Interval Training (HIIT) and Sprint Interval Training (SIT). As a cyclist, you can incorporate these types of interval training into your routine to boost your performance and endurance.

Now, let’s underline why interval training is a game-changer for cyclists.

Advantages of Interval Training for Cyclists

Interval training comes with a host of benefits that can significantly improve your cycling performance. One of the main advantages is improved cardiovascular health. By pushing your heart rate during the high-intensity periods, you strengthen your heart and improve your body’s ability to deliver oxygen to your muscles.

Interval training also leads to increased strength and endurance. The high-intensity periods challenge your muscles, leading to increased strength over time. This can translate to better endurance on your bike, allowing you to cycle longer distances without fatigue.

Finally, if you’re looking to boost your cycling speed, interval training can help. The explosive bursts of effort in the high-intensity periods can help increase your overall cycling speed, making you a faster, more efficient cyclist.

Ready to get started with interval training? Stay tuned for the next section where we will discuss exactly how to do that!

How to Get Started with Interval Training

So you’re ready to take your cycling to the next level? That’s great! But remember, it’s important to start slow and progress gradually. Safety should always be your top priority. And remember, it’s not a race. Your body will tell you when it’s ready to push harder, so make sure you’re listening to it.

Equipment Needed

Before you start, make sure you have the right gear. A good quality bicycle is a must. But it’s not just about the bike. A helmet is crucial for safety, and a comfortable cycling outfit can make your training sessions more enjoyable. You might also want to consider getting a cycling computer or a smartwatch to monitor your speed and heart rate. But remember, the most important thing is to have equipment that’s comfortable and safe.

Setting up an Interval Training Schedule

When it comes to setting up your training schedule, variety is key. You don’t want to do the same workout every day. Mix it up with different intensity levels, and make sure you’re incorporating rest days. It’s also important to balance your interval training with other fitness activities. Remember, your body needs time to recover, so don’t push yourself too hard. A balanced training schedule will help you avoid burnout and keep you motivated.

Simple Interval Training Workouts

Ready to get started? Here are a few simple interval workouts that are perfect for beginners:

  1. Workout 1: Start with a 10-minute warm-up, then do 20 seconds of high-intensity cycling followed by 40 seconds of low-intensity cycling. Repeat this cycle 10 times, then cool down for 10 minutes.
  2. Workout 2: Warm up for 10 minutes, then cycle at a high intensity for 1 minute. Follow this with 1 minute of low-intensity cycling. Repeat this cycle 10 times, then cool down for 10 minutes.
  3. Workout 3: After a 10-minute warm-up, cycle at a high intensity for 2 minutes, then cycle at a low intensity for 2 minutes. Repeat this cycle 5 times, then cool down for 10 minutes.

These workouts will help you build your endurance and speed. Remember, the high-intensity periods should be challenging, but not so hard that you can’t finish the workout. And don’t forget to hydrate!

Progressing in Interval Training

Once you have gotten into the rhythm of interval training, you may start to wonder, how do I keep advancing? The answer lies in monitoring your progress and knowing when to raise the bar. This doesn’t mean that you should be pushing yourself to the limit every single time. Instead, it’s about maintaining a balance and understanding your body’s signals.

One crucial aspect of progression is consistency. Just like any other form of exercise, interval training requires regular practice. By sticking to your training schedule, you will gradually notice improvements in your strength, endurance, and cycling speed.

Another important factor is gradual progression. This means slowly increasing the intensity or duration of your workouts over time. Doing too much too soon can lead to injuries and burnout. So, take your time and enjoy the journey!

Overcoming Common Challenges in Interval Training

Embarking on a new fitness regimen like interval training is not without its hurdles. You might face challenges such as fatigue, lack of motivation, or even injuries. But don’t worry, we’ve got you covered! Below is a list of common challenges and some tips on how to overcome them:

  • Fatigue: Rest is as important as the workout itself. Make sure you are getting enough sleep and incorporating rest days into your schedule.
  • Lack of motivation: Setting realistic goals and tracking your progress can keep you motivated. Also, remember why you started in the first place!
  • Injuries: Always warm up before your workout and cool down afterwards to reduce the risk of injuries. If you do get injured, seek medical advice and take it easy until you recover.

Remember, every cyclist faces these challenges at some point. It’s all part of the journey. The key is to stay patient, stay consistent, and most importantly, listen to your body.

Additional Tips for Effective Interval Training

Now that you’re well on your way to incorporating interval training into your cycling routine, how about we explore some additional tips to maximize your results? Remember, it’s not just about the training itself, but also about maintaining a balanced lifestyle. Exciting, isn’t it?

Proper Diet: Ever heard of the saying, “You are what you eat?” Well, it holds true for cyclists too. Consuming a balanced diet can significantly improve your performance. Prioritize lean proteins, complex carbohydrates, and healthy fats to fuel your body for optimal performance.

Staying Hydrated: Hydration is key! Ensure you’re drinking enough water before, during, and after your training sessions. Dehydration can negatively impact your performance and recovery, so don’t neglect this aspect.

Getting Enough Rest: Rest, believe it or not, is just as important as training. It’s during rest that your body recovers and muscles grow. Make sure you’re getting a good night’s sleep and also scheduling rest days in your training regimen.

Wrapping Up Interval Training Tips for Cyclists

And there you have it! We’ve embarked on a comprehensive journey exploring interval training for cyclists. From understanding the concept to starting your own regimen, overcoming challenges, and additional tips, we’ve covered it all.

Isn’t it exciting to see how a little knowledge can go a long way in enhancing your cycling experience? Remember, the road to improved performance is a marathon, not a sprint. So, take your time, enjoy the process, and watch as your efforts bear fruit.

So, are you ready to pedal your way to a fitter, healthier you?

Sections Key Points
Understanding Interval Training Improves cardiovascular health, increases strength and endurance, and enhances cycling speed and performance.
Getting Started with Interval Training Start slow, prioritize safety, and listen to your body.
Progressing in Interval Training Monitor your progress, increase intensity/duration gradually, and be consistent.
Overcoming Challenges Address fatigue, motivation issues, and potential injuries proactively.
Additional Tips Maintain a balanced diet, stay hydrated, and ensure sufficient rest.

Indoor Cycling vs Outdoor Cycling

Whether you’re a fitness enthusiast or a beginner starting your fitness journey, you’ve probably pondered over the dilemma of indoor cycling vs outdoor cycling. Both modes of cycling have their unique charms and challenges, and the choice between the two often boils down to individual preference, goals, and circumstances. Let’s explore both in detail.

Understanding Indoor Cycling

Indoor cycling typically refers to exercising on stationary bikes, usually in the comfort of your home or at a gym. It encompasses a range of activities, from spin classes that simulate road biking to virtual reality cycling that takes you on a scenic ride without leaving your room. Indoor cycling can be a convenient way to meet your exercise goals, especially if you’re time-crunched or prefer working out in a controlled environment.

Pros of Indoor Cycling

One of the biggest draws of indoor cycling is its convenience. Come rain or shine, your exercise routine remains uninterrupted. The controlled environment also allows you to easily track your progress and performance, offering tangible metrics that can be motivational for some. Plus, you get to avoid traffic, pollution, and the risk of accidents associated with outdoor cycling. Sounds appealing, doesn’t it?

Indoor cycling also provides an excellent platform for high-intensity interval training (HIIT). You can adjust the resistance on your indoor bike and alternate between high-intensity and low-intensity periods, which can be a powerful way to boost your cardiovascular fitness.

Cons of Indoor Cycling

However, indoor cycling is not without its downsides. For starters, the lack of real-world terrain and scenery can make the experience monotonous for some. The cost of purchasing a good quality stationary bike or a gym membership can also be a deterrent. Additionally, while some find the controlled environment of indoor cycling appealing, others may find it less engaging or motivating than cycling outdoors.

Also, indoor cycling primarily targets your lower body and, unlike outdoor biking, doesn’t offer much of a full-body workout. This could be a consideration if you’re looking to engage a wider range of muscles in your exercise routine.

Delving into Outdoor Cycling

Have you ever thought about the thrill of outdoor cycling? It’s not just about getting from point A to point B. Whether you’re on a traditional bike, a sleek road bike, or a rugged mountain bike, outdoor cycling offers a sense of adventure and freedom that’s hard to match. It’s you, your bike, and the open road – or trail. Sounds exciting, doesn’t it?

Different Types of Outdoor Cycling

Let’s explore the different types of outdoor cycling. First off, we have road cycling. This is probably what you picture when you think of cycling – speeding along paved roads, whether in the city or countryside. Next is mountain biking, where you tackle rough trails and steep inclines. It’s a bit more challenging, but the thrill is incomparable. And finally, there’s recreational cycling. This is for those who prefer a more laid-back ride, perhaps through a park or a leisurely ride around the neighborhood. Each type of outdoor cycling offers its own unique experience. Which one sparks your interest?

Advantages of Outdoor Cycling

There are several benefits to outdoor cycling. First and foremost, it improves balance and coordination. Unlike indoor cycling where the bike is stationary, outdoor cycling requires you to navigate and adjust to varying terrains and conditions. This not only works a wider range of muscles but also enhances your balancing skills.

Another advantage is the natural scenery. There’s something very calming about being surrounded by nature, and it can make your workout much more enjoyable. Plus, you get a dose of fresh air!

Lastly, outdoor cycling gives you an opportunity to socialize. Whether you’re cycling with friends or meeting other cyclists on your route, it’s a great way to connect with like-minded individuals. Who knew exercise could be this fun?

Disadvantages of Outdoor Cycling

But, of course, outdoor cycling has its downsides too. Weather can be unpredictable. One minute it’s sunny, the next it’s pouring rain. This can put a damper on your cycling plans and make for a challenging ride. No one likes to cycle in a storm, right?

Safety can also be a concern. Busy roads, uneven paths, and unexpected obstacles can pose potential hazards. It’s important to always be alert and aware of your surroundings.

And let’s not forget about maintenance. Bikes, especially those used for outdoor cycling, require regular upkeep. From tire pressure checks to brake adjustments, maintaining a bike can be quite a task. But, it’s a small price to pay for the joy of cycling outdoors, isn’t it?

Key Factors to Consider

So, you’re caught in the middle of the indoor cycling vs outdoor cycling debate. Which one is for you? Well, that might depend on a few key factors. These may include your fitness goals, the weather conditions in your area, safety concerns, your available time, budget, and, of course, personal preference.

Your Fitness Goals and Cycling

Let’s consider your fitness goals first. Both indoor and outdoor cycling can contribute to your fitness goals, but in slightly different ways. Indoor cycling, with its controlled environment, can be better for high-intensity interval training. Can’t you just picture yourself, sweat dripping, pushing hard for that last minute of a grueling interval?

On the other hand, outdoor cycling could be better for endurance training. Imagine yourself cycling down a countryside road, the wind in your hair, building your stamina with every mile. Isn’t it exhilarating?

Time, Money and Resources

Now, let’s talk about time, money, and resources. Not everyone has all the time in the world for workouts. Indoor cycling can be a great option for those with tight schedules, as you can do it at home or at the gym, no matter the time of day. No need to worry about the gym’s operating hours, or the sun setting too early.

However, if you’re on a tight budget, outdoor cycling could be more appealing. While there’s the initial investment of a bike, there aren’t any ongoing costs like gym memberships. But what about resources? Do you have access to safe cycling paths? Or does your apartment building have a gym with stationary bikes? These are all factors to consider in your decision.

Equipment Needed for Indoor and Outdoor Cycling

  1. Helmet: Whether you’re cycling indoors or outdoors, safety should be your priority. A helmet is a must.
  2. Bike: For outdoor cycling, you’ll need a traditional bike. For indoor cycling, you’ll need a stationary bike.
  3. Water Bottle: Hydration is key during any workout, so keep a water bottle handy.
  4. Cycling Shorts: Trust us, your bottom will thank you for this one.
  5. Heart Rate Monitor: This can be especially helpful for indoor cycling, where you’re looking to stay in certain heart rate zones.

Making the Choice: Indoor or Outdoor Cycling?

So, which one is right for you – indoor or outdoor cycling? The truth is, the decision ultimately depends on your personal preference and circumstances. Both forms of cycling have their unique benefits and drawbacks, and what matters most is what you enjoy and what fits your lifestyle.

Perhaps you live in a city with harsh winters, making outdoor cycling nearly impossible for half of the year. In that case, indoor cycling could be a great option. Or maybe you crave the fresh air and the feeling of the wind in your hair, in which case, outdoor cycling would likely be more enjoyable for you.

The key is to try both and see which you prefer. Remember, the most important thing is that you’re getting exercise and enjoying it, not whether you’re doing it inside or outside.

The Bottom Line

Throughout this post, we’ve explored the pros and cons of both indoor and outdoor cycling. Indoor cycling offers convenience, controlled conditions, and easy progress tracking, while outdoor cycling provides a sense of adventure, improves balance and coordination, and offers a social aspect.

However, both also have their downsides. Indoor cycling lacks real-world terrain and scenery and may require expensive equipment or gym memberships. Outdoor cycling, on the other hand, is subject to unpredictable weather and potential safety hazards.

Ultimately, the choice between the two should be based on your individual needs and preferences. Your decision should factor in your fitness goals, available time, budget, and personal preference.

Indoor Cycling Outdoor Cycling
Pros Convenience, controlled conditions, easy progress tracking Sense of adventure, improves balance and coordination, social aspect
Cons Lacks real-world terrain and scenery, may require expensive equipment or gym memberships Subject to unpredictable weather, potential safety hazards

Final Thoughts

To wrap things up, whether you choose indoor or outdoor cycling, the most important thing is that you’re staying active and enjoying it. Cycling, in any form, is a great way to improve cardiovascular health, build strength, and boost your mood.

So, why not give both a try and see which one you prefer? Who knows, you might just find that you love both equally! After all, variety is the spice of life, right?

So, get out there (or stay in!), start pedaling, and most importantly, have fun. Happy cycling!

Easy Bike Cleaning Tips: How to Clean Your Bike

Whether you’re a seasoned cyclist or a beginner, one thing is for sure – regular bike cleaning and maintenance is crucial. Not only does it prolong the life of your bike, but it also significantly enhances your overall biking experience. Imagine smoothly cruising down your favorite trail, your bike looking shiny and new. That’s the result of regular cleaning and maintenance. This guide is designed with beginners and hobbyists in mind, focusing on easy-to-follow steps that will keep your bike in top shape.

Why Regular Bike Cleaning is Crucial

Ever wondered why your bike’s performance seems to dip over time? Or why the gears aren’t shifting as smoothly as they did when the bike was new? The answer often lies in the lack of regular cleaning. By routinely cleaning your bike, you can detect potential issues early, prevent rust, ensure smoother operation, and extend the bike’s lifespan. Sounds like a win-win, doesn’t it?

Overview of the Bike Cleaning Process

The thought of cleaning your bike might seem daunting at first, especially if you’ve never done it before. But fear not! The process is quite simple. It starts with gathering your cleaning supplies, preparing your bike for cleaning, and then moving on to the actual cleaning process. Each part of the bike – whether it’s the frame, chain, gears, brakes, or wheels – needs specific attention. Once you’ve cleaned your bike, don’t forget to dry and lubricate it for optimal performance. Finally, a post-cleaning check will ensure your bike is ready for your next adventure. Ready to get started?

Gathering Your Bike Cleaning Supplies

Before we dive into the cleaning process, let’s first talk about the tools and materials you’ll need. Having the right cleaning supplies is essential for a thorough and effective bike cleaning. Just like a chef needs their cooking utensils, a bike enthusiast needs their cleaning tools. Ready to gather your cleaning arsenal?

Here’s a list of some basic cleaning supplies you’ll need:

  • Bucket
  • Warm water
  • Bike cleaning solution or dish soap
  • Sponge or soft bristle brush
  • Small brush for tight spots
  • Old toothbrush for chain and gears
  • Rags or towels for drying
  • Bike lubricant

Remember, these are just the basics. Depending on your bike and its condition, you might need a few more items. But don’t worry, most of these items are probably already in your home.

Environment Friendly Cleaning Supplies

Have you ever thought about the environmental impact of your cleaning supplies? Most conventional cleaning agents contain harmful chemicals that can harm the environment. As responsible bike owners and nature enthusiasts, we should do our part to minimize our impact.

That’s why it’s always a good idea to opt for eco-friendly cleaning supplies. For instance, instead of using chemical-laden cleaning solutions, why not use biodegradable soaps? They’re just as effective at cleaning your bike, but they’re much kinder to Mother Nature.

And what about those disposable rags? Instead, consider using reusable cloths. They can be washed and reused multiple times, reducing waste. Plus, they’re often more absorbent and effective at cleaning than disposable ones.

Choosing environmentally friendly cleaning supplies is a simple yet significant step towards a more sustainable lifestyle. And who knows, you might even find them more effective than their conventional counterparts!

Preparing Your Bike for a Clean

Now that you’ve gathered your cleaning supplies, it’s time to prepare your bike for a clean. But what does that involve?

First, remove any accessories like lights, saddle bags, or water bottle holders. This will make it easier to clean all the nooks and crannies of your bike. Plus, it prevents any damage to these items during the cleaning process.

Next, give your bike a quick once-over. Check for any visible damage or areas with serious dirt build-up. These areas may require extra attention during cleaning.

Lastly, position your bike for cleaning. If you have a bike stand, great! It will make the process much easier. If not, you can lean it against a wall, but make sure it’s in a stable position. And remember to place it somewhere where it’s okay for water and soap to splash around.

With your bike prepared, you’re ready to move on to the actual cleaning process. Excited to give your bike the spa treatment it deserves?

Deep Cleaning Step by Step Guide

Alright, let’s get our hands dirty (or rather, clean). Cleaning your bike isn’t just about making it look shiny and new. It’s about keeping it in top-notch condition so you can enjoy a smoother ride every time. Ready to get started? Here’s a detailed, step-by-step guide on how to clean different parts of your bike.

Cleaning the Bike Frame

The frame is the backbone of your bike and deserves your utmost attention. Use a sponge and some soapy water to gently clean the frame. Make sure to reach all those hidden nooks and crannies where dirt likes to hide. Rinse thoroughly with water.

Cleaning the Chain

Next on the list is the chain. This is your bike’s lifeline, transferring your pedal power to the rear wheel. A dirty chain not only affects performance but can also wear down quicker. Use a chain cleaning tool if you have one or simply use a brush and some degreaser. Remember to rinse well and dry before re-lubricating.

Cleaning the Gears

Ever wondered why changing gears feels rough sometimes? It’s probably because they’re dirty. Use a brush and some degreaser to clean the front and rear gears (also known as derailleurs). Don’t forget to re-lubricate after drying.

Cleaning the Brakes

Brakes are vital for safety, so you want them working at their best. Wipe the brake pads and discs with a clean, damp cloth. Make sure not to touch the brake surfaces with oily hands or let any lubricant get on them.

Cleaning the Wheels

Last but not least, the wheels. Take them off for a thorough clean. Use a brush and soapy water for the rims and spokes. For the tires, scrub off any dirt or debris stuck in the tread.

Well, that covers the basics of a deep bike clean. Let’s summarize these steps in a table for easy reference.

summarizing the cleaning steps for each part of the bike

Part of the Bike Cleaning Steps
Frame Clean with a sponge and soapy water, rinse, dry.
Chain Use a chain cleaning tool or a brush and degreaser, rinse, dry, re-lubricate.
Gears Clean the front and rear derailleurs with a brush and degreaser, rinse, dry, re-lubricate.
Brakes Wipe the brake pads and discs with a clean, damp cloth.
Wheels Remove and clean the rims, spokes, and tires with a brush and soapy water.

Remember, a clean bike is a happy bike. So, let’s keep those bikes clean and shiny, shall we?

Drying and Lubricating Your Bike

Now that your bike is squeaky clean, what’s next? Well, it’s time to dry it properly. The importance of drying your bike post-cleaning cannot be overstressed. It’s not just about wiping away the water; it’s about preventing rust and ensuring the longevity of your bike’s components.

To do this, gently wipe off excess water using a dry, soft cloth. Make sure to reach all the nooks and crannies of your bike where water might be hiding. A pro tip is to use a compressed air sprayer to blow out water from hard-to-reach areas. But remember, always be gentle!

Lubricating Your Bike After Cleaning

Once your bike is all dried up, the next step is lubricating. Ever wondered why your bike rides smoother after a thorough cleaning? The secret lies in the lubrication. It not only ensures smooth operation but also protects your bike’s components from wear and tear.

There are many types of lubricants available in the market, such as wet lube, dry lube, ceramic lube, etc. The type of lube you should use depends on your riding conditions. For instance, if you ride in wet conditions, a wet lube would be ideal.

Applying lubricant is simple. Drip the lube on each chain link while slowly turning the pedals in a reverse motion. After that, apply lube to other moving parts like the derailleurs and brake pivot points.

Post-Cleaning Bike Check

Alright, your bike is clean, dry, and well-lubricated. But are we done yet? Not quite. It’s time for a post-cleaning bike check. This is an excellent opportunity to check for any damages that may have been revealed during the cleaning process.

Ensure all parts are functioning well. Check the brakes, gears, and tires. Remember, safety is paramount, so never overlook this step. It’s always better to spot and fix a small problem before it turns into a big one, right?

Maintaining Cleanliness Between Major Cleans

So, you’ve done a great job cleaning your bike. But how do you keep it clean and shiny until the next major cleaning session? Good question! Here’s where our maintenance tips come in handy.

  • Wipe your bike down after each ride, especially if you’ve been riding in wet or muddy conditions.
  • Clean your chain regularly. A dirty chain not only affects performance but can also wear down other components faster.
  • Keep your tires inflated to the correct pressure. This can prevent unnecessary dirt and debris from sticking to them.
  • Store your bike properly. If possible, keep your bike indoors and away from the elements.
  • Use fenders. They can prevent mud and water from spraying onto your bike, keeping it cleaner for longer.

With these tips, you can keep your bike looking and performing its best between major cleaning sessions. And when it’s time for the next big clean, it will be much easier. So, are you ready to keep that bike sparkling?

Should I Wear a Windbreaker or Rain Jacket for Cycling?

Imagine cycling on a cool, crisp morning; the wind is blowing against your face, and the sky is threatening rain. The experience can be exhilarating, but it can also be uncomfortable, even dangerous, if you’re not wearing the right clothing. Choosing the right cycling attire, particularly for adverse weather conditions, is crucial not only for your comfort but also for your safety. This is where items such as windbreakers and rain jackets come into play. These specially designed pieces of clothing can protect you from harsh elements and significantly enhance your cycling experience.

But how do you decide between a windbreaker and a rain jacket? Is one inherently better than the other? To make an informed decision, you need to understand your cycling environment and the specific characteristics of each type of jacket.

Understanding Your Cycling Environment

Your cycling environment is a key factor that should influence your choice of attire. Are you cycling in an area with high winds? Is rain frequent? How about the temperature? Even the duration of your ride matters. For instance, a quick ride in a city may not require as much protection as a long-distance ride in the countryside. Knowing your environment will help you choose the most suitable clothing for your cycling needs.

Windbreaker vs Rain Jacket: What’s the Difference?

At first glance, windbreakers and rain jackets may seem quite similar. They both offer protection from the elements and are commonly used by outdoor enthusiasts. However, there are key differences in their designs, materials, and specific uses.

A windbreaker, as the name suggests, is primarily designed to protect you from the wind. They are typically lightweight, making them ideal for activities that require a lot of movement, like cycling. On the other hand, a rain jacket is specifically designed to protect you from water. It is usually made from waterproof materials and has a design that keeps water out, even in heavy rain.

So, windbreaker or rain jacket? The answer depends on your specific cycling needs and conditions. The next sections will explore these jackets in more detail to help you make an informed decision.

Key Features of a Cycling Windbreaker

Have you ever thought about the importance of a cycling windbreaker? They’re not just a fashion statement, but a crucial part of a cyclist’s attire. Let’s break down the key features that make a windbreaker such a valuable piece of clothing for cyclists.

Firstly, windbreakers are lightweight. This makes them easy to carry and wear without adding unnecessary weight, allowing for ease of movement while cycling. Secondly, they offer excellent wind resistance. Their unique design and materials help to reduce the wind’s impact, keeping you comfortable even on gusty days. Lastly, windbreakers are known for their breathability, an essential feature that prevents overheating during intensive cycling sessions.

Material and Design of Windbreakers

What exactly are windbreakers made of? Typically, they’re crafted from synthetic materials like nylon and polyester. These materials are not only lightweight but also durable and resistant to wind. Windbreakers are often designed with a loose fit and a front zipper, which helps reduce wind penetration and allows for better ventilation.

When to Use a Windbreaker

Now, you might be wondering, “When is the best time to wear a windbreaker?” Well, windbreakers are most effective in windy but relatively dry conditions. They can keep you warm when the wind chill is high and you need protection from the biting cold. Remember, while windbreakers can handle a light drizzle, they are not designed for heavy rain.

Key Features of a Cycling Rain Jacket

On the other hand, we have the reliable rain jacket. Just as vital as the windbreaker, a rain jacket has its unique features that make it an essential part of a cyclist’s wardrobe. Let’s take a closer look at what makes a rain jacket stand out.

One of the major features of a rain jacket is its waterproofing properties. Rain jackets are designed to keep you dry in heavy rain, ensuring comfort during your ride. They are also more durable than windbreakers and can withstand harsh weather conditions. However, this durability comes with a slightly heavier weight.

Material and Design of Rain Jackets

Rain jackets are often made from materials such as Gore-Tex, which are not only waterproof but also breathable. Their design typically includes features like sealed seams and waterproof zippers to repel water effectively.

When to Use a Rain Jacket

So, when should you consider wearing a rain jacket? As you might guess, a rain jacket is your best bet in heavy rain or very wet conditions. It provides the necessary protection to keep you dry, enabling you to enjoy your ride, come rain or shine.

Features Windbreaker Rain Jacket
Weight Lightweight Heavier
Weather Protection Wind Resistance Waterproof
Breathability High Varies
Material Nylon, Polyester Gore-Tex, etc.

Maintaining and Caring for Your Cycling Attire

Ever wondered how to keep your windbreaker or rain jacket in tip-top shape? Proper maintenance and care not only extends the lifespan of your cycling gear, but it also ensures optimal performance. Let’s get into it, shall we?

First and foremost, washing your windbreaker or rain jacket is crucial. However, it’s not as simple as throwing them in the washing machine with your regular laundry. These jackets often have special coatings that could be damaged by harsh detergents or high temperatures. Therefore, it’s best to use a gentle cycle and mild soap. If possible, hand washing is the safest option.

When it comes to drying, air drying is the way to go. High heat can degrade the material and affect its water-resistant or wind-resistant properties. Simply hang your jacket in a well-ventilated area and let it dry naturally.

Finally, proper storage is key. Avoid folding your jacket in a way that could crease or damage the material. Hanging it up in a dry, cool place is usually the best practice. Remember, taking good care of your cycling attire can make a significant difference in its effectiveness and longevity.

Popular Brands and Where to Buy

Now that we’ve covered how to care for your windbreaker or rain jacket, let’s talk about where to get them. There are numerous brands out there that produce high-quality cycling attire. The key is to find one that suits your needs and budget.

Some well-known brands in the market include Castelli, Pearl Izumi, and Gore Wear. These brands are renowned for their high-quality materials and innovative designs that cater to the needs of cyclists. But where can you buy these brands, you ask?

Physical sports stores usually carry a range of cycling attire. However, their selection might be limited compared to online platforms. Websites like Amazon, REI, and Backcountry not only offer a wider variety, but they also provide customer reviews, which can be helpful when choosing the right product.

  • Castelli: Available at Castelli official website, Amazon, and REI
  • Pearl Izumi: Available at Pearl Izumi official website, Amazon, and Backcountry
  • Gore Wear: Available at Gore Wear official website, Amazon, and REI

Remember, the key to a great cycling experience is not just about having the right gear, but also about ensuring it fits well and is comfortable. So, take your time when shopping and make sure to read reviews and product descriptions thoroughly.

The Impact of Your Cycling Outfit on Performance

Have you ever wondered how much of an effect your cycling attire has on your performance? The answer is – a lot! Wearing the right gear, such as windbreakers and rain jackets, can significantly improve your cycling experience, especially in adverse weather conditions.

For starters, wearing a windbreaker or rain jacket can provide protection against harsh weather elements. This not only increases comfort but also helps to maintain the body’s temperature, thereby reducing the risk of hypothermia. A well-ventilated jacket can also help wick away sweat, keeping you dry and reducing the risk of chafing and other discomforts.

Furthermore, the right attire can actually enhance your performance. For instance, a good cycling jacket is usually designed to be aerodynamic, helping you cut through the wind with less resistance. This can result in faster speeds and less energy expenditure.

Remember, comfort equates to better performance. If you’re comfortable, you’re less likely to get distracted, allowing you to focus on your ride.

Concluding Thoughts on Windbreakers and Rain Jackets for Cyclists

To wrap things up, choosing the right attire, be it a windbreaker or rain jacket, is crucial for any cyclist. The weather conditions and personal comfort are paramount in making this decision.

Windbreakers, with their lightweight and wind-resistant features, are perfect for those windy days when you need something to keep the chill off, but not necessarily to keep you dry. On the other hand, rain jackets, with their waterproofing and durability, are your best bet when the skies open up and the rain starts to pour.

At the end of the day, your decision should be based on what will make your ride the most comfortable and enjoyable. After all, isn’t that why we cycle?

Recap: Choosing Between a Windbreaker and Rain Jacket for Cycling

  • Consider the weather: Is it windy or rainy? Choose a windbreaker for the former and a rain jacket for the latter.
  • Think about your comfort: Which type of jacket do you find more comfortable to wear?
  • Consider the duration of your ride: If you’re going to be out for a long time, you might need a jacket that offers more protection.
  • Evaluate the jacket’s features: Does it have the features you need, such as breathability, waterproofing, or wind resistance?
  • Think about your performance: A good jacket can enhance your performance by helping you maintain your body temperature and cut through the wind more efficiently.

Bike Frame Materials Explained: Everything You Need to Know

Imagine a bicycle. What’s the first thing that comes to your mind? Is it the handlebars, the wheels, or the seat? While all these components are important, none of them would function without the frame. The backbone of any bicycle, the frame, holds everything together, providing the essential structure that allows the bike to move and bear weight. But did you know that the material of the bike frame can greatly influence the bike’s weight, strength, ride quality, and price? That’s right, the choice of frame material can make a significant difference!

Why Frame Material Matters

When it comes to bicycles, the frame material isn’t just about aesthetics. It plays a significant role in the performance of the bike. The weight of the frame can influence your speed and the ease of maneuverability. The stiffness of the material can affect the bike’s handling and responsiveness. Its durability can determine how long the bike lasts. And let’s not forget cost – the price of the bike can greatly vary depending on the frame material. So, choosing the right frame material is as crucial as choosing the right bike itself.

Understanding Different Bike Frame Materials

There are several types of bike frame materials available in the market today. Each has its unique properties, advantages, and disadvantages. From the traditional steel and aluminum frames to the high-tech carbon fiber and titanium frames, the options are vast. But don’t worry! In the following sections, we’ll dive deep into each type, helping you understand what each material brings to the table. Ready to get started?

Steel Bike Frames

Have you ever wondered why steel has been a popular choice for bike frames for decades? It’s all about its unique properties. Steel, an alloy of iron and carbon, offers a balance of strength, durability, and repairability that few materials can match. When we think about the iconic vintage bikes that have stood the test of time, most of them have one thing in common – a steel frame.

Advantages of Steel Frames

So, what makes steel frames a favorite among many cyclists? Let’s explore.

  • Durability: Steel is incredibly durable. It can withstand a significant amount of stress before it deforms or breaks, making it ideal for rough terrains and heavy riders.
  • Repairability: Unlike other materials, steel frames can be repaired if damaged. This is a huge advantage for those who use their bikes extensively and want a long-lasting frame.
  • Affordability: Steel is relatively inexpensive compared to other bike frame materials, making it a budget-friendly choice for many cyclists.

Disadvantages of Steel Frames

Despite its many advantages, steel frames are not without their drawbacks.

One of the major disadvantages is weight. Steel is heavier than materials like aluminum and carbon fiber, which can make a steel-framed bike more challenging to maneuver and slower to accelerate. Moreover, without proper care and maintenance, steel frames are susceptible to rust, which can degrade the frame’s integrity over time.

A Comparative Table of Steel Bike Frames

Advantages Disadvantages
Highly durable Heavier than other materials
Repairable Prone to rust if not properly maintained
Affordable

Aluminum Bike Frames

When it comes to lightweight bike frames, aluminum is often the first material that comes to mind. Aluminum frames are significantly lighter than steel ones, which can make a noticeable difference in the bike’s performance, especially over long distances or when climbing steep hills.

Advantages of Aluminum Frames

Aluminum bike frames come with their own set of benefits.

  • Lightweight: Aluminum is a light material, which makes aluminum frames much lighter than steel ones. This can result in a faster, more agile bike.
  • Resistance to Rust: Unlike steel, aluminum doesn’t rust, which means it requires less maintenance to keep in good condition.

Disadvantages of Aluminum Frames

Despite the advantages, aluminum frames do have some potential drawbacks to consider.

One major concern is the comfort. Aluminum is a very stiff material, which can result in a harsher ride compared to steel frames. This rigidity can lead to more vibration being transferred to the rider, which can be uncomfortable on longer rides or rough surfaces.

Carbon Fiber Bike Frames

Let’s shift gears and talk about carbon fiber. Carbon fiber is a high-tech material that’s making its way into the world of bike frames, and for good reason. It’s a composite material, made from thin strands of carbon that are bonded together with a plastic polymer resin. The result? A bike frame that’s both lightweight and incredibly strong. But there’s more to this material than just its weight and strength.

Advantages of Carbon Fiber Frames

So, what makes carbon fiber such a popular choice for bike frames? Well, for starters, it’s incredibly light. Who wouldn’t want to shave off a few extra pounds from their ride? But it’s not just about weight. Carbon fiber is also incredibly strong, but its real advantage comes from its versatility. It can be manipulated into shapes that other materials simply can’t achieve. This means that manufacturers can optimize the frame design for maximum performance.

Think about it. Don’t you want a bike frame that’s designed specifically to maximize power transfer and reduce drag? Of course, you do!

Disadvantages of Carbon Fiber Frames

But it’s not all sunshine and rainbows with carbon fiber frames. Firstly, they come with a pretty hefty price tag. This high-tech material isn’t cheap to produce, and that cost is passed on to the consumer. So, while a carbon fiber frame might be light on the scales, it’s sure to be heavy on your wallet.

Additionally, while carbon fiber is incredibly strong, it can be prone to damage. Unlike steel or aluminum, carbon fiber doesn’t dent or deform — it cracks. And once it’s cracked, it can be difficult to repair. So, while a carbon fiber bike frame might last a lifetime, it requires a bit more care and attention than its metal counterparts.

Titanium Bike Frames

And then there’s titanium. Titanium frames are renowned for their light weight and incredible resistance to corrosion. But what else is there to know about this material?

Advantages of Titanium Frames

There’s a lot to love about titanium. Firstly, it’s incredibly durable. A titanium frame can withstand a lot of punishment and still come out looking as good as new. It also offers a superb ride quality, thanks to its natural flexibility. This gives titanium frames a smooth, comfortable ride that’s hard to beat.

And did we mention its corrosion resistance? Unlike steel, titanium won’t rust, making it a great choice if you live in a wet climate or near the ocean. It’s also incredibly light, although not quite as light as carbon fiber.

Disadvantages of Titanium Frames

But titanium isn’t perfect. Its main drawback is its cost. Titanium is a difficult material to work with, which makes it more expensive to produce than other materials. So, while a titanium frame might be a great investment in terms of performance and longevity, it’s certainly not an option for those on a tight budget.

Choosing the Right Frame Material

Have you ever wondered how to choose the right bike frame material? Well, it all comes down to your personal needs and preferences. What’s your main goal? Is it performance or comfort? Perhaps it’s a mix of both? Your budget and the type of cycling you plan on doing are also significant factors. For example, if you’re into long-distance cycling, you might prioritize comfort over weight. On the other hand, if you’re a road racer, weight and stiffness could be your top considerations. It’s all about finding the right balance for you.

The Impact of Manufacturing Techniques

You might be surprised to learn that the same material can exhibit different characteristics depending on the manufacturing techniques used. Yes, that’s right! For instance, steel can be made to be very stiff or quite flexible, based on how it’s processed and shaped. This variability in manufacturing can greatly impact the ride quality and performance of a bike. The way the tubes are joined together (whether it’s by welding, lugging, or bonding) also plays a significant role in the bike’s overall feel. So, don’t just consider the material itself, but also how it’s been worked.

Recommendations for Different Cyclists

  • Road Racers: Opt for carbon fiber frames due to their light weight and stiffness.
  • Mountain Bikers: Aluminum frames are a good choice due to their strength, light weight, and affordability.
  • Long-distance Cyclists: Steel frames can offer a comfortable ride due to their flexibility and vibration absorption.
  • Casual Cyclists: Both steel and aluminum frames would suit, depending on whether you value comfort (steel) or low weight (aluminum).
  • Touring Cyclists: Steel frames are preferable due to their durability and ease of repair.

Final Words

In conclusion, choosing the right bike frame material is a personal decision that should be based on your individual needs and preferences. There’s no one-size-fits-all answer. Whether you’re a casual rider, a long-distance cyclist, or a competitive racer, the perfect bike frame material for you is the one that meets your specific needs and fits within your budget. So, take your time, do your research, and don’t be afraid to ask for advice. After all, the joy of cycling is all about the ride, and choosing the right frame material is a big part of that experience.

Hydration and Nutrition: The Importance of Proper Fueling

Imagine you’re out on a long cycling ride. Your body is working hard, your muscles are exerting themselves, and all you can think about is the finish line. But what’s fueling your journey? Are you properly hydrated? Do you have the right nutrition to keep you going? The importance of proper fueling can’t be overstated. Yet, it’s an aspect beginners often neglect, focusing more on speed and endurance. This blog aims to shed light on how proper hydration and nutrition can enhance cycling performance.

Understanding Our Body’s Fueling Needs

Every time we pedal, our body is using the food and water we consume as fuel. But how does this work? It’s all about carbohydrates, fats, proteins, water, and electrolytes. Carbohydrates and fats are our body’s main energy sources, while proteins help repair and build muscles. Water and electrolytes, on the other hand, keep us hydrated and maintain our body’s balance. Think of your body as a complex machine; it needs all these components to function optimally, especially during strenuous activities like cycling.

Recognizing the Signs of Dehydration and Poor Nutrition

Dehydration and poor nutrition are two major roadblocks that can hinder your cycling performance. But how do you recognize the signs? Dehydration can manifest as a dry mouth, fatigue, or dizziness. Poor nutrition might leave you feeling weak, sluggish, or lightheaded. These symptoms not only affect your performance but can also impact your overall wellbeing. It’s important to listen to your body and fuel it properly to prevent these issues.

Building a Hydration Strategy

Have you ever wondered why staying hydrated is so crucial when you’re cycling? Well, hydration is not just about replacing the water you lose through sweat. It’s also about maintaining the balance of electrolytes in your body and ensuring your muscles function optimally. Let’s explore some ways to stay hydrated before, during, and after your ride.

Hydration Before the Ride

Starting your ride well-hydrated is key. But how do you ensure that? It’s not just about drinking a ton of water right before you hop on your bike. In fact, that’s a common mistake that can lead to discomfort during your ride. Instead, focus on consistent hydration throughout the day leading up to your ride. Consuming fluids regularly can help maintain your hydration levels and prepare your body for the task ahead. Water, of course, is your best friend, but don’t shy away from beverages like herbal tea or fruit-infused water either.

Staying Hydrated During the Ride

Now, what about during the ride? The simplest and most effective way to stay hydrated is by carrying a water bottle. But what if you’re planning a longer ride? That’s where a hydration pack comes in handy. These backpack-like devices hold larger amounts of water, allowing you to drink hands-free while you ride. Just remember, your goal is to maintain hydration, not to drink so much that you feel waterlogged. Listen to your body and drink when you’re thirsty. And don’t forget those electrolytes! They are crucial for muscle function, so consider a sports drink or an electrolyte tablet if you’re going for a long ride.

Building a Nutrition Plan

Just like a car needs fuel to run, your body needs fuel to perform. But not just any fuel will do. The quality and timing of your meals can significantly impact your cycling performance, recovery, and overall health. Let’s explore how to create a solid nutrition plan for your rides.

Pre-Ride Meals

Have you ever felt sluggish or fatigued during a ride and wondered why? It could be due to what you ate (or didn’t eat) before setting off. The goal of your pre-ride meal is to provide sustained energy for your ride. Opt for a balance of carbohydrates and protein, and don’t forget a little healthy fat. Whole grain toast with peanut butter and banana, or a bowl of oatmeal with nuts and berries, are both excellent options. Make sure to eat this meal 2-3 hours before your ride to give your body time to digest.

Nutrition During the Ride

We’ve all seen those cyclists who munch on energy bars and gels while they ride. But are they really necessary? The answer is, it depends. For short rides, you probably don’t need to eat anything. But for longer rides, consuming small, nutrient-dense snacks can help maintain your energy levels. Portable snacks like bananas, trail mix, or energy bars work well. Just remember, it’s not about eating a full meal during the ride, but about providing your body with the fuel it needs to keep going.

Hydration and Nutrition Myths Debunked

Ever heard the saying, ‘sports drinks are always the best choice for hydration,’ or ‘you don’t need to eat during short rides’? Well, these are just a few of the many misconceptions that revolve around the realm of hydration and nutrition in cycling. It’s time to set the record straight and debunk these myths.

Truth be told, while sports drinks can be beneficial, they’re not always the best choice. And yes, even during short rides, your body needs energy, and that can only be supplied by fueling up properly. Let’s look at some of these common myths and their corresponding facts in the table below.

Myth Fact
Sports drinks are always the best choice for hydration While sports drinks can replenish electrolytes, water is often sufficient for hydration, especially for shorter rides.
You don’t need to eat during short rides Even during short rides, your body needs energy. Consuming a small, carbohydrate-rich snack can prevent energy dips.
More protein means more muscle Protein is essential for muscle recovery, but excess protein does not equate to more muscle. Balance is key.
You should only drink when you’re thirsty Thirst is a late indicator of dehydration. It’s important to drink regularly, especially during long rides.

Experimenting with Different Fuel Sources

One size doesn’t fit all when it comes to fueling your body for cycling. Each of us is unique, and what works for one cyclist may not work for another. Have you ever considered trying out different foods and drinks to find what works best for you?

From energy gels and bars to homemade sandwiches, there are various options to consider. Even within the realm of sports drinks, there’s a wide variety to choose from, each with its own pros and cons. Some provide quick energy, while others offer sustained release. Some might sit well in your stomach, while others might not.

Let’s not forget about hydration. Water, sports drinks, coconut water – what quenches your thirst and keeps you hydrated the best? It’s worth exploring all your options and finding your unique formula for success.

Remember, the key here is to experiment during training, not on the day of a big ride or race. The last thing you want is stomach trouble when you’re pushing for a personal best!

Basic Tips for Balancing Hydration and Nutrition

Now that we’ve covered the basics, how about some actionable tips to help you balance hydration and nutrition effectively? Sounds good, right? Let’s dive right in.

  • Hydrate before, during, and after your ride: Don’t wait until you’re thirsty to drink. Keep sipping on water or a sports drink throughout your ride to maintain hydration.
  • Eat a balanced meal before your ride: Include a good mix of carbohydrates, proteins, and fats in your pre-ride meal. This will provide sustained energy throughout your ride.
  • Snack during your ride: Pack portable, nutrient-dense snacks to fuel your cycling. Energy bars, bananas, and nuts are some great options.
  • Replenish post-ride: Post-ride nutrition is crucial for recovery. Include a mix of carbohydrates and proteins in your post-ride meal to replenish energy stores and repair muscle tissue.
  • Listen to your body: Everyone is different. Pay attention to how your body responds to different foods and hydration strategies, and adjust accordingly.

The Role of Hydration and Nutrition in Recovery

Have you ever wondered about the importance of hydration and nutrition in post-ride recovery? It’s more vital than you may think.

Hydration and nutrition play a crucial role in recovery post-ride. Rehydrating helps replace the fluids lost through sweat, while refueling replenishes the energy stores depleted during your ride. Also, don’t forget about those electrolytes! They help maintain your body’s balance of fluids, and their loss can lead to muscle cramps or even more severe conditions.

So next time you finish a ride, grab a glass of water, a healthy snack, and give your body the care it deserves. It’s not just about performing well during the ride, but also about recovering efficiently afterward.

Resources to Learn More About Hydration and Nutrition

Want to dive deeper into the world of cycling-specific hydration and nutrition? Here are some resources to help you continue your learning journey.

  • The Feed Zone Cookbook: This book is packed with easy-to-make recipes that are perfect for cyclists.
  • TrainingPeaks: An online resource that offers a wealth of articles on nutrition and hydration for endurance sports.
  • MyFitnessPal: This app can help you track your food and water intake, ensuring you’re meeting your nutritional needs.
  • Eat Sleep Cycle: A Bike Ride Around the World: This book not only chronicles a global cycling adventure but also includes insights on fueling for such a demanding journey.
  • Global Cycling Network: This YouTube channel often features videos on nutrition and hydration for cyclists.