Should I Cycle Alone or Join Group Rides?

There’s something undeniably appealing about cycling. The wind in your hair, the rush of adrenaline, and the sense of accomplishment after a long ride can make it an addictive hobby. Not to mention, it’s a fantastic way to stay fit and explore the outdoors. However, one question that often arises for beginners is whether to embark on solo rides or join group rides. Each offers a unique experience with its own set of benefits. So, how do you decide which is right for you? This blog aims to shed some light on this topic and help you make an informed decision.

Understanding the Basics of Cycling

Before we delve into the solo vs group cycling debate, let’s go over the basics. Cycling, like any sport, requires the right gear. This includes a suitable bike, helmet, and comfortable clothing. Safety is paramount, so make sure you’re familiar with road rules and always be aware of your surroundings. As for riding techniques, it’s all about balance, control, and endurance. And remember, practice makes perfect!

The Appeal of Solo Cycling

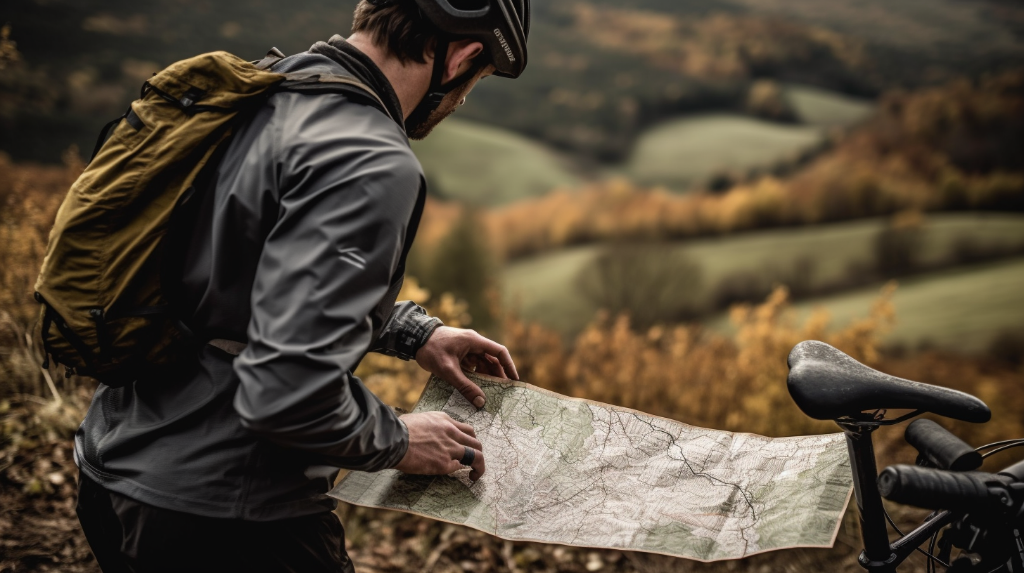
Now, let’s talk about solo cycling. Have you ever felt the need for some alone time? A moment to unwind, reflect, and just be with your thoughts? That’s what solo cycling can offer. It gives you the freedom to ride at your own pace, stop whenever you want, and choose your route. It’s just you, your bike, and the open road. Sounds pretty liberating, doesn’t it?

Pros and Cons of Cycling Alone

Have you ever wondered about the upsides and downsides of cycling alone? Well, let’s dive into it. Just like any other activity, cycling alone comes with its own set of pros and cons.

Advantages of Cycling Alone

One of the significant advantages of solo cycling is the independence it offers. You can set your own pace, choose your own routes, and take breaks whenever you feel like it. There’s no need to keep up with anyone or adjust your speed to a group’s average. Sounds liberating, doesn’t it?

Besides the freedom, cycling alone allows for a great deal of flexibility. You can decide to take off on a ride on a whim without having to coordinate schedules with others. This can be a real advantage if you have an unpredictable routine.

Lastly, solo rides can provide valuable time for introspection. The quiet solitude of a bike ride can offer a perfect backdrop for some deep thinking or even a bit of daydreaming. It’s the perfect way to clear your head and enjoy your own company.

Disadvantages of Cycling Alone

However, cycling alone is not without its challenges. A common issue solo riders face is the lack of external motivation. Without a group to push you, it might be easier to slack off or even skip rides.

Another concern when cycling alone is safety. In case of an accident or mechanical trouble, you’re on your own. This lack of support can be daunting, especially for beginners or on more remote routes.

Lastly, solo rides can sometimes get lonely. The lack of social interaction on long rides might make them feel monotonous or even boring for some people.

Navigating Solo Rides Successfully

Despite these challenges, solo rides can be quite rewarding. The key is to navigate them successfully. But how?

Firstly, it’s crucial to plan your routes in advance. Knowing where you’re going can give you confidence and prevent you from getting lost.

When it comes to safety precautions, always ensure that you have the right safety gear and your bike is in good shape before you head out. Carry a basic repair kit and learn how to fix common issues like a flat tire.

And finally, if you’re worried about motivation, set personal goals or use a fitness app to track your progress. Seeing your improvement over time can be a great motivator. Remember, the most important thing is to enjoy the ride!

Solo Cycling Group Cycling
Freedom High – Choose your own routes and pace Reduced – Need to consider group’s preferences
Safety Moderate – Increased risk when cycling alone High – Safety in numbers
Social Aspect Low – Mostly solitary activity High – Opportunity to meet and interact with others
Motivation Moderate – Self-motivation required High – Group can provide motivation and support
Flexibility High – Can cycle whenever you want Moderate – Need to coordinate with group’s schedule

The Buzz of Group Rides

Have you ever felt the thrill of being part of a team? The excitement that comes with shared experiences? That’s exactly what group rides offer! There’s a unique sense of camaraderie that comes with cycling in a group. It’s not just about the ride, it’s about the shared laughs, the friendly competition, and the collective experiences that make each ride memorable.

Upsides and Downsides of Group Rides

Just like solo rides, group rides have their own set of pros and cons. Let’s take a closer look.

Benefits of Group Rides

When you’re part of a group ride, there’s a strong sense of community. It’s not just about pedaling, it’s about the friendships and connections you make along the way. It’s about the shared motivation when the ride gets tough, and the collective cheer when a hill is conquered. And let’s not forget the safety factor – there’s always safety in numbers.

Drawbacks of Group Rides

However, group rides aren’t without their challenges. One of the main issues is the need to match the pace of the group. If you’re a beginner, this can be daunting. There’s also the matter of scheduling. Coordinating with a group means you have to adapt to other people’s schedules, which might not always align with yours. There’s also the potential for conflict within the group, as different personalities and cycling styles come into play.

  1. Understand group rules
  2. Practice group riding etiquette
  3. Take up the appropriate role in the group

Deciding What’s Best for You

So, you’re caught in the middle, wondering whether to ride solo or join a group? The decision ultimately depends on your personality, preferences, and cycling goals. Are you someone who values peace, solitude, and the freedom to control your own pace? Or do you thrive in a community setting, enjoying the shared motivation and camaraderie that comes with group rides? Your answer to these questions will guide you in choosing the right path.

Switching Between Solo and Group Rides

You might be thinking, “Do I really have to stick to one?” Not at all! It’s completely fine—and even beneficial—to switch between solo and group rides. There are days when you might crave the tranquility of a solo ride, and other days when the buzz of a group ride is just what you need. The beauty of cycling is its flexibility, allowing you to adapt it to your mood and circumstances.

  1. Cycling is a versatile activity that can be enjoyed alone or in a group.
  2. Both solo and group rides have their unique advantages and challenges.
  3. Your choice between the two should depend on your personal preferences and cycling goals.
  4. It’s perfectly fine to switch between solo and group rides depending on your mood and circumstances.

Group ride in action

Conclusion

In the world of cycling, there’s no one-size-fits-all. Whether you prefer the independence of a solo ride or the shared enthusiasm of a group ride, both experiences have their unique charm and benefits. The key is to explore and experiment until you find what works best for you. Remember, the goal isn’t to conform to a particular style, but to enjoy the ride and make the most of your cycling journey. So, are you ready to hit the pedals?

Best Bike Storage Solutions for Small Spaces

When it comes to bike storage, the struggle is real, especially for those of us living in small apartments or houses. While bikes provide a fun and eco-friendly mode of transport, they can be quite a challenge to store. Bulky, unwieldy, and often muddy, they seem to take up more space than they should. But fear not! The right storage solution can turn this challenge into a breeze.

Imagine a neat, organized space where your bike is conveniently stored, no longer in the way, yet easily accessible. This is the beauty of proper bike storage. It not only saves space but also keeps your bike safe and secure. Sounds like a dream, right? Let’s make that dream a reality.

Understanding Your Storage Needs

Before we dive into the various bike storage solutions, let’s first identify your specific needs. Every person and dwelling is unique, and what works for one may not work for another. So, what factors should you consider?

First and foremost, consider the size of your living space. If you’re in a tiny apartment, a floor stand might not be the best option. Then, think about the number of bikes you need to store. Are you a single bike household, or do you have a fleet of bicycles for the whole family? Lastly, consider your budget. While some storage solutions can be a bit pricey, there are many affordable options out there as well. Remember, understanding your needs is the first step towards finding the perfect solution.

The Impact of Improper Bike Storage

Why is proper bike storage so important, you ask? Well, improperly storing your bike can lead to a number of issues. For starters, your bike could get scratched or dented, especially if it’s constantly being moved around or knocked over. This not only affects the aesthetic of your bike, but can also lead to more serious problems.

Structural damage is a real risk with improper storage. Bikes are designed to withstand the pressures of riding, not to be leaning awkwardly against a wall or other objects. Over time, this can lead to warping or bending of the frame. Furthermore, if you’re not storing your bike in a secure location, there’s also the risk of theft. All of these factors underscore the importance of a proper storage solution.

Types of Bike Storage Solutions

Wondering what types of bike storage solutions are available for you? Worry not, dear reader! The market today is replete with a variety of storage options that cater to the needs of both novice cyclists and bicycle hobbyists alike. The key is to find the one that best suits your space, needs, and budget.

Let’s discuss some of these storage solutions in detail. Shall we?

Wall Mounts

Ever seen a bicycle hanging on a wall like a piece of art? That’s a wall-mounted bike storage system for you! Wall mounts are a popular choice, particularly for small spaces. They are easy to install and can hold your bike securely, saving you precious floor space.

But what makes them such a great choice? Well, apart from being space-saving, they also provide easy access to your bike. Plus, they add a stylish element to your decor. However, they do require a sturdy wall for installation. So, if you’re in a rented apartment or have weak walls, you might want to consider other options.

Bike Stands

Not a fan of drilling holes in your wall? Or perhaps you don’t have a wall space to spare? Don’t worry, bike stands are here to the rescue!

Bike stands, as the name suggests, are freestanding structures that hold your bike upright. They are perfect for those who prefer a non-permanent storage solution. They are portable, easy to assemble, and don’t require any wall or ceiling mounts.

However, bike stands do take up some floor space. So, if you’re really tight on space, this might not be the best option for you. But if you have a bit of room to spare, bike stands can offer an easy and flexible bike storage solution.

DIY Bike Storage Ideas

Are you a DIY enthusiast or just on a tight budget? Well, why not create your own bike storage solution? With a little creativity and some basic tools, you can build a storage solution that’s tailored to your specific needs and space.

For example, you can create a simple wall mount using a large hook and a wooden board. Or, you could build a bike rack out of PVC pipes. The possibilities are endless!

Remember, the goal is to create a storage solution that is both functional and aesthetically pleasing. So, don’t be afraid to get creative and experiment with different materials and designs. And most importantly, have fun with it!

Choosing the Right Bike Storage Solution

Now that we’ve explored the different types of bike storage solutions, it’s time to decide which one is right for you. Remember, it’s not just about choosing the most popular or the cheapest option. It’s about finding a solution that fits your needs and your space.

Think about the factors we discussed earlier. What’s the size of your space? How many bikes do you need to store? And of course, what’s your budget? These are all crucial questions that will guide your decision-making process.

  • How many bikes do I need to store?
  • Do I have wall space available for a wall mount or should I consider a stand?
  • What is my budget for a storage solution?
  • Do I prefer a DIY solution or a ready-made one?
  • Is there a specific material or design that I prefer?

By asking yourself these questions, you’re already one step closer to finding the perfect bike storage solution for your small space. But remember, there’s no rush. Take your time to consider your options and make an informed decision. After all, it’s not just about storing your bike, but also about keeping it safe and in good condition.

Maintenance and Care for Bike Storage Solutions

Once you’ve chosen your bike storage solution, it’s crucial to take care of it to ensure it lasts a long time. Proper maintenance and care can significantly extend the lifespan of your storage solution and keep your bike safe and secure.

For wall mounts, make sure to check the stability regularly. If you notice any wobbling or shifting, it may be time to tighten the screws or consider a replacement. Don’t forget to clean the mount occasionally to prevent dust buildup, which can lead to wear and tear.

For bike stands, it’s essential to check for any signs of rust or corrosion, especially if you’re using the stand outdoors. Regular cleaning and oiling can help prevent these issues. If your stand has any moving parts, ensure they’re well lubricated to prevent sticking and squeaking.

Remember, a well-maintained bike storage solution not only looks good but also performs better. It’s a small investment of time that can pay off significantly in the long run. So why not give your bike storage solution the care it deserves?

Where to Buy Bike Storage Solutions

Now that you know what to look for in a bike storage solution, you might be wondering, where can I buy one? Well, you’re in luck! With the rise in cycling popularity, there are numerous places where you can purchase bike storage solutions.

Online platforms such as Amazon, eBay, and specialized cycling websites offer a vast variety of options. From wall mounts to bike stands, you’ll find an array of solutions to suit your needs. Plus, the product reviews from other customers can be incredibly helpful when making your decision.

Alternatively, physical stores like home improvement stores or bike shops also carry bike storage solutions. The advantage here is that you can see and touch the product before you buy it. You can also get expert advice from the staff. Remember to take your time and choose a solution that fits your space, budget, and needs.

Conclusion and Next Steps

Well, there you have it! We’ve covered the importance of proper bike storage, the different types of storage solutions, and where to buy them. Now it’s time for you to take the next step. Think about your storage needs, do your research, and find a solution that works for you.

Remember, the right storage solution can protect your bike, save space, and even add a stylish element to your room. So, why wait? Start exploring various bike storage solutions today!

Bike Storage Solution Cost Space Efficiency Ease of Installation
Wall Mounts $$ High Medium
Bike Stands $ Low High
DIY Ideas $ Variable Variable

Cold Weather Cycling: Tips and Tricks

Let’s talk about cycling in cold weather. Now, you might be thinking, “Cycling in the cold? No, thank you!” But hold on, hear us out. There’s something uniquely exhilarating about cycling in the winter. Yes, it’s cold, and yes, it’s challenging, but it’s also incredibly rewarding. Imagine pedaling through a serene, snow-covered landscape, with the chill air in your lungs and the crunch of fresh snow under your tires. Exciting, isn’t it?

The Appeal of Cold Weather Cycling

So, what’s so special about cold weather cycling? First off, there’s the beauty of the winter landscape. There’s nothing quite like watching the sunrise over a frost-covered field, or cycling through a snow-dusted forest. And then there’s the peace and quiet. The roads are less crowded, the trails are less busy, and the world seems to hold its breath in the cold. You get to experience nature in a way that’s simply not possible in other seasons.

And let’s not forget the sense of accomplishment. There’s something incredibly satisfying about braving the elements and coming out on top. You’ll feel like a true adventurer, and your hot chocolate at the end of the ride will taste that much better.

What to Expect When Cycling in Cold Weather

Now, let’s get into the nitty-gritty. What exactly can you expect when cycling in cold weather? Well, for one, the roads and trails can be icy, which means you’ll need to be extra careful. Your tire pressure will also be lower due to the cold, so you’ll need to adjust accordingly. And of course, there’s the wind. Cycling against a cold wind can be a challenge, but it’s also a great workout.

But don’t let these challenges deter you. With the right preparation and mindset, you can not only survive but thrive in these conditions. So, ready to give it a shot?

Essential Gear for Cold Weather Cycling

Now that we’ve covered the appeal and expectations of cold weather cycling, are you ready to brace the chill? Well, not quite yet. Before you hit the icy roads, it’s crucial to gear up. Remember, the right equipment can make a significant difference in your overall experience. So what exactly do you need?

Clothing Layers

When cycling in cold weather, layering is key. But why is it so important? Simply put, layering allows you to adjust your body temperature easily, keeping you comfortable throughout your ride. It’s all about finding the right balance – you don’t want to end up overheating or freezing!

Start with a base layer that is moisture-wicking to keep you dry. Merino wool or synthetic fabrics are excellent choices. Next, add an insulating layer to keep you warm. Fleece is a popular choice for this. Lastly, a water-resistant and windproof outer layer will protect you from the elements. Remember, the goal is to stay warm, not sweaty!

Insulated Gloves and Socks

Ever tried cycling with cold hands or feet? Not the most pleasant experience, right? That’s why insulated gloves and socks are an absolute must.

In colder temperatures, our bodies prioritise keeping the core warm, often leaving extremities vulnerable to the cold. Insulated gloves and socks protect these areas, ensuring you remain comfortable throughout your ride. Look for gloves that are windproof, waterproof, and offer a good grip. As for socks, go for wool or thermal insulated options.

Bicycle Preparation for the Cold

Just as you need to gear up, your bicycle also needs some preparation for the cold weather. Let’s look at some key areas that need attention.

Your tyre choice can significantly affect your bike’s performance. For icy conditions, consider using wider tyres with lower pressure for better grip. Regular bike maintenance is also crucial during winter. Pay particular attention to your chain, as it can suffer from increased wear and tear due to road salt and grit.

Bike lights are another must-have for winter cycling. As daylight hours are shorter, chances are you’ll be riding in darker conditions. Good front and rear lights will ensure you’re visible to other road users.

Gear Description
Layered Clothing Base layer (moisture-wicking), Insulating layer (fleece), Outer layer (water-resistant, windproof)
Insulated Gloves and Socks Windproof, waterproof gloves with good grip. Wool or thermal insulated socks.
Bike Tyres Wider tyres, lower pressure for icy conditions
Bike Maintenance Regular maintenance, with special attention to the chain
Bike Lights Good front and rear lights for visibility

Safety Tips for Winter Cycling

When it comes to cycling in colder weather, safety should be your top priority. Riding on icy roads can be a bit challenging. But don’t worry, with the right precautions, you can safely enjoy your ride. Sounds good, right?

First and foremost, visibility is key. The days are shorter during winter, and foggy or snowy conditions can limit visibility. Always use bright, blinking lights on the front and back of your bike. Reflective gear can also help other road users see you better.

Next, be aware that roads may be slippery due to ice or snow. Always ride slower than usual, especially around curves. Keep your body relaxed and avoid sudden braking to maintain control of your bike. Remember, there’s no rush. It’s all about enjoying the ride, isn’t it?

Lastly, even though it’s cold, staying hydrated is still important. Cold air has a drying effect, which can lead to dehydration. Always bring a bottle of water and take regular sips during your ride.

Staying Motivated During Winter Cycling

Now that we’ve covered safety, let’s talk about motivation. Cycling in cold weather can be tough, but with the right mindset, it can also be incredibly rewarding. So, how do you keep your motivation high?

Setting goals is a great way to stay motivated. Whether it’s increasing your distance, improving your speed, or simply riding a certain number of days per week, having a goal gives you something to work towards.

Another tip is to use apps to track your progress. Seeing your stats and improvements can be a big motivator. Plus, many apps have social features, allowing you to connect with other cyclists and even participate in virtual challenges.

Finally, consider joining a winter cycling group. Not only will you have others to share the experience with, but a group can also provide a sense of accountability, making you more likely to stick with it. Remember, there’s strength in numbers!

  • Set goals: Aim for a specific distance, speed, or number of rides per week.
  • Use tracking apps: Monitor your progress and participate in virtual challenges.
  • Join a winter cycling group: Share the experience with others and gain a sense of accountability.

Beneficial Aspects of Cold Weather Cycling

Ever wonder why some cyclists are so enthusiastic about biking in the cold? Well, there’s more to it than just the thrill and the beautiful winter scenery. Cold weather cycling has some significant fitness and health benefits too.

First off, cycling in the cold can boost your metabolism. Your body has to work harder to keep warm, which means you’ll be burning more calories. It’s a fantastic way to maintain your weight during the winter months when we all tend to be a bit more sedentary.

Did you know that cycling in the cold can also help to build mental resilience? Pushing through the challenging conditions requires mental toughness, and over time, this can translate to other areas of your life as well.

Lastly, let’s not forget the immunity boost. Regular exercise in the cold can enhance your immune system, making you less susceptible to common winter illnesses. Now, isn’t that a reason to bundle up and get pedaling?

Making the Most Out of Your Winter Bike Rides

Now that you’re aware of the benefits and have all the necessary knowledge to tackle cold weather cycling, it’s time to focus on enjoying the ride. Yes, it’s important to be prepared and stay safe, but let’s not forget the joy of cycling!

Take time to stop and take in the views. Winter landscapes can be incredibly beautiful and serene, making for some fantastic photo opportunities. You might even find that the winter light brings a whole new perspective to your usual cycling routes.

Another way to make your winter rides enjoyable is to reward yourself afterwards. A hot drink or a warm bath can be a great incentive to get out on the bike, even on the chilliest days. Plus, it’s a great way to warm up and relax your muscles after the ride.

Remember, winter cycling isn’t just about enduring the cold, it’s about embracing it. So get out there and make the most of it. You might just find that it becomes your favorite season for cycling!

  • Boost your metabolism by cycling in cold weather
  • Build mental resilience and enhance your immune system
  • Enjoy the serene and beautiful winter landscapes
  • Take time to reward yourself after each ride
  • Embrace the cold and make winter your favorite cycling season

How to Choose Your First Bike?

Choosing your first bike is an exciting moment. It’s like picking your first car or your first guitar. It’s a choice that can shape your cycling journey from the get-go. With so many different types of bikes available, it’s important to choose one that suits your needs and preferences. Whether you want to cycle in the city, off-road, or for fitness, there’s a bike that’s just right for you.

Let’s dive right into it and help you pick your first bike.

Why Your First Bike Matters

Your first bike plays a pivotal role in shaping your cycling experience. The right bike not only motivates beginners but also boosts their confidence. A bike that’s comfortable and easy to handle can make learning quicker and more enjoyable. So, why settle for anything less than perfect?

What to Consider Before Choosing Your First Bike

Before you embark on your quest to find your first bike, there are several factors to consider. First and foremost is your physique. Not all bikes are designed for all body types. You need to find a bike that you can comfortably mount, dismount, and ride.

The intended use of the bike is another crucial factor. Do you plan to use it for commuting, fitness, or leisure? Different uses call for different types of bikes. Last but not least, your budget plays a significant role in your choice. Bikes come in a wide range of prices, and it’s important to choose one that fits your financial plan.

Think about these factors, take your time, and then start your bike hunt. Remember, it’s about finding the right bike, not the most expensive or the most trendy one.

Understanding Different Types of Bikes

So, you’ve decided to start your cycling journey, but where to begin with the multitude of bikes out there? Fear not, we’re here to break down the basics for you. There’s a wide variety of bikes available in the market, each designed to serve a specific purpose. Let’s dive into the details.

Road Bikes

Ever seen a cyclist whizzing past you on the highway? Chances are, they were riding a road bike. These are lightweight and designed for speed, with thin tires and a slim frame. They’re perfect for those who want to ride on paved paths and city streets, and value speed above all else.

Don’t forget though, the seating position can be a bit aggressive for beginners. But once you get used to it, there’s no beating the thrill of speed these bikes can offer!

Mountain Bikes

Are you an adventure seeker who loves off-road trails? Then, mountain bikes might be the one for you. They are designed with a rugged frame and wide, knobby tires to handle off-road terrain. Their suspension system also helps in absorbing shocks from bumpy trails, making your ride smoother.

Remember, they’re not as fast as road bikes on pavement, but they’re unbeatable when it comes to tackling dirt trails and rocky paths.

Hybrid Bikes

Can’t decide between a road bike and a mountain bike? Why not get the best of both worlds with a hybrid bike! As the name suggests, these bikes combine the features of both road and mountain bikes, making them incredibly versatile.

They have a more comfortable upright seating position like a mountain bike, but also possess the lighter frame and thinner tires of a road bike. If you’re someone who loves variety in their cycling routes, this could be the perfect choice!

How to Determine the Right Bike Size

Choosing a bike that fits you well is crucial. The right size can make your ride comfortable and enjoyable, while the wrong size can lead to discomfort or even injuries. But how do we determine the right bike size?

Most bikes are sized by their frame size (the length of the seat tube), and your height is the primary factor in determining the frame size you need. If you’re between sizes, it’s generally best to go with the smaller size. You can always raise the seat or move it forward to adjust the fit.

Remember, comfort is key when choosing a bike size. The best way to see if a bike fits you is to actually get on it and try it out!

Setting Your Budget

When it comes to purchasing your first bike, setting a reasonable budget is crucial. The price of bikes can vary greatly, depending on factors such as the type, quality, and brand. But did you know that there’s a bike for every budget? That’s right! Whether you have a modest budget or you’re willing to splurge, there’s a bike out there for you.

However, it’s important to remember that the cost of a bike doesn’t end at the purchase price. You should also consider ongoing costs like maintenance, upgrades, and accessories. Cycling, like any other hobby, requires a certain level of investment, but the health benefits and the joy of riding make it all worthwhile, don’t you agree?

Type of Bike Price Range Features
Road Bikes $500 – $2000 Lightweight, built for speed, ideal for paved surfaces
Mountain Bikes $400 – $3000 Durable, designed for off-road cycling, great suspension
Hybrid Bikes $300 – $1500 Combines features of road and mountain bikes, versatile

Where to Buy Your First Bike

Okay, you’ve done your research, you’ve set your budget, and now you’re ready to buy your first bike. But where do you go? Well, there are several options available to you, each with its own pros and cons.

Local bike shops are a great place to start. They often offer personalized service, expert advice, and the opportunity to try before you buy. However, their prices may be slightly higher than what you’d find online.

Speaking of online, there are many reputable online retailers that offer a wide range of bikes at competitive prices. But be aware, buying a bike online means you won’t have the chance to try it out first. And then there’s the second-hand market, which can be a great way to get a high-quality bike at a lower price, though it requires a bit more knowledge and caution.

  • Trek Bikes: Known for their high-quality bikes for all types of riders. They offer free shipping and have a comprehensive website with plenty of information.
  • Chain Reaction Cycles: This online retailer offers a wide range of bikes at different price points. They also have regular sales and discounts.
  • Evans Cycles: A UK-based online store that ships internationally. They offer a wide range of bikes and cycling gear.
  • Performance Bicycle: Offers a variety of bikes for different cycling disciplines. They have a great customer service and a flexible return policy.

Test Ride and Final Decision

Have you ever wondered why test rides are so important when buying a bike? It’s because a bike that looks perfect on paper might not feel so perfect once you’re actually riding it. So, when you’ve narrowed down your choices, it’s time for a test ride. It’s your opportunity to see how the bike handles, how it fits your body, and whether it’s comfortable to ride.

During your test ride, pay attention to how the bike feels under you. Is the seat comfortable? Do the handlebars feel natural in your hands? Can you reach the pedals easily without straining? These are all crucial points to consider. Remember, you’ll be spending a lot of time on this bike, so it needs to feel right.

Necessary Gear and Accessories

Now that you’ve found your perfect bike, it’s time to gear up. Safety should always be your top priority when cycling, so a good quality helmet is a must. But that’s not all. Lights, locks, and other accessories play an important role in making your cycling experience safe and enjoyable.

Here’s a list of necessary gear and accessories for new cyclists:

  • Helmet
  • Bike lights
  • Bike lock
  • Water bottle and holder
  • Bike pump
  • Spare tubes and a small tool kit
  • Cycling shorts and gloves for comfort
  • A bell or horn for safety in traffic

Understanding Basic Bike Maintenance

Getting a new bike is exciting, but your responsibility doesn’t end with the purchase. Regular maintenance is key to keeping your bike in good working condition. Think of it this way: your bike is like a pet, it needs regular care to stay happy!

Some basic bike maintenance tasks include cleaning your bike regularly, keeping the chain lubricated, checking the tire pressure, and making sure all the bolts are tight. Don’t worry, these tasks are simple to do and don’t require a lot of special tools. Plus, taking care of your bike can actually be a rewarding experience in itself.

Remember, the journey of becoming an avid cyclist begins with choosing the right bike. Take your time, do your research, and make sure the bike you choose is something that you genuinely love and are comfortable riding. Isn’t it exciting to think of all the places your new bike will take you? Happy cycling!

Cycling with a Flat Tire: What You Should Know

Imagine this: You’re enjoying a peaceful ride on a sunny afternoon, when suddenly, your bike starts to feel sluggish. You notice that you’re putting in more effort than usual to keep your pace. You stop and check, only to find out that you have a flat tire. It’s an all-too-common scenario for many cyclists, and while it may seem like a minor inconvenience, cycling with a flat tire can actually have serious consequences. It’s more than just a bump in the road—it can significantly impact your ride and your safety.

The Impact of a Flat Tire on Your Cycling Experience

Ever tried riding with a flat tire? If you have, then you know it’s no walk in the park—or rather, no ride on the road. A flat tire can drastically affect your speed and control, making your overall cycling experience far from enjoyable. You might find yourself struggling to maintain balance and control, which could potentially lead to accidents. And let’s not forget the possible damage to your beloved bike, especially if the flat tire goes unnoticed for a long time.

Common Causes of Flat Tires

But how do flat tires happen in the first place? Well, there are several culprits. One of the most common causes is punctures from sharp objects like glass shards, nails, or thorns. Regular wear and tear can also lead to flat tires, especially if your tires are old and worn out. And let’s not forget about improper tire pressure—too much or too little air in your tires can lead to flats as well. So, it’s important to always keep an eye on your tires and ensure they’re in good condition.

Recognizing the Signs of a Flat Tire

Have you ever noticed your bike feeling a bit off? Maybe it’s not as stable as it usually is, or perhaps it’s become unexpectedly difficult to control. Well, these could be signs that you’re dealing with a flat tire. It’s not always easy to spot, especially if the tire isn’t completely deflated. But being able to recognize the early signs of a flat can save you from a lot of trouble down the line.

One of the most obvious visual cues is when the tire looks deflated. A healthy tire should appear round and full, so if yours is looking a bit squashed or saggy, it’s likely that it’s lost some air. Another sign to look out for is the bike’s performance. Flat tires can make your bike feel unstable, especially when cornering or riding at high speeds. If you’re finding it more difficult to control your bike than usual, it’s worth checking your tires.

How to Perform a Quick Tire Check

So, how can you ensure your tires are in good condition before each ride? You can do this by performing a quick tire check. It’s easy and it doesn’t take much time at all. Here’s how:

First, visually inspect your tires. Look for any signs of deflation, such as a squashed or saggy appearance. Also, keep an eye out for any visible damage, such as cuts, punctures, or worn-out tread.

Next, physically check your tires. Press them with your thumb. They should feel firm, not soft or squishy. If they feel soft, it’s likely that they’re underinflated.

Lastly, take your bike for a quick spin. Pay attention to how it feels. Does it feel stable and easy to control? If not, your tires may be to blame.

The Dangers of Continuing to Ride with a Flat Tire

So, you’ve discovered that your tire is flat. What now? Well, the worst thing you can do is to ignore it and keep riding. Continuing to ride with a flat tire can lead to a host of problems, some of which can be quite dangerous.

Firstly, a flat tire can cause you to lose control of your bike. Without the necessary air pressure, your tire won’t be able to maintain its shape, affecting its grip on the road. This can make your bike unstable and harder to control, increasing the risk of accidents.

In addition, riding on a flat tire can cause damage to the wheel. The rim can get bent or even cracked, leading to costly repairs. Even worse, if you continue to ride on a damaged wheel, it might fail altogether, putting you at risk of a serious accident.

So, next time you notice that your tire is flat, resist the temptation to just keep going. It’s not worth the risk. Instead, take steps to fix the problem as soon as possible.

What to Do When You Get a Flat Tire Mid-Ride

Ever been out on a ride, enjoying the wind in your hair and the sun on your face, only to hear that dreaded hiss? Yes, that’s right. You’ve got a flat tire. But don’t worry, it’s not the end of the world, or your ride for that matter. Here’s a step-by-step guide on what you should do if you find yourself in such a situation.

Firstly, stay calm. Panicking won’t help. Secondly, get off the road. It’s safer to deal with your flat tire off the road, away from traffic. Thirdly, assess the situation. Is it a full flat or a slow leak? Depending on the severity of the flat, your course of action might differ.

At this point, it’s good to have a certain set of tools and equipment on hand. But what exactly should you have in your emergency kit?

  • Spare tube – This is a must. It’s your quickest way to get back on the road.
  • Tire levers
  • – These will help you remove the tire from the rim.

  • Mini pump – To inflate the new tube. Some cyclists prefer CO2 cartridges for their speed and ease of use, but these are single-use.

How to Fix a Flat Tire

Got your tools ready? Great! Let’s get to fixing that flat. The first step is to remove the wheel from your bike. Next, use your tire levers to pry the tire off the rim. Once you’ve done that, remove the tube from the tire. Now’s the time to inspect your tire and tube to find the cause of the flat. Look for punctures, cuts, or embedded objects. Once you’ve found the culprit, it’s time to put in your new tube. Make sure it’s slightly inflated before you put it in the tire. This will help it take shape and prevent any pinching. Put the tire back on the rim, ensuring the tube isn’t pinched between the tire and the rim. Finally, inflate the tire to the correct pressure.

Tips for Preventing Flat Tires

Prevention is better than cure, they say. And they’re right. Here are some tips to help you avoid flat tires in the first place.

Check your tire pressure regularly. Under-inflated tires are more prone to flats. Make it a habit to check your tire pressure before each ride. Avoid riding over sharp objects. This might seem obvious, but sometimes we can’t resist that shortcut through the gravel or that jump off the curb. Just remember, every time you do that, you’re increasing your chances of getting a flat. Lastly, consider using puncture-resistant tires. They might be more expensive, but they could save you a lot of hassle in the long run.

Remember, a flat tire is not the end of the world. With the right knowledge, tools, and a bit of patience, you can be back on the road in no time. Ride safe!

The Importance of Proper Bike Maintenance

Have you ever considered the role regular bike maintenance plays in preventing flat tires and other issues? It’s quite significant! Not only does a well-maintained bike keep you safer on the roads and trails, but it also enhances your overall riding experience. Imagine gliding smoothly over the asphalt, confident in the knowledge that your bike is in top-notch condition. Sounds good, doesn’t it?

Regular maintenance is not just about keeping your bike clean and shiny – it’s about ensuring that all its components, including the tires, are in good working order. This way, you can preempt any issues that might arise, such as a flat tire, and take appropriate action. After all, prevention is better than cure, right?

Task Frequency
Check tire pressure Before every ride
Inspect tires for wear and tear Weekly
Clean and lubricate chain Every 100 miles or after riding in the rain
Inspect brake pads Every 2-4 weeks
Check and adjust gears Every 2-4 weeks

Wrapping Up: Stay Safe and Enjoy Your Ride

So there you have it, folks! You now know the importance of checking your tires before every ride, understanding the signs of a flat tire, and the risks associated with continuing to ride with one. You also know what to do if you get a flat tire mid-ride, how to repair it, and how to prevent flat tires in the first place. That’s quite a lot of information, isn’t it? But it’s all essential for your safety and enjoyment on the bike.

Remember, cycling isn’t just about speed and agility – it’s also about safety and preparedness. So, always take the time to check your tires before you set off, and make sure you carry the necessary equipment for dealing with a flat tire. After all, it’s better to be safe than sorry, right?

Let’s not forget the importance of regular bike maintenance too. Keeping your bike in good shape is crucial for preventing issues like flat tires, and for ensuring a smooth and enjoyable ride. So, follow the maintenance schedule we’ve outlined above, and your bike will thank you for it!

Alright then, it’s time to wrap things up. Stay safe, ride responsibly, and most importantly, enjoy every moment on your bike. Happy cycling!

Understanding Bike Gears and When to Shift

For those who love cycling, whether as a hobby or a means of commute, understanding the bike’s gear system is of utmost importance. You may wonder, why? The answer is simple. Knowing when and how to shift your bike’s gears can drastically enhance your cycling experience. It can make your ride smoother, more efficient, and less tiring. Especially for novice cyclists, familiarizing yourself with the gear system can be a game-changer. So, let’s dive in and discover the fascinating world of bike gears.

The Basics of Bike Gears

Before we delve into the mechanics of bike gears, let’s familiarize ourselves with some basic terminologies. Firstly, we have the front and rear derailleurs. These are the devices that move your chain from one gear to another. Then we have the chainrings, the large gears attached to the pedals, and the cassettes, the set of gears on the rear wheel. Lastly, we have the sprockets, individual gears on the cassette. Understanding these terms is the first step towards mastering bike gears.

How Bike Gears Work

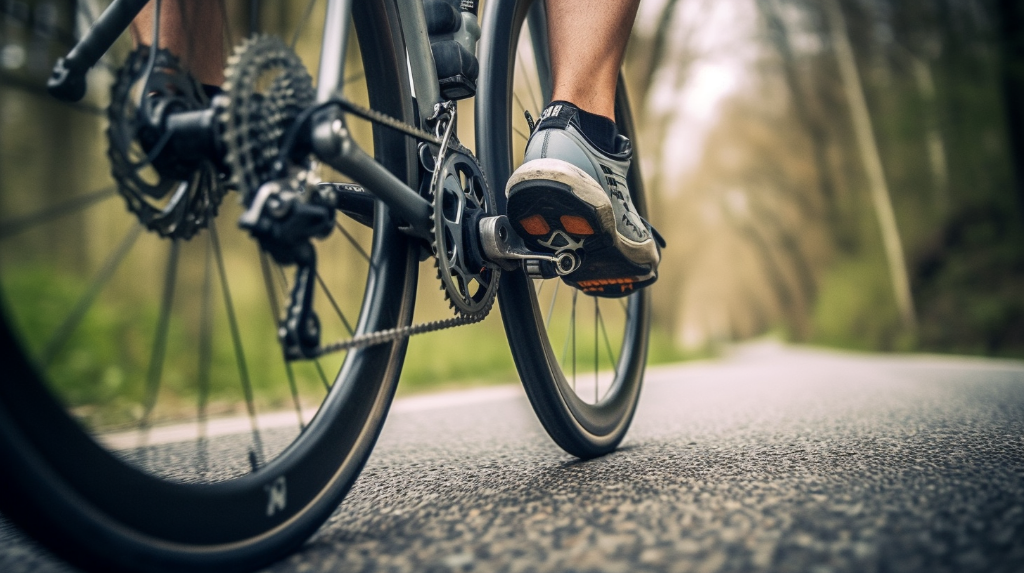
So how exactly do bike gears work? Let’s break it down. The combination of gears you choose – one from the chainring and one from the cassette – determines the effort you need to pedal and the speed of the bike. When you shift to a larger chainring or a smaller sprocket, you’ll need to put in more effort, but you’ll also go faster. On the other hand, shifting to a smaller chainring or a larger sprocket makes it easier to pedal, but you’ll travel slower. Sounds complicated? Don’t worry, with a bit of practice, you’ll become a pro in no time.

Now that we’ve covered the basics, you’re probably wondering how to use this knowledge in practical riding situations. Stay tuned, as we’ll be discussing that in the upcoming sections!

Types of Bike Gears

Did you know that not all bikes are made the same? Indeed, they aren’t! One of the primary differences lies in the type of gears they use. Bicycles generally come with three types of gears: single-speed, fixed gear, and multi-speed.

Single-speed bikes, as the name suggests, operate on a single gear ratio. They are most commonly seen on BMX or kids’ bikes. Then we have fixed gear bikes, often called ‘fixies.’ They are unique in that they do not allow coasting or freewheeling. Lastly, the multi-speed bikes come with a variety of gears to choose from, perfect for tackling diverse terrains and speeds. These are typically found on mountain bikes, road bikes, and hybrids.

Pros and Cons of Different Types of Gears

Each gear type comes with its unique set of advantages and disadvantages. Single-speed gears, for example, are simple and easy to use, making them ideal for beginners. However, their lack of versatility can be a limitation when cycling on varied terrains.

Fixed gears offer a direct connection between the rider and the bike, providing a unique riding experience. But, they can be challenging to handle for inexperienced cyclists. On the other hand, multi-speed gears offer a wider range of gear ratios, making them highly adaptable. However, they require a better understanding and regular maintenance due to their complexity.

Understanding Gear Ratios

Ever wondered what a gear ratio is? Well, in simple terms, a gear ratio refers to the relationship between the number of teeth on two gears that are meshed. In cycling, it determines the bike’s performance in different terrains.

For instance, a low gear ratio makes pedaling easier, perfect for uphill rides or when you’re battling against the wind. A high gear ratio, in contrast, is more challenging to pedal but can help you reach higher speeds, ideal for flat or downhill terrains.

Gear Ratios and Terrain

As we’ve mentioned before, changing the gear ratio can significantly influence your cycling experience. When you’re riding on a flat surface, a higher gear ratio can help you maintain a faster speed. When going uphill, shifting to a lower gear ratio can make the ride easier. And when you’re cruising downhill, a high gear ratio can help you harness the pull of gravity for an exhilarating ride. Isn’t it fascinating how gears can transform your ride?

Calculating Your Bike’s Gear Ratio

Calculating your bike’s gear ratio isn’t as complicated as it might seem. First, you need to know the number of teeth on the front chainring and the rear cog. The gear ratio is simply the division of the former by the latter. So, if your front chainring has 40 teeth and your rear cog has 20, your gear ratio is 2:1.

The Role of Cadence in Cycling

Let’s talk about cadence now. Cadence refers to the number of times a cyclist pedals per minute. It plays a pivotal role in determining your speed and the effort you need to put in while cycling.

The interesting part is that your gear shifting significantly influences your cadence. When you shift to a lower gear, your cadence increases, making it easier to pedal but at a slower speed. Conversely, shifting to a higher gear reduces cadence, making pedaling harder but at a faster speed. That’s why understanding gears and mastering the art of shifting is so crucial in cycling!

When to Shift Gears

Ever wondered when it’s the best time to shift gears while cycling? Well, it largely depends on factors like the terrain you’re cycling on and the speed you’re trying to maintain. Let’s dive right into it, shall we?

Shifting Gears for Uphill and Downhill Cycling

When cycling uphill, you’ll want to shift down to a lower gear to make pedaling easier. On the other hand, when going downhill, you should shift up to a higher gear. This helps to increase your speed without having to pedal like a maniac. Remember, the aim here is to maintain a comfortable and efficient cadence, regardless of the terrain.

But what if the terrain is constantly changing, you ask? Well, that’s where the beauty of bike gears comes in. Being able to switch between gears smoothly allows you to adapt to changes in the terrain, ensuring an enjoyable and efficient cycling experience.

Shifting Gears for Speed

Now, let’s talk about speed. Shifting gears can significantly affect your cycling speed. For instance, if you’re trying to increase your speed while cycling on a flat terrain, shifting up to a higher gear can make your wheels turn more for each pedal turn, allowing you to go faster. However, this also requires more effort. So, it’s a bit of a trade-off!

What about maintaining speed? Well, that’s where the concept of cadence comes into play. By shifting gears to maintain a comfortable and efficient cadence, you can maintain your speed without exerting unnecessary energy. It’s all about finding that sweet spot!

Common Mistakes in Gear Shifting

Shifting gears can be a bit tricky, especially if you’re a beginner. But don’t worry, we’ve all been there. Here are some common mistakes that beginner cyclists often make when shifting gears, along with some tips on how to avoid them:

  • Shifting too late: This can cause the chain to drop or the bike to come to a sudden stop. To avoid this, try to anticipate the terrain and shift gears in advance.
  • Shifting under load: Shifting gears while pedaling hard can cause wear and tear to your bike’s gear system. Try to ease off the pedals when shifting gears.
  • Not using the full range of gears: Many cyclists tend to stick to a small range of gears. However, doing so can make cycling more strenuous and less efficient. Don’t be afraid to explore the full range of gears on your bike.
  • Incorrect gear combinations: Using extreme gear combinations (like the smallest front gear with the smallest rear gear) can cause the chain to stretch, leading to wear and tear. Try to use a combination of gears that allows the chain to be as straight as possible.

Practical Tips for Shifting Bike Gears

Ever wondered how you could make your biking experience smoother and more enjoyable? Well, mastering the art of gear shifting might just be the answer! Here are some practical tips to help you shift gears like a pro:

  • Anticipate the Terrain: One of the keys to smooth gear shifting is anticipation. If you see a hill coming up, shift your gears before you start climbing to prevent your chain from straining.
  • Don’t Cross-Chain: This means you should avoid using the smallest chainring and smallest cog or the largest chainring and largest cog at the same time. It can cause unnecessary wear and tear on your gears.
  • Practice Makes Perfect: The more you practice shifting gears, the more intuitive it will become. Try practicing on different terrains and at different speeds to get comfortable with your bike’s gear system.
  • Listen to Your Bike: Your bike will often give you audible feedback when you need to shift gears. If you hear a clicking noise or if the bike feels like it’s struggling, it might be time to shift.

Basic Gear Maintenance

Maintaining your bike gears is just as important as knowing how to use them. Proper maintenance not only ensures smoother rides but also prolongs the life of your bike. Here are some maintenance tips to keep your gears in top shape:

Maintenance Tip Frequency
Clean your chain regularly Every 200-300 miles
Lubricate the chain Every 100-200 miles, or after cleaning
Check for wear and tear Every 500 miles
Replace the chain Every 2,000 miles, or if significantly worn

Becoming a More Efficient Cyclist

Understanding your bike gears and how to use them efficiently can truly transform your cycling experience. It can help you adapt to different terrains, maintain a steady cadence, and conserve energy. So why not take the time to practice your gear shifting skills?

Remember, every great cyclist was once a beginner. Don’t be discouraged if you don’t get it right away. With patience, practice, and a little bit of maintenance, you’re well on your way to becoming a more efficient and confident cyclist. So, are you ready to shift gears and take your biking experience to the next level?

Sharing the Road: Biking Etiquette Explained

Ever been on a bike ride and wondered if you’re following the unwritten rules of the road? You’re not alone. Understanding biking etiquette is crucial when you’re sharing the road with other users such as pedestrians and motorists. In this blog post, we’ll cover essential etiquette rules, help you understand traffic laws, and provide tips for safe and respectful biking. It’s not just about avoiding accidents—it’s about promoting harmony on the road.

Whether you’re a seasoned cyclist or a biking beginner, this guide will help you navigate the roadways with confidence and respect for your fellow travelers. So, buckle up your helmet and let’s get rolling!

Understanding the Basics of Road Sharing

What exactly is road sharing? It’s a simple concept that holds immense significance in ensuring safety and harmony on the roads. Road sharing is all about understanding that the road is a shared space, used by a variety of people including drivers, cyclists, and pedestrians. Each user has a responsibility to behave in a way that ensures the efficient and safe use of this shared space.

But how are different road users supposed to interact? That’s where the importance of understanding traffic rules and etiquette comes into play.

The Importance of Biking Etiquette

So, why is biking etiquette so important? It goes beyond the individual—it’s about ensuring the safety of all road users. Proper biking etiquette promotes better understanding, reduces conflicts, and ensures a more enjoyable biking experience for everyone.

It’s about giving and receiving respect. By following the rules of the road and showing consideration for others, we can all help to create a positive biking culture. Don’t you think it’s high time we start putting these principles into practice?

Essential Etiquette Rules for Bikers

Have you ever wondered about the unwritten rules that govern the world of cycling? Just like any other form of transportation, biking has its own set of etiquette rules that contribute to safer and more respectful road sharing. These rules are not just for the bikers but also for the pedestrians, motorists, and other road users they share the road with. So, what are these rules?

Yielding to Pedestrians

First and foremost, bikers should always yield to pedestrians. Why, you ask? It’s simple. Pedestrians are the most vulnerable road users, and they have the right of way. When you’re on a bike, and you see a pedestrian, slow down, acknowledge their presence, and let them pass. It’s about respecting their space and safety. Also, it’s crucial not to speed up or startle them, especially when overtaking. Remember, we’re all in this together, aren’t we?

Signaling Turns and Stops

Another essential etiquette rule is signaling your intentions. How else are other road users supposed to know what you’re planning? Whether you’re turning left, right, or stopping, it’s crucial to use hand signals to communicate your intentions. And it’s not just about safety. It’s also about courtesy and respect for others on the road. So, don’t forget to signal, it’s a simple act that can prevent accidents and misunderstandings.

Navigating Bike Lanes and Trails

Bike lanes and trails are a blessing for bikers. They provide a safe and efficient way to travel. But they also come with their own set of etiquette rules. First, always stay on the right, allowing others to pass on your left. It’s a standard rule that applies to most roads and trails. But what about when you want to overtake another biker?

Well, the rule is simple. Always announce your intention to overtake by saying “on your left” or using a bell. It’s about giving them a heads up and ensuring they’re not startled. And remember, never block the trails, whether you’re riding or taking a break. Keep to the side so that others can pass. Sounds fair, right?

Above all, navigating bike lanes and trails is about being aware of your surroundings and respectful of other users. So, let’s make the road a better place for everyone, shall we?

Understanding Traffic Laws for Bikers

As cyclists, we’re not just out there pedaling for fun or fitness, we’re part of the traffic. This means that, just like motorists, we are subject to certain rules and regulations. Ever thought about that? Many people don’t realize that bikers are legally considered vehicles on the road. We have the same rights – and responsibilities – as those behind the wheel of a car.

For instance, we must stop at stop signs and red lights, just like cars. We also have to signal our turns, using hand signals, so other road users know what we plan to do. Riding against traffic? Not a good idea – it’s illegal in most places and can be dangerous.

It’s critical to familiarize yourself with the specific traffic laws in your area because they can vary from one place to another. However, the underlying principle remains the same: we should conduct ourselves on the road as responsible, law-abiding users.

The Role of Courtesy in Biking Etiquette

Okay, so we’ve covered the legal part. But what about the unwritten rules of the road? We’re talking about courtesy. Yes, that old-fashioned concept that can make all the difference when it comes to harmonious road sharing. Think about it. How would you feel if every cyclist you encountered was rude or inconsiderate?

Small acts of courtesy can defuse potential conflicts, promote goodwill, and make the road a more pleasant place for everyone. A simple wave to a motorist who gives you space, a polite “on your left” when overtaking another cyclist, an apologetic smile if you make a mistake – these are all gestures that can go a long way in fostering positive interactions on the road.

But wait, there’s more. Courtesy also extends to how we treat the road itself. This means not littering, not damaging property, and respecting nature if we’re biking on trails. In other words, being good stewards of the environment. Sounds like a big responsibility, doesn’t it? Well, it is. But it’s also a rewarding one.

Common Courteous Acts for Bikers

  • Signal: Always signal your intentions to other road users. This is not just about following the law, it’s about showing respect.
  • Thank you wave: A friendly wave of thanks to a motorist who’s been considerate can do wonders for cyclist-driver relations.
  • Apologize if you make a mistake: We’re all human. If you mess up, a simple apology can diffuse any tension.
  • Respect nature: If you’re on trails, stay on the path to protect the environment and wildlife.
  • Don’t litter: Keep a small bag with you to store trash until you can dispose of it properly.

Tips for Safe and Respectful Biking

Now that we have a solid understanding of biking etiquette and traffic laws, let’s dig into some practical tips for safe and respectful biking. Remember, it’s not just about following the rules, it’s also about promoting a positive biking culture where everyone feels safe and respected.

Firstly, always ensure your bike is in good working condition before hitting the road. Regular maintenance checks are key in preventing accidents caused by mechanical failures. Secondly, wear appropriate safety gear like helmets, reflective clothing, and lights. This not only protects you but also makes you more visible to other road users, particularly in low-light situations.

Next, always be predictable in your movements. Sudden changes in direction can be dangerous, so make sure to signal your intentions well in advance. Also, respect traffic signs and signals just as any other vehicle would. Bicycles may be smaller and more agile, but they are still part of the traffic ecosystem and should adhere to the same rules.

Lastly, always keep a safe distance from other vehicles, pedestrians, and cyclists. This gives everyone enough space to manoeuvre and react to unexpected situations. And of course, remember to be courteous and patient on the road. A little kindness can go a long way in fostering a positive road-sharing environment.

Etiquette Rules Traffic Laws Practical Tips
Yielding to pedestrians Obey traffic signals Regular bike maintenance
Signaling turns and stops Adhere to speed limits Wear safety gear
Proper use of bike lanes and trails Riding on the right side of the road Be predictable in movements
Displaying courtesy Respect traffic signs Keep a safe distance

Final Thoughts on Biking Etiquette

As we wrap up, let’s take a moment to revisit the importance of good biking etiquette. It’s not just about rules and regulations, it’s about fostering a safer and more enjoyable environment for all road users. Whether you’re a seasoned cyclist or a beginner, it’s crucial to be knowledgeable of the etiquette and laws that govern sharing the road.

Remember, it’s in everyone’s best interest to promote a positive biking culture. So, why not lead by example? Show consideration for others, respect the laws, and continuously strive to improve your biking manners. After all, wouldn’t it be great if all your future rides were smooth, safe, and enjoyable?

How to Do Interval Training for Cyclists

Ever wondered how you could take your cycling hobby to the next level? Or perhaps you’re searching for a way to improve your cycling performance? If so, interval training might just be what you need. Cycling is not just a pastime; it’s a fantastic way to keep fit, challenge yourself, and explore new terrains. With interval training, you can unlock new potentials in your cycling performance.

But what exactly is interval training, you ask? And how can it benefit you as a cyclist? Let’s find out!

Understanding Interval Training

Interval training is a type of training that involves alternating periods of high-intensity exercise with low-intensity recovery periods. It’s not just for professional athletes; it’s beneficial for anyone looking to improve their fitness level, including cyclists like you.

There are various types of interval training, but the most common types include High Intensity Interval Training (HIIT) and Sprint Interval Training (SIT). As a cyclist, you can incorporate these types of interval training into your routine to boost your performance and endurance.

Now, let’s underline why interval training is a game-changer for cyclists.

Advantages of Interval Training for Cyclists

Interval training comes with a host of benefits that can significantly improve your cycling performance. One of the main advantages is improved cardiovascular health. By pushing your heart rate during the high-intensity periods, you strengthen your heart and improve your body’s ability to deliver oxygen to your muscles.

Interval training also leads to increased strength and endurance. The high-intensity periods challenge your muscles, leading to increased strength over time. This can translate to better endurance on your bike, allowing you to cycle longer distances without fatigue.

Finally, if you’re looking to boost your cycling speed, interval training can help. The explosive bursts of effort in the high-intensity periods can help increase your overall cycling speed, making you a faster, more efficient cyclist.

Ready to get started with interval training? Stay tuned for the next section where we will discuss exactly how to do that!

How to Get Started with Interval Training

So you’re ready to take your cycling to the next level? That’s great! But remember, it’s important to start slow and progress gradually. Safety should always be your top priority. And remember, it’s not a race. Your body will tell you when it’s ready to push harder, so make sure you’re listening to it.

Equipment Needed

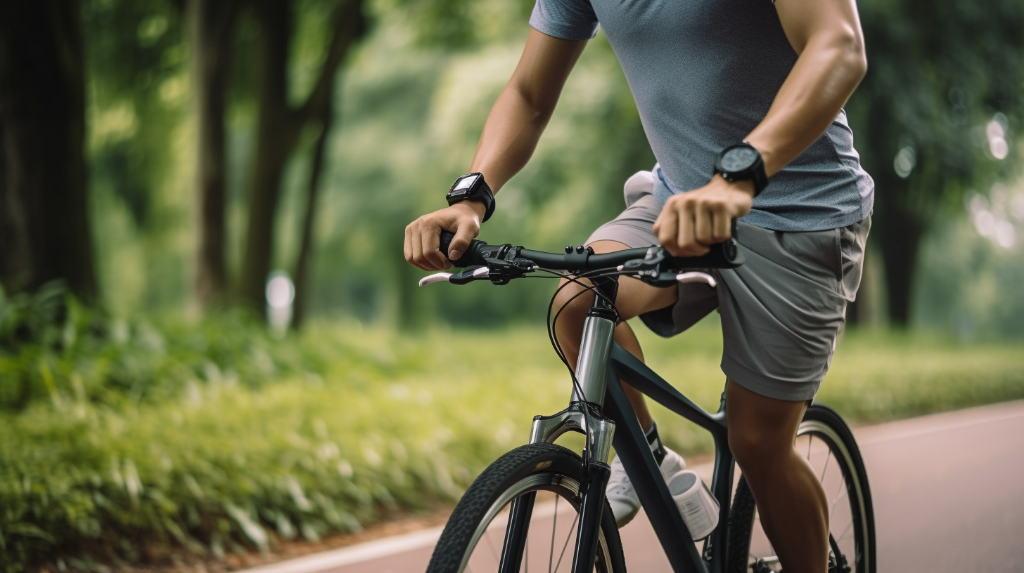
Before you start, make sure you have the right gear. A good quality bicycle is a must. But it’s not just about the bike. A helmet is crucial for safety, and a comfortable cycling outfit can make your training sessions more enjoyable. You might also want to consider getting a cycling computer or a smartwatch to monitor your speed and heart rate. But remember, the most important thing is to have equipment that’s comfortable and safe.

Setting up an Interval Training Schedule

When it comes to setting up your training schedule, variety is key. You don’t want to do the same workout every day. Mix it up with different intensity levels, and make sure you’re incorporating rest days. It’s also important to balance your interval training with other fitness activities. Remember, your body needs time to recover, so don’t push yourself too hard. A balanced training schedule will help you avoid burnout and keep you motivated.

Simple Interval Training Workouts

Ready to get started? Here are a few simple interval workouts that are perfect for beginners:

  1. Workout 1: Start with a 10-minute warm-up, then do 20 seconds of high-intensity cycling followed by 40 seconds of low-intensity cycling. Repeat this cycle 10 times, then cool down for 10 minutes.
  2. Workout 2: Warm up for 10 minutes, then cycle at a high intensity for 1 minute. Follow this with 1 minute of low-intensity cycling. Repeat this cycle 10 times, then cool down for 10 minutes.
  3. Workout 3: After a 10-minute warm-up, cycle at a high intensity for 2 minutes, then cycle at a low intensity for 2 minutes. Repeat this cycle 5 times, then cool down for 10 minutes.

These workouts will help you build your endurance and speed. Remember, the high-intensity periods should be challenging, but not so hard that you can’t finish the workout. And don’t forget to hydrate!

Progressing in Interval Training

Once you have gotten into the rhythm of interval training, you may start to wonder, how do I keep advancing? The answer lies in monitoring your progress and knowing when to raise the bar. This doesn’t mean that you should be pushing yourself to the limit every single time. Instead, it’s about maintaining a balance and understanding your body’s signals.

One crucial aspect of progression is consistency. Just like any other form of exercise, interval training requires regular practice. By sticking to your training schedule, you will gradually notice improvements in your strength, endurance, and cycling speed.

Another important factor is gradual progression. This means slowly increasing the intensity or duration of your workouts over time. Doing too much too soon can lead to injuries and burnout. So, take your time and enjoy the journey!

Overcoming Common Challenges in Interval Training

Embarking on a new fitness regimen like interval training is not without its hurdles. You might face challenges such as fatigue, lack of motivation, or even injuries. But don’t worry, we’ve got you covered! Below is a list of common challenges and some tips on how to overcome them:

  • Fatigue: Rest is as important as the workout itself. Make sure you are getting enough sleep and incorporating rest days into your schedule.
  • Lack of motivation: Setting realistic goals and tracking your progress can keep you motivated. Also, remember why you started in the first place!
  • Injuries: Always warm up before your workout and cool down afterwards to reduce the risk of injuries. If you do get injured, seek medical advice and take it easy until you recover.

Remember, every cyclist faces these challenges at some point. It’s all part of the journey. The key is to stay patient, stay consistent, and most importantly, listen to your body.

Additional Tips for Effective Interval Training

Now that you’re well on your way to incorporating interval training into your cycling routine, how about we explore some additional tips to maximize your results? Remember, it’s not just about the training itself, but also about maintaining a balanced lifestyle. Exciting, isn’t it?

Proper Diet: Ever heard of the saying, “You are what you eat?” Well, it holds true for cyclists too. Consuming a balanced diet can significantly improve your performance. Prioritize lean proteins, complex carbohydrates, and healthy fats to fuel your body for optimal performance.

Staying Hydrated: Hydration is key! Ensure you’re drinking enough water before, during, and after your training sessions. Dehydration can negatively impact your performance and recovery, so don’t neglect this aspect.

Getting Enough Rest: Rest, believe it or not, is just as important as training. It’s during rest that your body recovers and muscles grow. Make sure you’re getting a good night’s sleep and also scheduling rest days in your training regimen.

Wrapping Up Interval Training Tips for Cyclists

And there you have it! We’ve embarked on a comprehensive journey exploring interval training for cyclists. From understanding the concept to starting your own regimen, overcoming challenges, and additional tips, we’ve covered it all.

Isn’t it exciting to see how a little knowledge can go a long way in enhancing your cycling experience? Remember, the road to improved performance is a marathon, not a sprint. So, take your time, enjoy the process, and watch as your efforts bear fruit.

So, are you ready to pedal your way to a fitter, healthier you?

Sections Key Points
Understanding Interval Training Improves cardiovascular health, increases strength and endurance, and enhances cycling speed and performance.
Getting Started with Interval Training Start slow, prioritize safety, and listen to your body.
Progressing in Interval Training Monitor your progress, increase intensity/duration gradually, and be consistent.
Overcoming Challenges Address fatigue, motivation issues, and potential injuries proactively.
Additional Tips Maintain a balanced diet, stay hydrated, and ensure sufficient rest.

Indoor Cycling vs Outdoor Cycling

Whether you’re a fitness enthusiast or a beginner starting your fitness journey, you’ve probably pondered over the dilemma of indoor cycling vs outdoor cycling. Both modes of cycling have their unique charms and challenges, and the choice between the two often boils down to individual preference, goals, and circumstances. Let’s explore both in detail.

Understanding Indoor Cycling

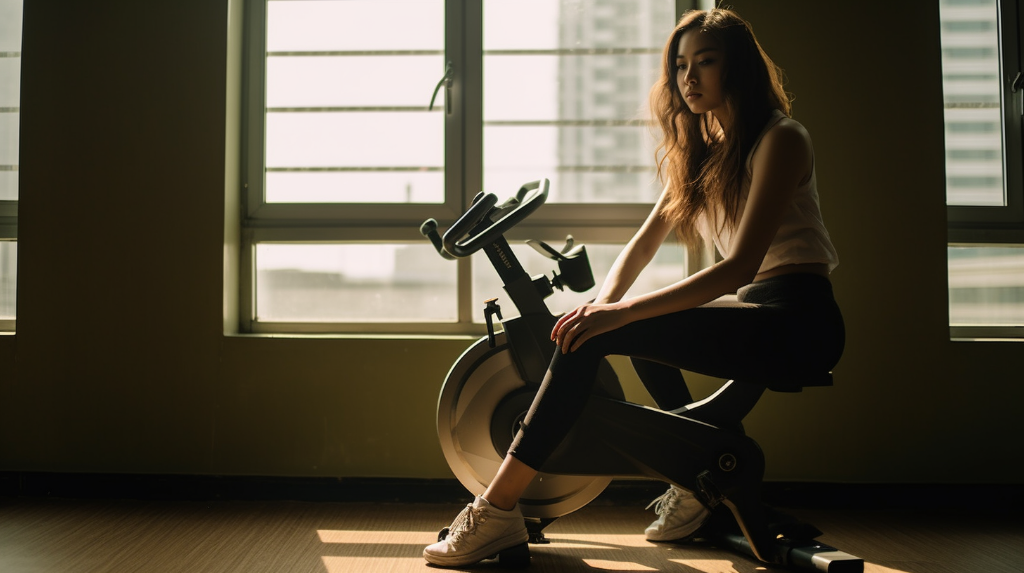
Indoor cycling typically refers to exercising on stationary bikes, usually in the comfort of your home or at a gym. It encompasses a range of activities, from spin classes that simulate road biking to virtual reality cycling that takes you on a scenic ride without leaving your room. Indoor cycling can be a convenient way to meet your exercise goals, especially if you’re time-crunched or prefer working out in a controlled environment.

Pros of Indoor Cycling

One of the biggest draws of indoor cycling is its convenience. Come rain or shine, your exercise routine remains uninterrupted. The controlled environment also allows you to easily track your progress and performance, offering tangible metrics that can be motivational for some. Plus, you get to avoid traffic, pollution, and the risk of accidents associated with outdoor cycling. Sounds appealing, doesn’t it?

Indoor cycling also provides an excellent platform for high-intensity interval training (HIIT). You can adjust the resistance on your indoor bike and alternate between high-intensity and low-intensity periods, which can be a powerful way to boost your cardiovascular fitness.

Cons of Indoor Cycling

However, indoor cycling is not without its downsides. For starters, the lack of real-world terrain and scenery can make the experience monotonous for some. The cost of purchasing a good quality stationary bike or a gym membership can also be a deterrent. Additionally, while some find the controlled environment of indoor cycling appealing, others may find it less engaging or motivating than cycling outdoors.

Also, indoor cycling primarily targets your lower body and, unlike outdoor biking, doesn’t offer much of a full-body workout. This could be a consideration if you’re looking to engage a wider range of muscles in your exercise routine.

Delving into Outdoor Cycling

Have you ever thought about the thrill of outdoor cycling? It’s not just about getting from point A to point B. Whether you’re on a traditional bike, a sleek road bike, or a rugged mountain bike, outdoor cycling offers a sense of adventure and freedom that’s hard to match. It’s you, your bike, and the open road – or trail. Sounds exciting, doesn’t it?

Different Types of Outdoor Cycling

Let’s explore the different types of outdoor cycling. First off, we have road cycling. This is probably what you picture when you think of cycling – speeding along paved roads, whether in the city or countryside. Next is mountain biking, where you tackle rough trails and steep inclines. It’s a bit more challenging, but the thrill is incomparable. And finally, there’s recreational cycling. This is for those who prefer a more laid-back ride, perhaps through a park or a leisurely ride around the neighborhood. Each type of outdoor cycling offers its own unique experience. Which one sparks your interest?

Advantages of Outdoor Cycling

There are several benefits to outdoor cycling. First and foremost, it improves balance and coordination. Unlike indoor cycling where the bike is stationary, outdoor cycling requires you to navigate and adjust to varying terrains and conditions. This not only works a wider range of muscles but also enhances your balancing skills.

Another advantage is the natural scenery. There’s something very calming about being surrounded by nature, and it can make your workout much more enjoyable. Plus, you get a dose of fresh air!

Lastly, outdoor cycling gives you an opportunity to socialize. Whether you’re cycling with friends or meeting other cyclists on your route, it’s a great way to connect with like-minded individuals. Who knew exercise could be this fun?

Disadvantages of Outdoor Cycling

But, of course, outdoor cycling has its downsides too. Weather can be unpredictable. One minute it’s sunny, the next it’s pouring rain. This can put a damper on your cycling plans and make for a challenging ride. No one likes to cycle in a storm, right?

Safety can also be a concern. Busy roads, uneven paths, and unexpected obstacles can pose potential hazards. It’s important to always be alert and aware of your surroundings.

And let’s not forget about maintenance. Bikes, especially those used for outdoor cycling, require regular upkeep. From tire pressure checks to brake adjustments, maintaining a bike can be quite a task. But, it’s a small price to pay for the joy of cycling outdoors, isn’t it?

Key Factors to Consider

So, you’re caught in the middle of the indoor cycling vs outdoor cycling debate. Which one is for you? Well, that might depend on a few key factors. These may include your fitness goals, the weather conditions in your area, safety concerns, your available time, budget, and, of course, personal preference.

Your Fitness Goals and Cycling

Let’s consider your fitness goals first. Both indoor and outdoor cycling can contribute to your fitness goals, but in slightly different ways. Indoor cycling, with its controlled environment, can be better for high-intensity interval training. Can’t you just picture yourself, sweat dripping, pushing hard for that last minute of a grueling interval?

On the other hand, outdoor cycling could be better for endurance training. Imagine yourself cycling down a countryside road, the wind in your hair, building your stamina with every mile. Isn’t it exhilarating?

Time, Money and Resources

Now, let’s talk about time, money, and resources. Not everyone has all the time in the world for workouts. Indoor cycling can be a great option for those with tight schedules, as you can do it at home or at the gym, no matter the time of day. No need to worry about the gym’s operating hours, or the sun setting too early.

However, if you’re on a tight budget, outdoor cycling could be more appealing. While there’s the initial investment of a bike, there aren’t any ongoing costs like gym memberships. But what about resources? Do you have access to safe cycling paths? Or does your apartment building have a gym with stationary bikes? These are all factors to consider in your decision.

Equipment Needed for Indoor and Outdoor Cycling

  1. Helmet: Whether you’re cycling indoors or outdoors, safety should be your priority. A helmet is a must.
  2. Bike: For outdoor cycling, you’ll need a traditional bike. For indoor cycling, you’ll need a stationary bike.
  3. Water Bottle: Hydration is key during any workout, so keep a water bottle handy.
  4. Cycling Shorts: Trust us, your bottom will thank you for this one.
  5. Heart Rate Monitor: This can be especially helpful for indoor cycling, where you’re looking to stay in certain heart rate zones.

Making the Choice: Indoor or Outdoor Cycling?

So, which one is right for you – indoor or outdoor cycling? The truth is, the decision ultimately depends on your personal preference and circumstances. Both forms of cycling have their unique benefits and drawbacks, and what matters most is what you enjoy and what fits your lifestyle.

Perhaps you live in a city with harsh winters, making outdoor cycling nearly impossible for half of the year. In that case, indoor cycling could be a great option. Or maybe you crave the fresh air and the feeling of the wind in your hair, in which case, outdoor cycling would likely be more enjoyable for you.

The key is to try both and see which you prefer. Remember, the most important thing is that you’re getting exercise and enjoying it, not whether you’re doing it inside or outside.

The Bottom Line

Throughout this post, we’ve explored the pros and cons of both indoor and outdoor cycling. Indoor cycling offers convenience, controlled conditions, and easy progress tracking, while outdoor cycling provides a sense of adventure, improves balance and coordination, and offers a social aspect.

However, both also have their downsides. Indoor cycling lacks real-world terrain and scenery and may require expensive equipment or gym memberships. Outdoor cycling, on the other hand, is subject to unpredictable weather and potential safety hazards.

Ultimately, the choice between the two should be based on your individual needs and preferences. Your decision should factor in your fitness goals, available time, budget, and personal preference.

Indoor Cycling Outdoor Cycling
Pros Convenience, controlled conditions, easy progress tracking Sense of adventure, improves balance and coordination, social aspect
Cons Lacks real-world terrain and scenery, may require expensive equipment or gym memberships Subject to unpredictable weather, potential safety hazards

Final Thoughts

To wrap things up, whether you choose indoor or outdoor cycling, the most important thing is that you’re staying active and enjoying it. Cycling, in any form, is a great way to improve cardiovascular health, build strength, and boost your mood.

So, why not give both a try and see which one you prefer? Who knows, you might just find that you love both equally! After all, variety is the spice of life, right?

So, get out there (or stay in!), start pedaling, and most importantly, have fun. Happy cycling!

Easy Bike Cleaning Tips: How to Clean Your Bike

Whether you’re a seasoned cyclist or a beginner, one thing is for sure – regular bike cleaning and maintenance is crucial. Not only does it prolong the life of your bike, but it also significantly enhances your overall biking experience. Imagine smoothly cruising down your favorite trail, your bike looking shiny and new. That’s the result of regular cleaning and maintenance. This guide is designed with beginners and hobbyists in mind, focusing on easy-to-follow steps that will keep your bike in top shape.

Why Regular Bike Cleaning is Crucial

Ever wondered why your bike’s performance seems to dip over time? Or why the gears aren’t shifting as smoothly as they did when the bike was new? The answer often lies in the lack of regular cleaning. By routinely cleaning your bike, you can detect potential issues early, prevent rust, ensure smoother operation, and extend the bike’s lifespan. Sounds like a win-win, doesn’t it?

Overview of the Bike Cleaning Process

The thought of cleaning your bike might seem daunting at first, especially if you’ve never done it before. But fear not! The process is quite simple. It starts with gathering your cleaning supplies, preparing your bike for cleaning, and then moving on to the actual cleaning process. Each part of the bike – whether it’s the frame, chain, gears, brakes, or wheels – needs specific attention. Once you’ve cleaned your bike, don’t forget to dry and lubricate it for optimal performance. Finally, a post-cleaning check will ensure your bike is ready for your next adventure. Ready to get started?

Gathering Your Bike Cleaning Supplies

Before we dive into the cleaning process, let’s first talk about the tools and materials you’ll need. Having the right cleaning supplies is essential for a thorough and effective bike cleaning. Just like a chef needs their cooking utensils, a bike enthusiast needs their cleaning tools. Ready to gather your cleaning arsenal?

Here’s a list of some basic cleaning supplies you’ll need:

  • Bucket
  • Warm water
  • Bike cleaning solution or dish soap
  • Sponge or soft bristle brush
  • Small brush for tight spots
  • Old toothbrush for chain and gears
  • Rags or towels for drying
  • Bike lubricant

Remember, these are just the basics. Depending on your bike and its condition, you might need a few more items. But don’t worry, most of these items are probably already in your home.

Environment Friendly Cleaning Supplies

Have you ever thought about the environmental impact of your cleaning supplies? Most conventional cleaning agents contain harmful chemicals that can harm the environment. As responsible bike owners and nature enthusiasts, we should do our part to minimize our impact.

That’s why it’s always a good idea to opt for eco-friendly cleaning supplies. For instance, instead of using chemical-laden cleaning solutions, why not use biodegradable soaps? They’re just as effective at cleaning your bike, but they’re much kinder to Mother Nature.

And what about those disposable rags? Instead, consider using reusable cloths. They can be washed and reused multiple times, reducing waste. Plus, they’re often more absorbent and effective at cleaning than disposable ones.

Choosing environmentally friendly cleaning supplies is a simple yet significant step towards a more sustainable lifestyle. And who knows, you might even find them more effective than their conventional counterparts!

Preparing Your Bike for a Clean

Now that you’ve gathered your cleaning supplies, it’s time to prepare your bike for a clean. But what does that involve?

First, remove any accessories like lights, saddle bags, or water bottle holders. This will make it easier to clean all the nooks and crannies of your bike. Plus, it prevents any damage to these items during the cleaning process.

Next, give your bike a quick once-over. Check for any visible damage or areas with serious dirt build-up. These areas may require extra attention during cleaning.

Lastly, position your bike for cleaning. If you have a bike stand, great! It will make the process much easier. If not, you can lean it against a wall, but make sure it’s in a stable position. And remember to place it somewhere where it’s okay for water and soap to splash around.

With your bike prepared, you’re ready to move on to the actual cleaning process. Excited to give your bike the spa treatment it deserves?

Deep Cleaning Step by Step Guide

Alright, let’s get our hands dirty (or rather, clean). Cleaning your bike isn’t just about making it look shiny and new. It’s about keeping it in top-notch condition so you can enjoy a smoother ride every time. Ready to get started? Here’s a detailed, step-by-step guide on how to clean different parts of your bike.

Cleaning the Bike Frame

The frame is the backbone of your bike and deserves your utmost attention. Use a sponge and some soapy water to gently clean the frame. Make sure to reach all those hidden nooks and crannies where dirt likes to hide. Rinse thoroughly with water.

Cleaning the Chain

Next on the list is the chain. This is your bike’s lifeline, transferring your pedal power to the rear wheel. A dirty chain not only affects performance but can also wear down quicker. Use a chain cleaning tool if you have one or simply use a brush and some degreaser. Remember to rinse well and dry before re-lubricating.

Cleaning the Gears

Ever wondered why changing gears feels rough sometimes? It’s probably because they’re dirty. Use a brush and some degreaser to clean the front and rear gears (also known as derailleurs). Don’t forget to re-lubricate after drying.

Cleaning the Brakes

Brakes are vital for safety, so you want them working at their best. Wipe the brake pads and discs with a clean, damp cloth. Make sure not to touch the brake surfaces with oily hands or let any lubricant get on them.

Cleaning the Wheels

Last but not least, the wheels. Take them off for a thorough clean. Use a brush and soapy water for the rims and spokes. For the tires, scrub off any dirt or debris stuck in the tread.

Well, that covers the basics of a deep bike clean. Let’s summarize these steps in a table for easy reference.

summarizing the cleaning steps for each part of the bike

Part of the Bike Cleaning Steps
Frame Clean with a sponge and soapy water, rinse, dry.
Chain Use a chain cleaning tool or a brush and degreaser, rinse, dry, re-lubricate.
Gears Clean the front and rear derailleurs with a brush and degreaser, rinse, dry, re-lubricate.
Brakes Wipe the brake pads and discs with a clean, damp cloth.
Wheels Remove and clean the rims, spokes, and tires with a brush and soapy water.

Remember, a clean bike is a happy bike. So, let’s keep those bikes clean and shiny, shall we?

Drying and Lubricating Your Bike

Now that your bike is squeaky clean, what’s next? Well, it’s time to dry it properly. The importance of drying your bike post-cleaning cannot be overstressed. It’s not just about wiping away the water; it’s about preventing rust and ensuring the longevity of your bike’s components.

To do this, gently wipe off excess water using a dry, soft cloth. Make sure to reach all the nooks and crannies of your bike where water might be hiding. A pro tip is to use a compressed air sprayer to blow out water from hard-to-reach areas. But remember, always be gentle!

Lubricating Your Bike After Cleaning

Once your bike is all dried up, the next step is lubricating. Ever wondered why your bike rides smoother after a thorough cleaning? The secret lies in the lubrication. It not only ensures smooth operation but also protects your bike’s components from wear and tear.

There are many types of lubricants available in the market, such as wet lube, dry lube, ceramic lube, etc. The type of lube you should use depends on your riding conditions. For instance, if you ride in wet conditions, a wet lube would be ideal.

Applying lubricant is simple. Drip the lube on each chain link while slowly turning the pedals in a reverse motion. After that, apply lube to other moving parts like the derailleurs and brake pivot points.

Post-Cleaning Bike Check

Alright, your bike is clean, dry, and well-lubricated. But are we done yet? Not quite. It’s time for a post-cleaning bike check. This is an excellent opportunity to check for any damages that may have been revealed during the cleaning process.

Ensure all parts are functioning well. Check the brakes, gears, and tires. Remember, safety is paramount, so never overlook this step. It’s always better to spot and fix a small problem before it turns into a big one, right?

Maintaining Cleanliness Between Major Cleans

So, you’ve done a great job cleaning your bike. But how do you keep it clean and shiny until the next major cleaning session? Good question! Here’s where our maintenance tips come in handy.

  • Wipe your bike down after each ride, especially if you’ve been riding in wet or muddy conditions.
  • Clean your chain regularly. A dirty chain not only affects performance but can also wear down other components faster.
  • Keep your tires inflated to the correct pressure. This can prevent unnecessary dirt and debris from sticking to them.
  • Store your bike properly. If possible, keep your bike indoors and away from the elements.
  • Use fenders. They can prevent mud and water from spraying onto your bike, keeping it cleaner for longer.

With these tips, you can keep your bike looking and performing its best between major cleaning sessions. And when it’s time for the next big clean, it will be much easier. So, are you ready to keep that bike sparkling?